- Posts: 3170
- Thank you received: 903

Super Chipmunk Engine Upgrade
- Phil Ford
-
 Topic Author
- Offline
- Administrator
-

Less
More
9 years 3 months ago - 9 years 3 months ago #9196
by Phil Ford
Replied by Phil Ford on topic Super Chipmunk Engine Upgrade
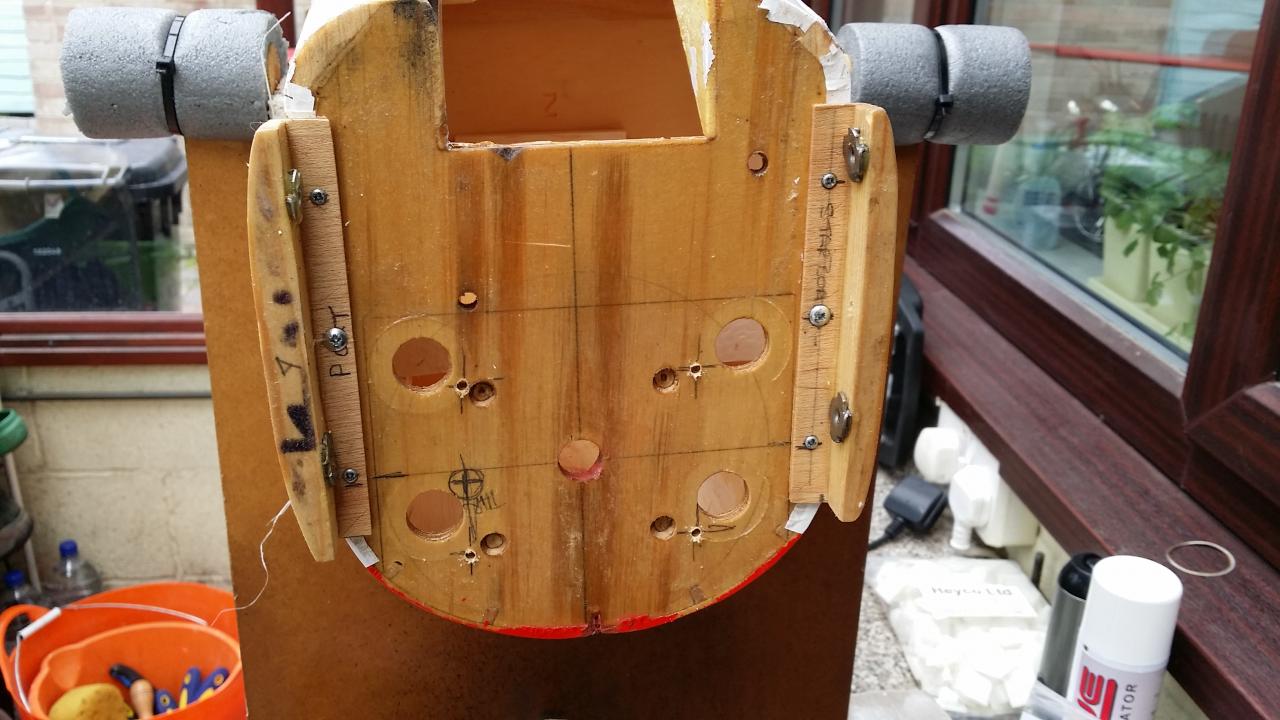
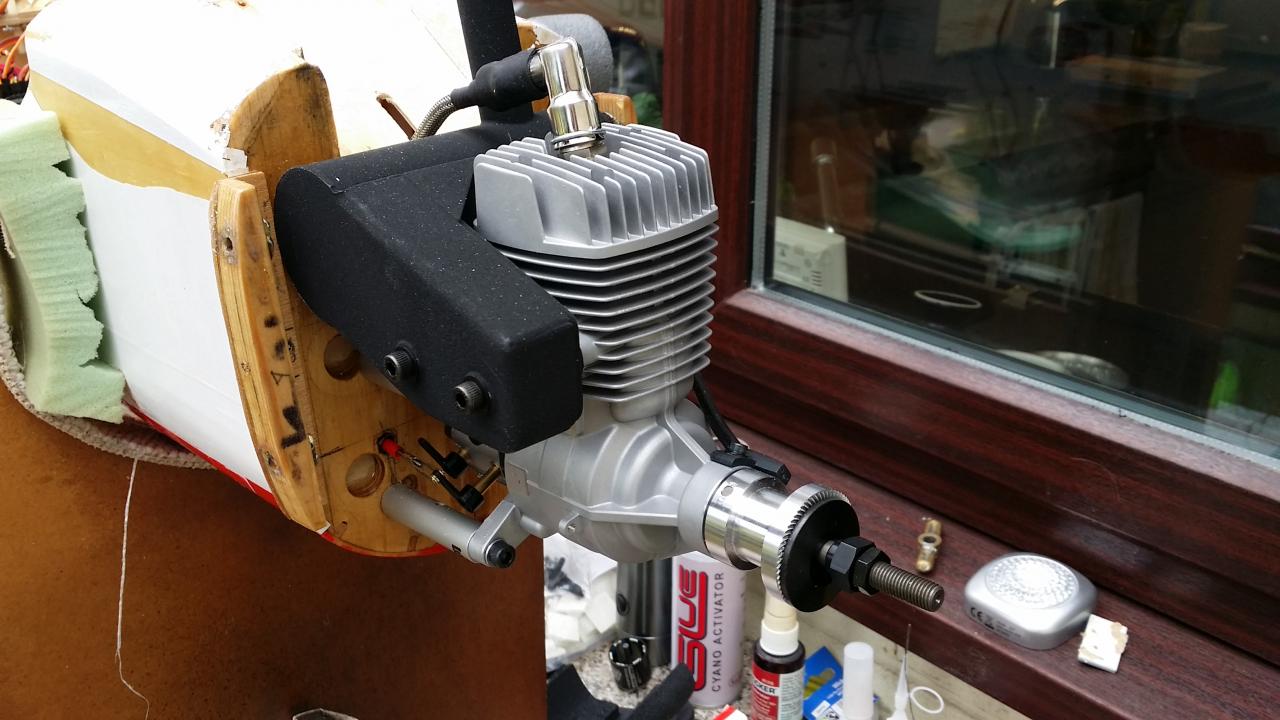
The OS engine is now fitted using ex Wots Wot stand-offs. DLE stand-offs were10 mm too long. I had to beef up the firewall on the backside with 6mm ply, this would blank off the original grommit holes, plus give plenty of wood for the new captured nuts to bite into. Also bored some 25mm holes to allow for plumbing and electrical leads in F2.
Was hoping to re-use the original throttle servo but alas to far out of line. So, with just a Stanley knife I had to create a new servo tray and use a mini servo to ensure clearance for the servo arm when the tank is installed. Now the servo is directly in line, the servo on this set up has to push the throttle lever rather than pulling back. Throttle arm is spring loaded to close throttle if it becomes disconnected. There is no idle stop on this Walbro carb. Here are some images of progress so far.
I have also stripped off the oil soaked Monokote at the front end. Awful stuff - leaves most of the pigment behind. Replacing white no problem but the Red is not Oracover/Profilm so the replacement Red (no.22) will be a bit different to the rest of the plane. I don;t really care.")
As of time of posting waiting for delivery of an AR9020 RX and some 3/32Tygon.
Was hoping to re-use the original throttle servo but alas to far out of line. So, with just a Stanley knife I had to create a new servo tray and use a mini servo to ensure clearance for the servo arm when the tank is installed. Now the servo is directly in line, the servo on this set up has to push the throttle lever rather than pulling back. Throttle arm is spring loaded to close throttle if it becomes disconnected. There is no idle stop on this Walbro carb. Here are some images of progress so far.
I have also stripped off the oil soaked Monokote at the front end. Awful stuff - leaves most of the pigment behind. Replacing white no problem but the Red is not Oracover/Profilm so the replacement Red (no.22) will be a bit different to the rest of the plane. I don;t really care.
As of time of posting waiting for delivery of an AR9020 RX and some 3/32Tygon.


Last edit: 9 years 3 months ago by Phil Ford.
Please Log in or Create an account to join the conversation.
- Phil Ford
-
Topic Author
- Offline
- Administrator
-
Less
More
- Posts: 3170
- Thank you received: 903
9 years 3 months ago - 9 years 3 months ago #9229
by Phil Ford
Replied by Phil Ford on topic Super Chipmunk Engine Upgrade
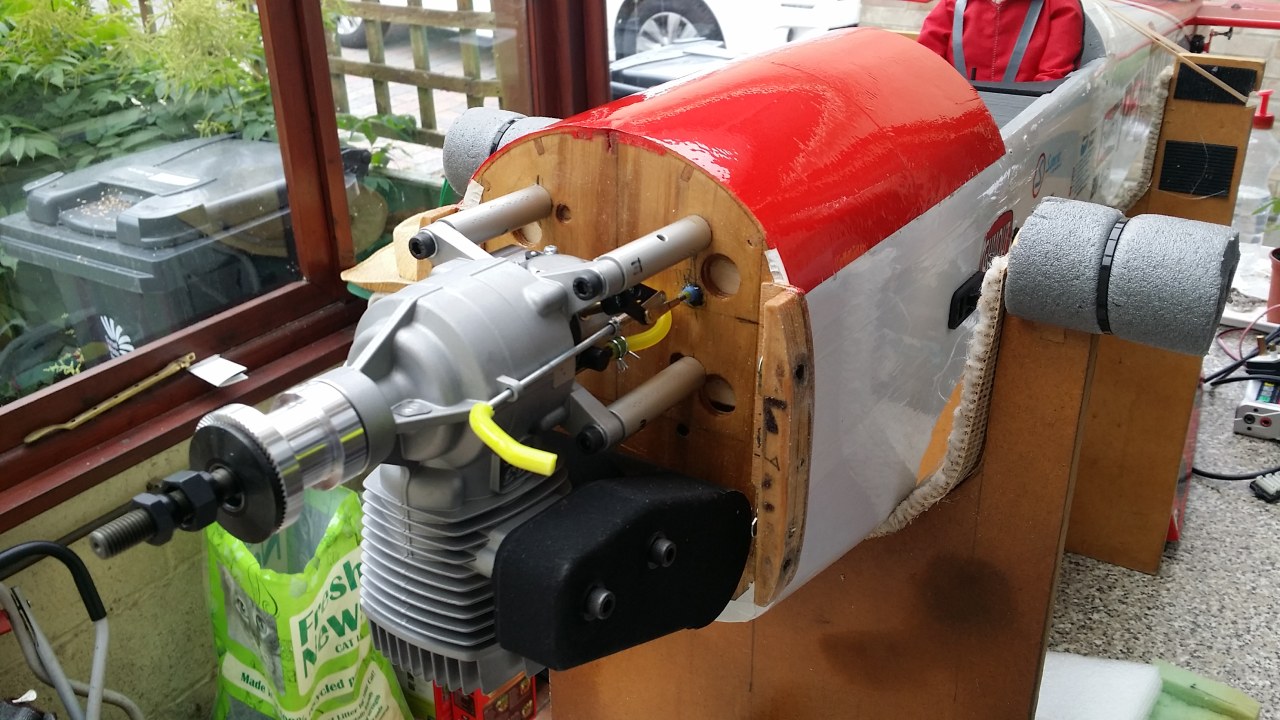
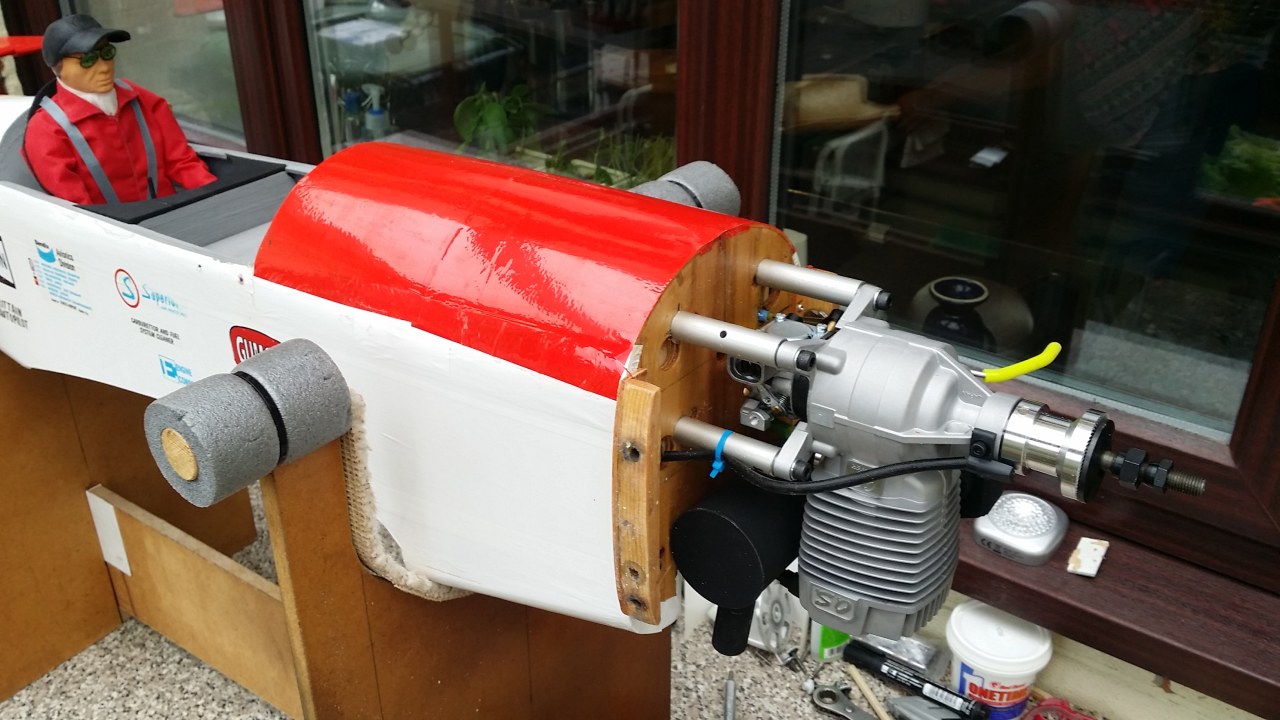
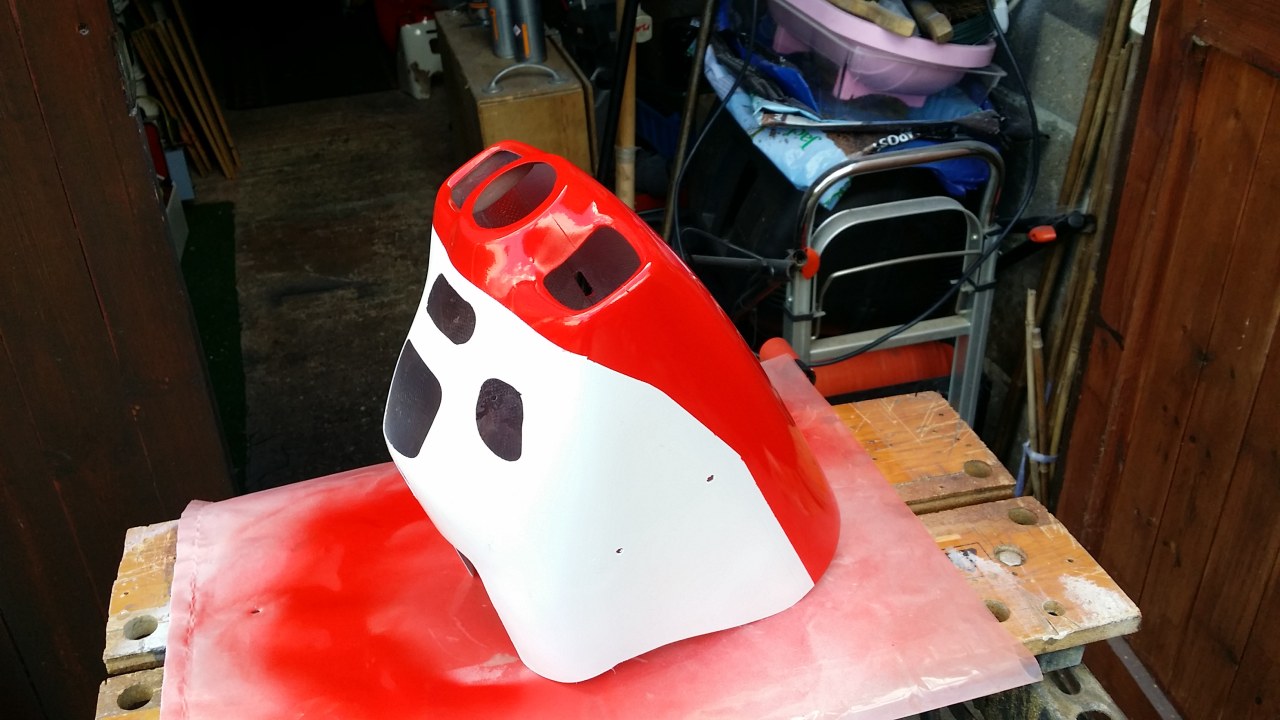
Engine permanently installed now. Tank and plumbing installed. New 9 channel RX. Why? (Because JR will only let me assign Aux 4 to the trainer switch, which is now my ignition cut off) Had lots of fun getting the new cowl to sit right and to make several cut-outs for cooling. On the other hand the GT33 sits neatly inside the wide cowl. Cowl painting in progress which may take some time as there are two colours and RC Colours takes at least 24 hrs to dry. If hard enough then I can mask on to it for the next colour.
Just got to decide on a battery pack for the ignition module and where it will be installed. OS ignition module Ver 2 now supports 7.4v, 6.6, etc.
Meantime I hope to start the engine up over the weekend swinging a 18x8 Menz.")
Upgrading has not been that easy. Especially when the builder had designed it for a 180 four stroke glow. You can guarantee holes and servos are all in the wrong place for the next engine..........
Just got to decide on a battery pack for the ignition module and where it will be installed. OS ignition module Ver 2 now supports 7.4v, 6.6, etc.
Meantime I hope to start the engine up over the weekend swinging a 18x8 Menz.
Upgrading has not been that easy. Especially when the builder had designed it for a 180 four stroke glow. You can guarantee holes and servos are all in the wrong place for the next engine..........
Last edit: 9 years 3 months ago by Phil Ford.
Please Log in or Create an account to join the conversation.
- Phil Ford
-
Topic Author
- Offline
- Administrator
-
Less
More
- Posts: 3170
- Thank you received: 903
9 years 3 months ago - 9 years 3 months ago #9238
by Phil Ford
Replied by Phil Ford on topic Super Chipmunk Engine Upgrade
What breezy day Sunday is! Glad I am indoors.
Saturday finally got the engine to running but needs some fuel through it to get it to settle down. After the little episode I put th ewing back on to see where she balances. On the engine bearers needed 450 gms! :huh: The new engine is only a few grams lighter. Ah! Had not allowed for the fact that the original lump was mounted on a insulated secondary firewall along with mountings and bolts, etc.
So, I had to make up a battery tray which is fitted up to the tank wall, F2, with two life packs (RX) and a NiMh pack (ignition). A bit windy in the drive when testing again but I think that balances it.
Sunday afternoon, did not want to watch Wimbledon so painted the top half of the cowl in Red now that the white is dry and hardened. Then checked out the wing for maintenance. Why has the gear got toe-out? Ah! some numbnut must have put them back in the wrong sockets. :whistle: That's done now with toe-in.
Images to follow when I get round to it.
Saturday finally got the engine to running but needs some fuel through it to get it to settle down. After the little episode I put th ewing back on to see where she balances. On the engine bearers needed 450 gms! :huh: The new engine is only a few grams lighter. Ah! Had not allowed for the fact that the original lump was mounted on a insulated secondary firewall along with mountings and bolts, etc.
So, I had to make up a battery tray
which is fitted up to the tank wall, F2, with two life packs (RX) and a NiMh pack (ignition). A bit windy in the drive when testing again but I think that balances it.Sunday afternoon, did not want to watch Wimbledon so painted the top half of the cowl in Red now that the white is dry and hardened. Then checked out the wing for maintenance. Why has the gear got toe-out? Ah! some numbnut must have put them back in the wrong sockets. :whistle: That's done now with toe-in.
Images to follow when I get round to it.
Last edit: 9 years 3 months ago by Phil Ford.
Please Log in or Create an account to join the conversation.
- Phil Ford
-
Topic Author
- Offline
- Administrator
-
Less
More
- Posts: 3170
- Thank you received: 903
9 years 3 months ago #9246
by Phil Ford
Replied by Phil Ford on topic Super Chipmunk Engine Upgrade
Unfortunately when I pulled the masking tape off it took some of the previously painted white too.  Now I'll have to wait a few days for the enamel to harden before flatting down and redo the white. Um! I think I will use this time to do other stuff and not DIY as that has stalled at present.
When are these high winds going to subside?
Now I'll have to wait a few days for the enamel to harden before flatting down and redo the white. Um! I think I will use this time to do other stuff and not DIY as that has stalled at present. When are these high winds going to subside?
Please Log in or Create an account to join the conversation.
- Phil Ford
-
Topic Author
- Offline
- Administrator
-
Less
More
- Posts: 3170
- Thank you received: 903
9 years 3 months ago #9256
by Phil Ford
Replied by Phil Ford on topic Super Chipmunk Engine Upgrade
Update: Decided that the cowl needs redoing completely. Sprayed it with acetone and the enamel fell off virtually. Start again tomorrow but his time I am using Acrylic paint. Appliance White and Volkswagon Mars Red. The latter the nearest colour I could find... If it was not for the colour of the Chippy covering, I would've used a metallic red just to be different. :whistle:
Sprayed it with acetone and the enamel fell off virtually. Start again tomorrow but his time I am using Acrylic paint. Appliance White and Volkswagon Mars Red. The latter the nearest colour I could find... If it was not for the colour of the Chippy covering, I would've used a metallic red just to be different. :whistle: Please Log in or Create an account to join the conversation.
- Phil Ford
-
Topic Author
- Offline
- Administrator
-
Less
More
- Posts: 3170
- Thank you received: 903
9 years 3 months ago #9264
by Phil Ford
Replied by Phil Ford on topic Super Chipmunk Engine Upgrade
Etch primed again, wet-dry 600 then the two colours. All done in less than 5 hours. A few lines are slightly rough but that is down to the masking tape. The "Mars Red" is not quite as "orangy red" as the RC colour no22 but I am not that bothered and I am not using so called fuel proof enamels again either. Just waiting on some Chipmunk transfers from SLEC now. Then run in the engine properly up the field sometime.


Please Log in or Create an account to join the conversation.
Moderators: DaveBright
Time to create page: 0.266 seconds
Latest Posts
-
-
- Ray Ivey's Models
- In WimborneMac Members / For Sale - Exchange - Wanted
- by Brian
- 2 weeks 1 day ago
-
-
-

- Various Gliders from Dave Ambrose ex W.M.A.C Membe...
- In WimborneMac Members / For Sale - Exchange - Wanted
- by 4Pedalsfly
- 3 weeks 3 days ago
-
©
2009 - 2025
WMAC PCF Design