- Posts: 3156
- Thank you received: 903

Nexa Twin Otter Rebuild
- Phil Ford
-
 Topic Author
- Offline
- Moderator
-

Less
More
27 Aug 2022 12:58 - 28 Aug 2022 14:23 #26139
by Phil Ford
Replied by Phil Ford on topic Nexa Twin Otter Rebuild
As usual like DIY one job overlaps another which means that while working on one task you must be aware that it might well have an unwanted effect on another further down the line. Anyway, the motors have been fitted to the firewalls with 10mm stand-offs and their position checked with the new cowls.
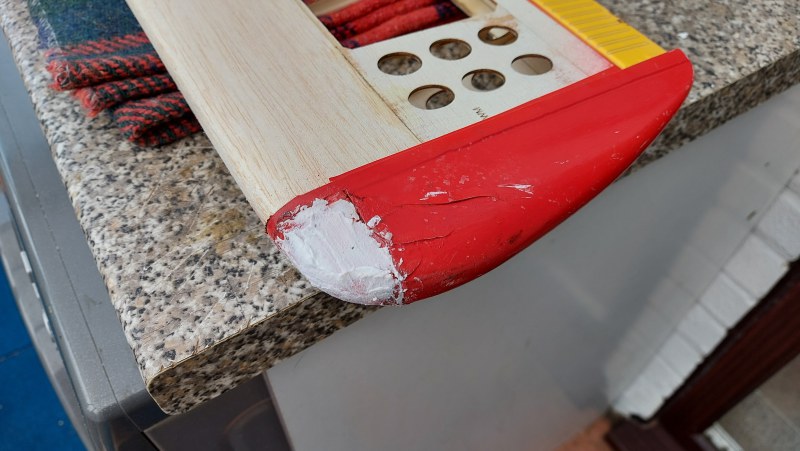
Two holes (I assume for the ESC leads) have been filled with skinning balsa. These holes were totally unnecessary as VQ had made provision for the leads behind the motors and would be covered by the lower nacelle half. The damaged wing tip was "repaired" with balsa but not very well finished so have sanded and filled grain/holes with light weight filler. The plastic tip will have to stay as is. At least it is on the underside. The ailerons were hinged with CA/Mylar but one aileron was not fitted very properly either so I have cut the ailerons off and re-hinging with Kavan flat pin hinges.
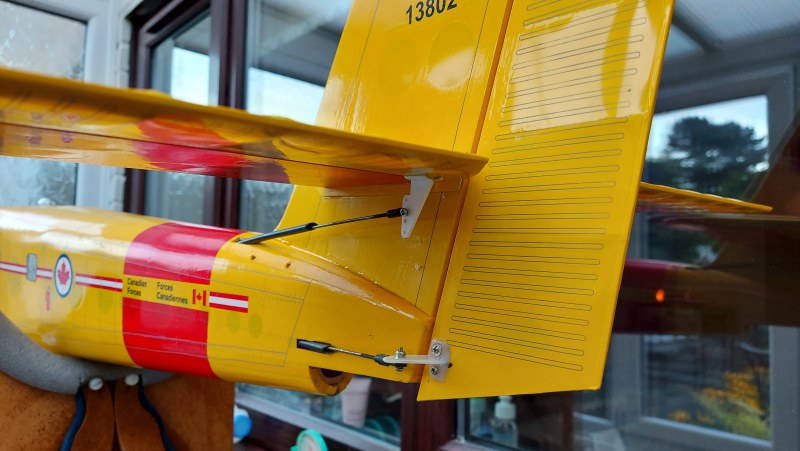
While waiting on the filler to dry I thought I would check again the tail assembly as I will be gluing this in shortly or so I thought! The Guy had tried to make it detachable probably for transport. The fin appears to locate okay but the stabiliser is not square. I have tried to uncure the CA and scalpel the joint but to no avail, I cannot get the stab back out. Now I am thinking on making my own tail bits. Pondered over the problem along with a cup of coffee. Just a thought - I wonder if. On to Motion RC and lo and behold they have a tail assembly complete in stock and quite cheap. So to avoid more balsa copying, cutting and shaping I will have one please. Click click - done. Although it won't be here much before 9th September.
 Still plenty more tasks to do in the meantime.
Two holes (I assume for the ESC leads) have been filled with skinning balsa. These holes were totally unnecessary as VQ had made provision for the leads behind the motors and would be covered by the lower nacelle half. The damaged wing tip was "repaired" with balsa but not very well finished so have sanded and filled grain/holes with light weight filler. The plastic tip will have to stay as is. At least it is on the underside. The ailerons were hinged with CA/Mylar but one aileron was not fitted very properly either so I have cut the ailerons off and re-hinging with Kavan flat pin hinges.
While waiting on the filler to dry I thought I would check again the tail assembly as I will be gluing this in shortly or so I thought!
The Guy had tried to make it detachable probably for transport. The fin appears to locate okay but the stabiliser is not square. I have tried to uncure the CA and scalpel the joint but to no avail, I cannot get the stab back out. Now I am thinking on making my own tail bits. Pondered over the problem along with a cup of coffee. Just a thought - I wonder if. On to Motion RC and lo and behold they have a tail assembly complete in stock and quite cheap. So to avoid more balsa copying, cutting and shaping I will have one please. Click click - done. Although it won't be here much before 9th September. Still plenty more tasks to do in the meantime. 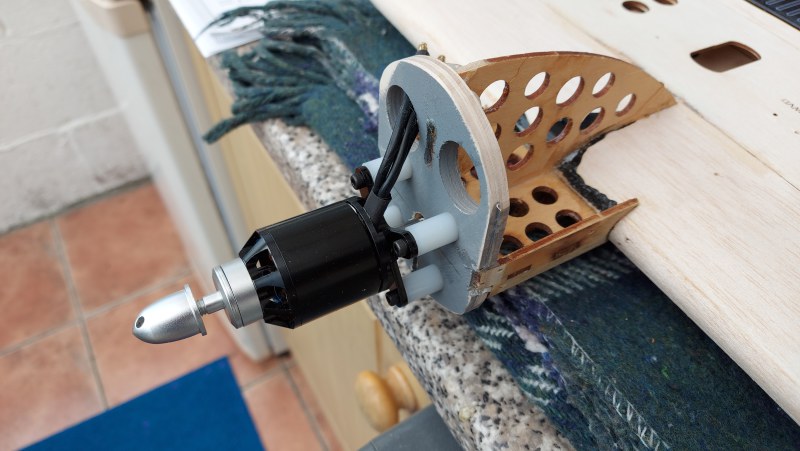
Last edit: 28 Aug 2022 14:23 by Phil Ford.
The following user(s) said Thank You: 4Pedalsfly
Please Log in or Create an account to join the conversation.
- Phil Ford
-
Topic Author
- Offline
- Moderator
-
Less
More
- Posts: 3156
- Thank you received: 903
29 Aug 2022 17:02 - 29 Aug 2022 17:03 #26141
by Phil Ford
Replied by Phil Ford on topic Nexa Twin Otter Rebuild
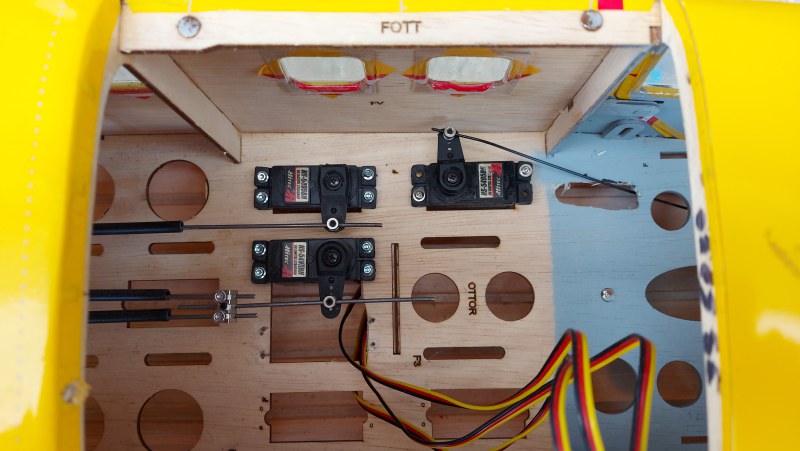
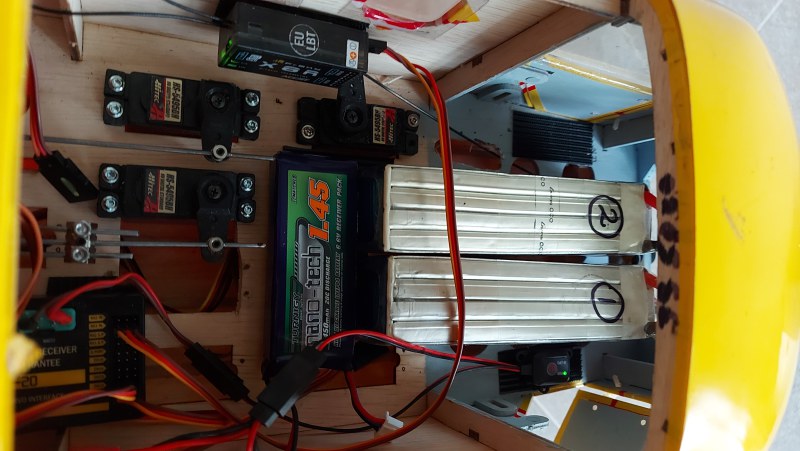
Yesterday, Sunday I installed the servos for rudder, elevator and steering. The steering push rod fouled and created resistance so had to hack some more material away but it works just fine now. The control rods are a little too long but won't shorten them until I get the tail assembly fitted. The control rods ends have had their original clevises changed to ball links for smoother operation. The servos area bit of an overkill at HiVolt 13kg torque but that was all I had in my stock bin.
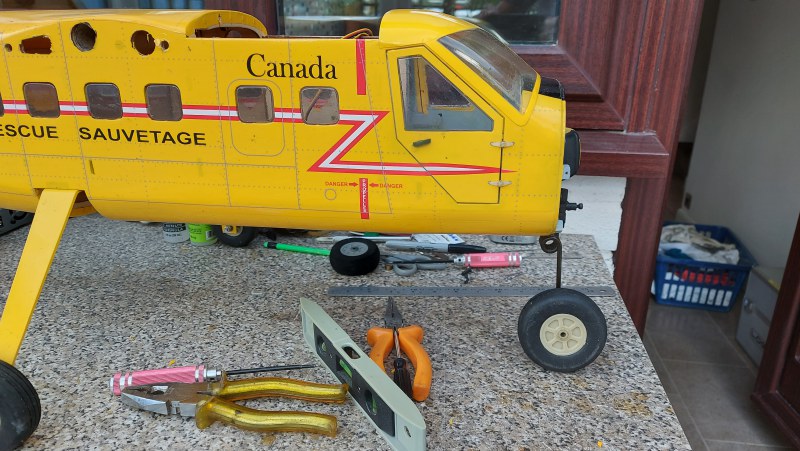
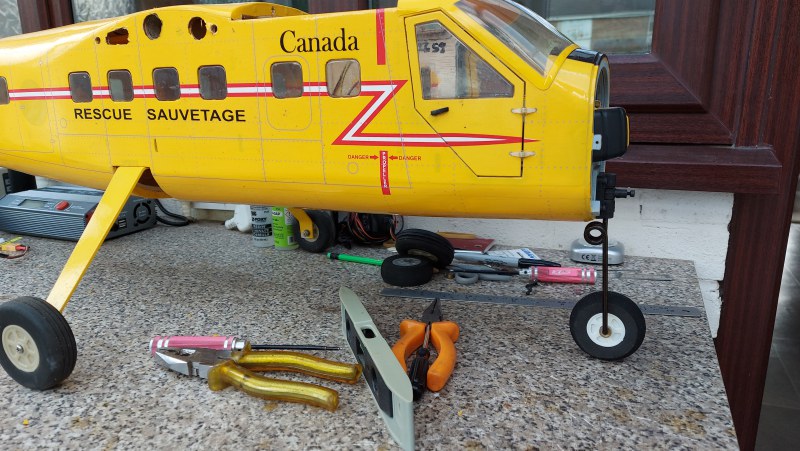
Wheels? Yes I appreciate models like this are designed to roll across rough grass but the front wheel is too big. The Otter stand tilt up rather than level. In fact the model sits high compared to the full size. Scale wise you would need a 10 ft ladder to access the cargo doors unlike the real one which would be shoulder height. Nit picking.:lol: Anyway the nose leg now has a smaller wheel similar to some Otter versions. It also sits just level.
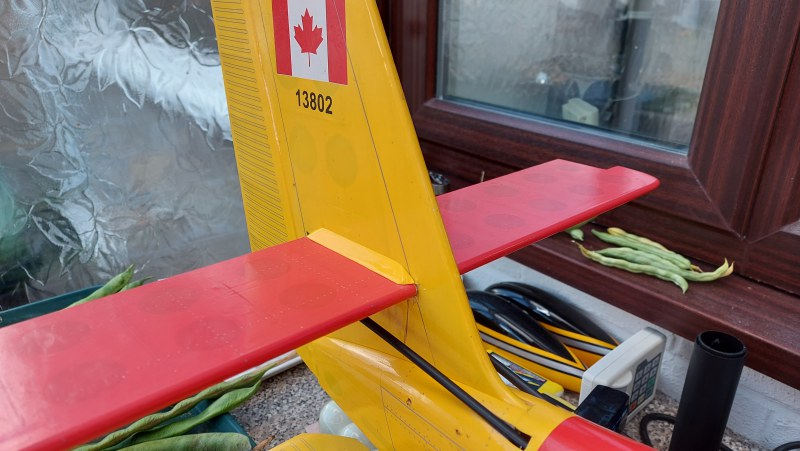
Speaking of level I set the aircraft level to bubble and temporarily installed the old tail assembly to check whether the stabiliser is level too. With a bit of jiggling it does.
Wheels? Yes I appreciate models like this are designed to roll across rough grass but the front wheel is too big. The Otter stand tilt up rather than level. In fact the model sits high compared to the full size. Scale wise you would need a 10 ft ladder to access the cargo doors unlike the real one which would be shoulder height. Nit picking.:lol: Anyway the nose leg now has a smaller wheel similar to some Otter versions. It also sits just level.
Speaking of level I set the aircraft level to bubble and temporarily installed the old tail assembly to check whether the stabiliser is level too. With a bit of jiggling it does.
Last edit: 29 Aug 2022 17:03 by Phil Ford.
The following user(s) said Thank You: 4Pedalsfly, kevinross
Please Log in or Create an account to join the conversation.
- Phil Ford
-
Topic Author
- Offline
- Moderator
-
Less
More
- Posts: 3156
- Thank you received: 903
29 Aug 2022 17:13 - 29 Aug 2022 17:16 #26142
by Phil Ford
Replied by Phil Ford on topic Nexa Twin Otter Rebuild
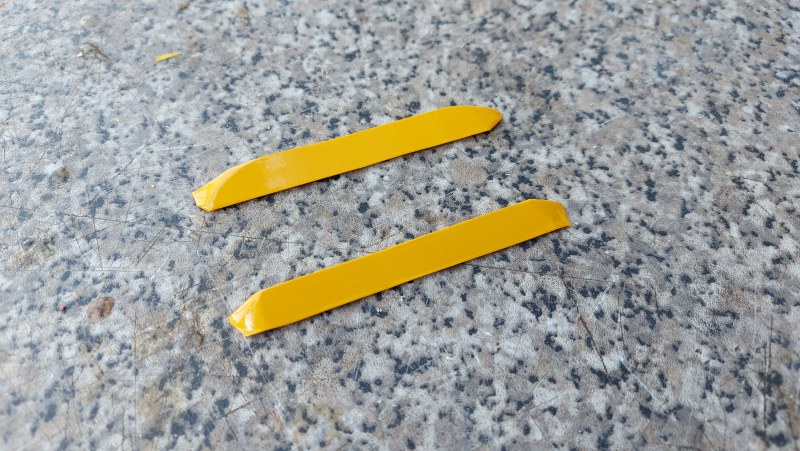
With nothing to do on Monday except for some household chores and the project held up due to the wing covering and other small parts are stuck in the strike affected mail. I had a practice go at sorting the old tail assembly. I removed about 5mm of the sticky back covering on the surfaces by the joints in preparation for gluing. With the stab slightly wobbly now but still effectively glued, I held the fin to stab with clamps and a set square. Back filled the worse side of the joint with medium CA. I cut some quarter triangle balsa and made up some fillets. Covered them in Cub yellow Oracover. With the tail still clamped I glued these fillets plus two more for the underside with Medium CA. After a coffee I removed the clamps and we now have a stabiliser that is square to the fin. Hooray!
I had a practice go at sorting the old tail assembly. I removed about 5mm of the sticky back covering on the surfaces by the joints in preparation for gluing. With the stab slightly wobbly now but still effectively glued, I held the fin to stab with clamps and a set square. Back filled the worse side of the joint with medium CA. I cut some quarter triangle balsa and made up some fillets. Covered them in Cub yellow Oracover. With the tail still clamped I glued these fillets plus two more for the underside with Medium CA. After a coffee I removed the clamps and we now have a stabiliser that is square to the fin. Hooray! 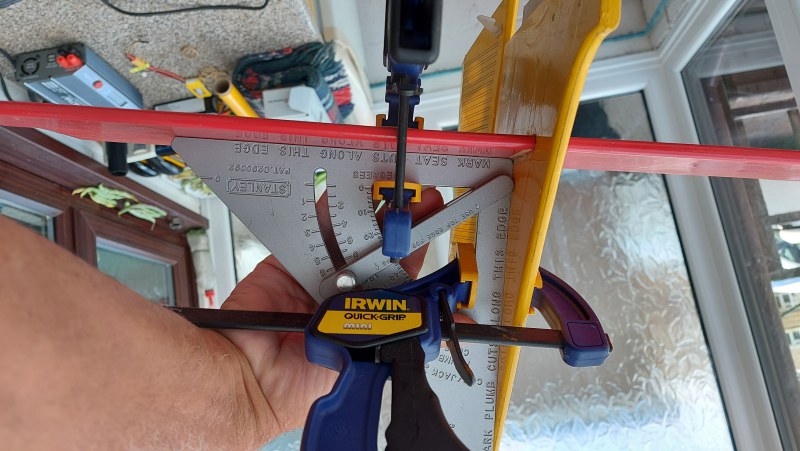
Last edit: 29 Aug 2022 17:16 by Phil Ford.
The following user(s) said Thank You: 4Pedalsfly
Please Log in or Create an account to join the conversation.
- Phil Ford
-
Topic Author
- Offline
- Moderator
-
Less
More
- Posts: 3156
- Thank you received: 903
30 Aug 2022 11:57 - 30 Aug 2022 12:01 #26143
by Phil Ford
Replied by Phil Ford on topic Nexa Twin Otter Rebuild
Tuesday and the post lady arrives with the covering from Macgregors but no 2mm rods, kavan hinges and Epoxy from RC World. Grrr. Earlier, whilst the wing is not covered I added some captured nuts where the wing stays attach to the wing rather than the maker's idea of a self tapper. Opening the covering rolls it appears that Cub Yellow is only one shade down from Cadmium Yellow. Still too bright for the Twotter. Um! What to do? Just get on with it and bite the bullet. Video phone rings! It's Matt wandering around a model shop. We compare the yellows. It may be that Golden Yellow is the nearest to the printed covering on the Twotter. Hope so cos' I have got Matt to bring two rolls back for me.
Meanwhile project can no further till wings are finished. Weather and wind speeds do not look too promising either for Cashmoor, Wednesday is a no go as RBH beckons, Thursday not sure and Friday we have got the grandsons all day and possible heavy rain is forecast at the weekend and onwards. I need some indoor jobs/projects.
Meanwhile project can no further till wings are finished. Weather and wind speeds do not look too promising either for Cashmoor, Wednesday is a no go as RBH beckons, Thursday not sure and Friday we have got the grandsons all day and possible heavy rain is forecast at the weekend and onwards. I need some indoor jobs/projects.
Last edit: 30 Aug 2022 12:01 by Phil Ford.
The following user(s) said Thank You: MBorrett
Please Log in or Create an account to join the conversation.
- Phil Ford
-
Topic Author
- Offline
- Moderator
-
Less
More
- Posts: 3156
- Thank you received: 903
31 Aug 2022 18:02 - 01 Sep 2022 09:32 #26151
by Phil Ford
Replied by Phil Ford on topic Nexa Twin Otter Rebuild
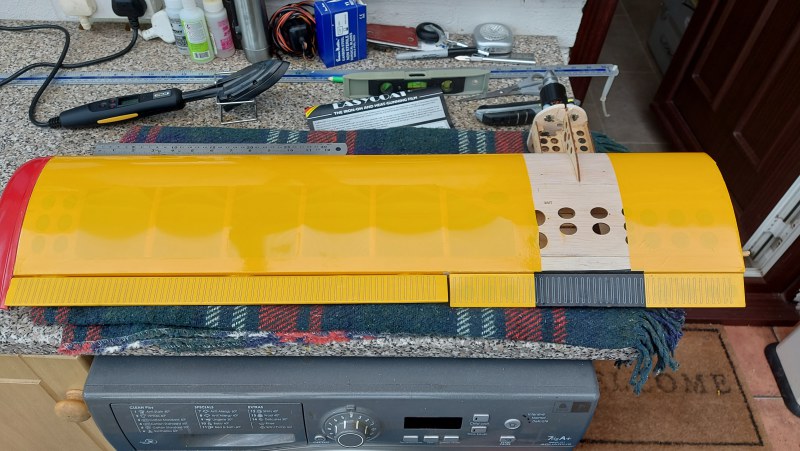
With a big thanks to Matt who saw my recent post about colours and just so happened to be in Worthing at a well known model shop. Using video it was decided that Golden Yellow is the nearest. So, today, Wednesday I unwrapped the roll and it's so close and considering the model has been hanging around a bit so colour would have changed a little. The covering is Easycoat, not my favourite due to the fact that pigment is also the adhesive but at £10 a roll cheaper than Oracover it's got to be a bargain and a colour match. Oracover is three layers the pigment in the centre layer.
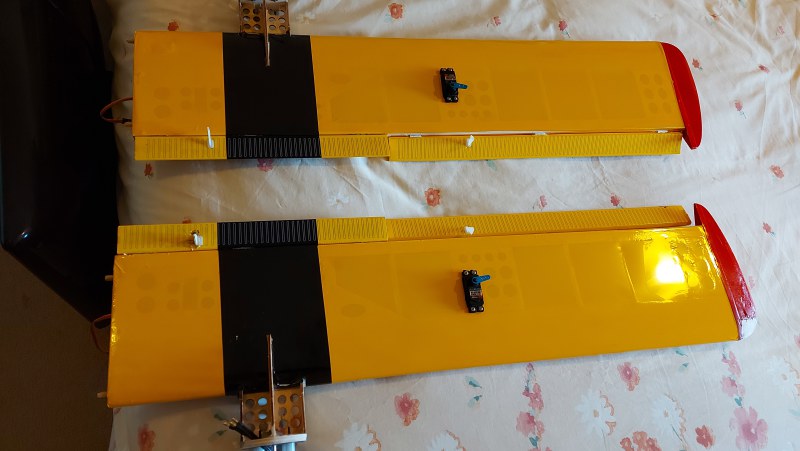
Wing are now covered and the aileron HV servos are installed. Ailerons are still waiting on hinges somewhere in the post. If they don't turn up tomorrow I will install the flap servos and repaint the wing tips if no household tasks appear- again.
Wing are now covered and the aileron HV servos are installed. Ailerons are still waiting on hinges somewhere in the post. If they don't turn up tomorrow I will install the flap servos and repaint the wing tips if no household tasks appear- again.
Last edit: 01 Sep 2022 09:32 by Phil Ford.
The following user(s) said Thank You: 4Pedalsfly, kevinross, MBorrett
Please Log in or Create an account to join the conversation.
- Phil Ford
-
Topic Author
- Offline
- Moderator
-
Less
More
- Posts: 3156
- Thank you received: 903
01 Sep 2022 17:27 - 07 Sep 2022 19:26 #26153
by Phil Ford
Replied by Phil Ford on topic Nexa Twin Otter Rebuild
Not much achieved today due to lack of bits. However, I managed to preset the ailerons and flap servos and the flaps are set up using two channels. The latter due to the fact the servos are facing the same way so had to reverse one channel. I have created two versions on the Horus.
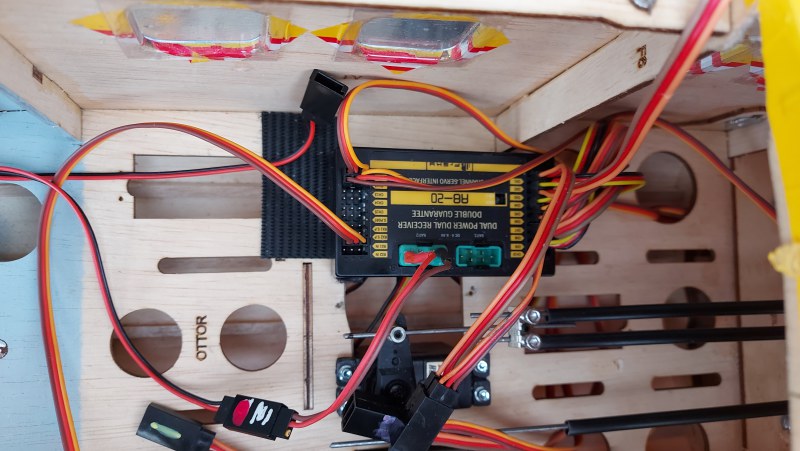
Version 1: uses Sbus and a 15 channel Hub. Two channels for Ailerons, two channels for Throttles, Two for Flaps (as per above) one channel for steering and two channel for switching beacons/lights. Spare channels for any more gadgetry.")
Version 2: Standard basic set up for 8 ch RX. Ail, Elv,Thr, Rud, Flap, Flap, Steer. Channel 8 is power in.
Version 1: uses Sbus and a 15 channel Hub. Two channels for Ailerons, two channels for Throttles, Two for Flaps (as per above) one channel for steering and two channel for switching beacons/lights. Spare channels for any more gadgetry.
Version 2: Standard basic set up for 8 ch RX. Ail, Elv,Thr, Rud, Flap, Flap, Steer. Channel 8 is power in.
Last edit: 07 Sep 2022 19:26 by Phil Ford. Reason: Error
The following user(s) said Thank You: 4Pedalsfly
Please Log in or Create an account to join the conversation.
- Phil Ford
-
Topic Author
- Offline
- Moderator
-
Less
More
- Posts: 3156
- Thank you received: 903
07 Sep 2022 19:23 - 07 Sep 2022 19:25 #26175
by Phil Ford
Replied by Phil Ford on topic Nexa Twin Otter Rebuild
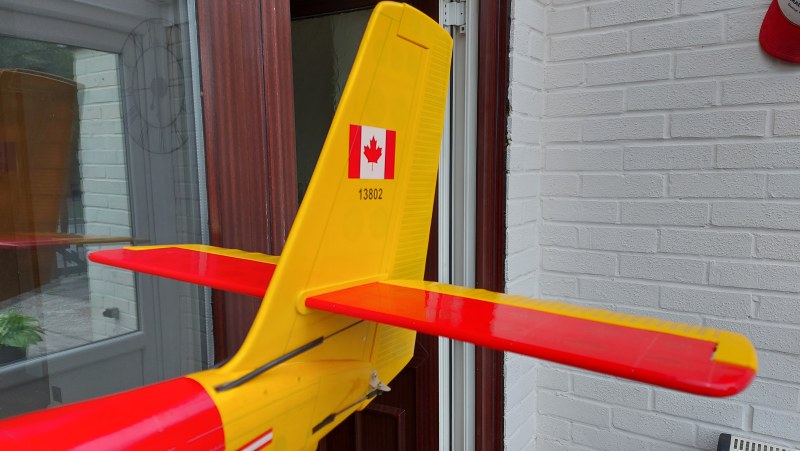
Monday decided on electronics version 1. Every surface and item has it's own channel via the Hub and Sbus. 12 in use at present and if I can make some landing lights that will be thirteen. Still no parts - courier has lost the package. :huh: No matter, I got some from somewhere else. Tail assembly arrived from the Nederlands on Tuesday so made some progress on the tail end on Wednesday. Stabiliser pushed through pre -cut slot in fin but was not square, out by 2 degs or so. So I nibbled a bit out of the slot and using a set square clamped to the stab and fin I zapped it with CA medium. Then slid the stabiliser supports on and zapped with CA. With that done I now dry fitted the assembly into the fuselage. When sat fully down the stab is level or should I say parallel with the fuselage line. I verifed this using a bubble level. However with the fuselage level crossways the stab was not level out again by around 2 degrees. Sand some balsa off the base of the fin to give a bit leeway and looser fit. Using a bit of skinning balsa on one side of the slot the fin is vertical and the stab is level. Re-checked three times, made up some 30 min epoxy and glued the assembly in along with the piece of 3/32 balsa. Coffe break for half an hour but keep checking the assembly.
After the break I glued the horns to the elevators and rudder. I had already dry fit checked they fitted okay into the fin and stabiliser. The rudder and elevator halves come with the Mylar hinges pre-glued into the control surfaces so it was just a matter of checking the alignment and securing with a few drops of Thin CA. Whilst things are now moving a better pace I connected the control rods to their respective surfaces using ball links. The rods seem to slide back n forth okay but I think the elevator guide tubes which are quite stiff compared to Sullivan snake tubes. Also I need to cut shorter at the exit end a bit more to allow for the up-n-down movement as the horn moves back n forth. This will reduce any rod to tube resistance - hopefully.
There is a slim chance that the ESC's will arrive tomorrow so if that is the case I can start working on the motive power side.
Last edit: 07 Sep 2022 19:25 by Phil Ford. Reason: Grammar again!
The following user(s) said Thank You: 4Pedalsfly, kevinross, MBorrett
Please Log in or Create an account to join the conversation.
- Phil Ford
-
Topic Author
- Offline
- Moderator
-
Less
More
- Posts: 3156
- Thank you received: 903
08 Sep 2022 17:17 - 08 Sep 2022 17:19 #26177
by Phil Ford
Replied by Phil Ford on topic Nexa Twin Otter Rebuild
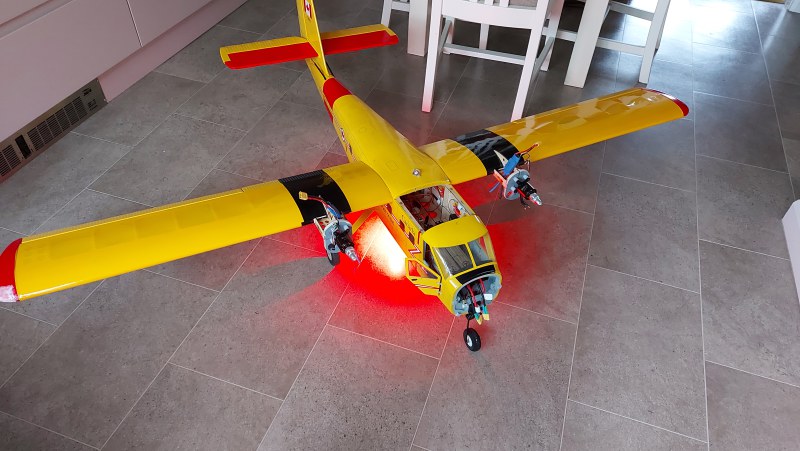
No ESCs today but Friday if the update is to be believed. Anyway, done a bit of re-wiring and control surfaces are now set up. Quick assemble of the Otter to check again the controls. Placed a couple of ESCs temporarily on the motor mounts. Now the CG. 60mm back from leading edge. Using known weights and lipos it needs about 700gms. Checked on Motion RC forum and yes some Guys are using 2 x 3000 mah Graphene 3 cells. As I am using a 4 cell set up I had to have rummage in my lipo boxes. Found two 4000 maH 4 cell Gens Ace at 395 gms each. Along with the RX Life at 120 gms just behind the lipo packs it becomes just a tad nose heavy. So rumours were right, a roughly a kilo to balance. :blink: Final positioning I will do when the plane is fully assembled and ready to go. Maiden before Christmas?
Thinking back to my 10% larger H9 Twin Otter whose lipos are in the nacelles I had to have two life 2100 mah RX packs upfront along with 300 gms of lead in the nose too.
The red flare on the kitchen floor is the belly beacon not a fire. :lol:
Thinking back to my 10% larger H9 Twin Otter whose lipos are in the nacelles I had to have two life 2100 mah RX packs upfront along with 300 gms of lead in the nose too.
The red flare on the kitchen floor is the belly beacon not a fire. :lol:
Last edit: 08 Sep 2022 17:19 by Phil Ford.
The following user(s) said Thank You: 4Pedalsfly, MBorrett
Please Log in or Create an account to join the conversation.
- Phil Ford
-
Topic Author
- Offline
- Moderator
-
Less
More
- Posts: 3156
- Thank you received: 903
09 Sep 2022 10:10 - 09 Sep 2022 10:11 #26179
by Phil Ford
Replied by Phil Ford on topic Nexa Twin Otter Rebuild
Today I had an email reply to my enquiry for spare parts two weeks ago back from VQ Models in Vietnam. Yes they could supply me with new motor mounts (15$) and the cowls (43$). Problem was the carriage - 93$. :ohmy: Just as well Motion RC had a set of cowls in stock and I made an extra effort to put right the motor mounts.
Looking back to 2017 on RC Groups talking about VQ and VMAR models, there was great favour for the sticky back covering when making your own livery. It peels off easily without leaving residue like MonoKote. Control surfaces would have to be primed and painted though unless your willing to rehinge everything. In hind sight - a great thing that is) maybe I should have done that too, strip off and recover. Oh well, next time.....:lol: I really fancied a FlyBe Otter.
Looking back to 2017 on RC Groups talking about VQ and VMAR models, there was great favour for the sticky back covering when making your own livery. It peels off easily without leaving residue like MonoKote. Control surfaces would have to be primed and painted though unless your willing to rehinge everything. In hind sight - a great thing that is) maybe I should have done that too, strip off and recover. Oh well, next time.....:lol: I really fancied a FlyBe Otter.
Last edit: 09 Sep 2022 10:11 by Phil Ford.
The following user(s) said Thank You: 4Pedalsfly, MBorrett
Please Log in or Create an account to join the conversation.
- Phil Ford
-
Topic Author
- Offline
- Moderator
-
Less
More
- Posts: 3156
- Thank you received: 903
10 Sep 2022 17:07 - 10 Sep 2022 17:10 #26182
by Phil Ford
Replied by Phil Ford on topic Nexa Twin Otter Rebuild
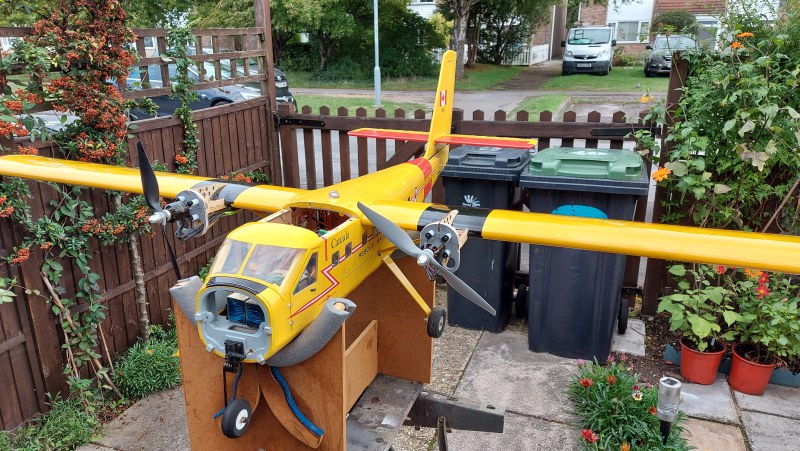
Friday saw the ESCs turn up. Fitted them straight away on the motor mounts and now I can make up the power leads, soldering XT60s each end. Took a bit of fiddling to get them through the wings, having to pull out the flap servo to help the pull-thro. Quick fit of the wings to check I have enough cable to reach the Lipos and is it easy enough to do when on site? Yes!
Saturday, with a break in the wet weather got the Twin Otter outside , fit the wings and make adjustments to the lower nacelle covers to allow for the wing stays. While it is assembled time to put some props on and check the 4Max 3547 700kv motor's power. Using a 3/4 charged 4 cell lipo with 11 x 10 props I got 350 watts @ 24 amps Um? I found a spare 12 x 8 and tried that. 440 watts @ 28 amps. That's better. 4Max motors are rated 28 amp continuous, 35 burst. 12 x 8 looks out of place on the Otter so I will fit 3 blade 11 x 7 or 11 x 8 as fitted on my H9 Twin Otter.
Port wing is done but the human wood eater also had a go at the starboard nacelle covers. :huh: 10 mm short! I am thinking a plastic bottle cut up for some bits glue and paint. There will be a slight ridge but so what!

Last edit: 10 Sep 2022 17:10 by Phil Ford.
The following user(s) said Thank You: 4Pedalsfly, kevinross
Please Log in or Create an account to join the conversation.
Moderators: DaveBright
Time to create page: 0.397 seconds
©
2009 - 2026
WMAC PCF Design