
The following article will give you an insight to what is required basically to get started into RC Flight with a trainer type model powered by a brushless electric motor. The model used for this purpose is the MaxThrust Riot but many other models follow a similar pattern.
We will take you through in simple form the types and versions available, the assembly, setting up, testing and preparation before taking your new model up to the flying field where you should consult an experienced pilot who will give your model a check over before it's maiden flight.
There are a few more specialised items you will need for this type of model but read on....
Electric Power
See Pairing or Binding Receiver to your Transmitter
See Range Checking
The advantages of Electric are clean, no messy fuels, unlikely to deadstick and fairly quick to assemble.
A typical high wing trainer will run on trike landing gear, ie; steerable nose wheel and two main landing legs. They can be "foam" or traditional balsa/ply construction. Some models come RTF (ready to fly) so all that is needed is a suitable battery and your own TX. There RTF versions that supply a basic TX but these are just that!
An alternative version is the ARF. There will be some assembly required, you will have to install your own servos (usually three) your choice of motor, typically a brushless similar to top photo, an ESC a propellor, a reciever preferably 2.4Ghz (RX) and a battery pack, nowadays typically LiPo ( lithium polymer ).
 The manual will suggest a suitable size motor, ESC (see image right), prop size and battery capacity. This seems daunting but don't be put off assembling your model because you will find help by asking on our forums.
Probably if this is your very first model then go down the road for a RTF which will have minimal assembly, servos, ESC and motor installed. You may have to acquire your own TX but a second hand one would do preferably 2.4Ghz, the new standard. Avoid the old 35Mhz although it is still popular but losing ground fast.
Note that some RTF - Ready to Fly models may come complete with a Transmitter and suitable charger. The transmitter will be very basic and minimal and I would not recommend this type, especially for some new to RC flying. It will not have possibly dual rates or expotential, these altering the rate of the control surfaces movement in comparison to your input on the sticks. Expo changes the initial amount of movement, soften if you like although the transmitters supplied have improved depending on manufacturuer or supplier.
In our example model we are using the Max Thrust Riot. This model is a "taildragger" ie; one pair of main gear and tailwheel which steers whilst on the ground. (A Review is available - See reviews) Minimal assembly required, constructed of EPOFlexy foam, a very resilient compressed plastic and ideal for beginners due to it's crash damage resistance. All that is required is your own receiver, a TX and a 2300 MaH Lipo Battery pack of three cells (nominal 11.2volts but in reality 12 volts+)
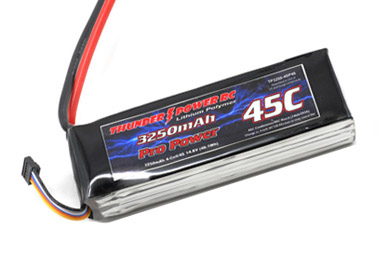
 Let us assume you have your TX and receiver already so what else do you need? You will need a specialised battery charger. These chargers not only properly charge your precious Lipo Typical Electric Motor but most are capable of charging NiCad, NiMH and small lead acid batteries.
Your local model shop will be able to suggest and supply a suitable charger. You will need also to purchase because they are not always supplied an multi-adaptor lead. These are normally around £7 - 10 each. Verify that the charger comes with an XT balance adaptor. When charging LiPo batteries you should most of the time and especially at first use, balance the cells.
 Note: There are precautions when charging LiPo batteries. These batteries can discharge an enormous amount of power and any short circuit of the leads may cause a fire. Never run the batteries till they are flat. This will destroy the chemical reaction inside the cell or cells and render the battery useless. It is recommended to charge the batteries on a non-flammable surface and not to leave the battery unattended for long periods of time. When the battery is fully charged the charger will bleep and display END or Finish. It is also recommended that if you envisage an extended period of time of non use then charge the battery to approx 80%.
Caution!
When plugging in a battery pack into your model you must consider your model "live" as if the engine/motor was running - keep hands, etc clear of prop. A model restraint is required.
Pairing a Transmitter to the Receiver
Futaba: Pairing Futaba for example requires the TX to be switched on and a model selected. Supply battery power to reciever and press a small button on the side of the RX and hold till the LED stops flashing. You are now paired (Futaba uses channel hopping technology)
Similar for Spektrum (these use the DSM or DSMX technology) receivers have to be "bound" to the TX. This is done by inserting a bind plug into the RX 's battery/bind socket, supplying some battery power via any of the other channels. The difference here from Futaba is the RX is powered up with bind plug inserted. Then the TX is switched on whilst holding down the button on the rear of the TX. The RX LED will flash a number of times and when steadily lit means you are paired. In this order switch off RX, remove bind plug and then switch off the TX.
Note: From now on you always switch on the TX first and then your model's receiver. Switching off is reverse order. Failure to do this golden rule may unbind the model and if flown or operated be become out of control. This rule is global for RC Cars and Boats too.
Get into the habit, make it mandatory to range check at the start of every days flying for each model. Depending on which type of transmitter you have (see handbook) switch on Transmitter then receiver. Holding the transmitter as you normally would, antenna extended or at 45 degrees, set the transmitter into low power/range check and walk away to about 90 paces using the sticks to operate the control surfaces, watching the model as you walk back to ensure that the controls are responding as they should. If all is well then it is safe to fly.
Some pilots do this in varying ways.
1. With glow engine running and the model restrained (recommend a purpose made restraint) or held by another flyer, walk away operating controls as in previous paragraph ensuring you also have full throttle control. If electric powered then follow previous advice but ensure the motor powers up and down correctly.
2. Optional - Range check first before fuelling up a glow powered aircraft, if there is a problem you won't have to drain the fuel tank if the model has to be held upside down for an extended period. Don't want to lose any of that expensive fuel!
*** If you don't have full radio contact during this check then it may be necessary to move the receiver antenna or the unit itself until range check is successful
Terminology:
Deadstick - loss of motive power * TX - Transmitter * RX - Receiver * ESC - Electronic Speed Controller
ARF - Almost Ready to fly RTF - Ready to Fly *
Trike - Three Leg landing gear * Tail dragger - One Pair of Mains and tail wheel * LiPo - Lithium Polmer
NiMh - Nickel-Metal Hydride. * Ni-Cad - Nickel-Cadmium * LiFe - Lithium Ferrous * LiFePO4
* Prop Pitch - Number of turns of prop in comparison to prop diameter * Motor KV - Revolutions of motor per volt *