- Posts: 492
- Thank you received: 83
New Toy
- Chris73
-
 Topic Author
- Offline
- Platinum Member
-

Less
More
7 years 7 months ago - 7 years 7 months ago #16088
by Chris73
New Toy was created by Chris73
Last edit: 7 years 7 months ago by Phil Ford.
The following user(s) said Thank You: Brian
Please Log in or Create an account to join the conversation.
- throttletothewall
-

- Offline
- Senior Member
-

Less
More
- Posts: 171
- Thank you received: 153
7 years 7 months ago #16089
by throttletothewall
Replied by throttletothewall on topic New Toy
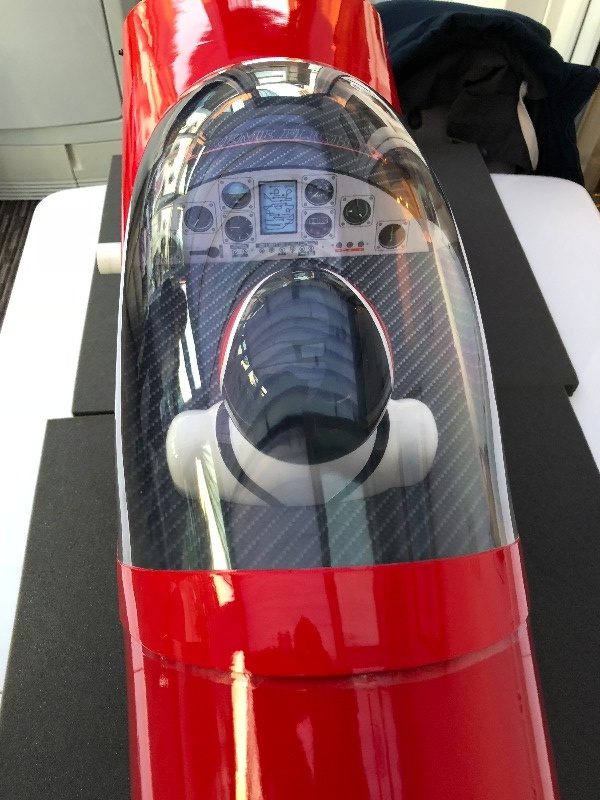
Chris, as soon as I see all that carbon laminated wood it makes my wallet snap shut, given how much a sheet of carbon laminated balsa is these days! However, the model looks fantastic and I assume is ultra lite for it's size, look forward to the install blog as it is always interesting to see how other people tackle the various problems and decisions.
Peter
Peter
Please Log in or Create an account to join the conversation.
- Chris73
-
 Topic Author
- Offline
- Platinum Member
-

Less
More
- Posts: 492
- Thank you received: 83
7 years 7 months ago - 7 years 7 months ago #16090
by Chris73
Replied by Chris73 on topic New Toy
After unpacking and checking everything, the first thing I do is hit every joint that I can get to with thin CA
A few people have had issues with the cross bracing not being very well glued, so will have to figure out a way to reach down the back of the fuse to apply some extra glue, I am thinking an epoxy brush taped onto a long piece of dowel, so I can paint some epoxy on the joints
Then go over the whole plane with a covering iron and heat gun, to ensure that all the covering is well stuck down
Then on to gluing the hinges in, everybody has their own way of doing this, and I will post some photos of how I like to do it later today
Last edit: 7 years 7 months ago by Chris73.
Please Log in or Create an account to join the conversation.
- DaveBright
-

- Offline
- Moderator
-

Less
More
- Posts: 886
- Thank you received: 129
7 years 7 months ago #16099
by DaveBright
Replied by DaveBright on topic New Toy
Nice Chris
Please Log in or Create an account to join the conversation.
- Chris73
-
 Topic Author
- Offline
- Platinum Member
-

Less
More
- Posts: 492
- Thank you received: 83
7 years 7 months ago #16104
by Chris73
Replied by Chris73 on topic New Toy
Felt like I spent quite a long time achieving not a lot today, but got all of the covering shrunk down (It didnt look like it needed it but I like to go over it anyway to make sure it is well stuck down)
Then got all the hinges glued in and all the control horns glued in, then ironed some covering in the hinge line to seal the gap
I like to glue both sides at the same time, so couldn't take many photos as you have to work quick!!
I start by using a reamer and very slightly enlarging the hole so the knuckle of the hinge sits in properly, I then use vasiline on the hinge point to stop glue getting in the pivot point, plenty of glue in the hole and then some on the hinge itself, same for the other side and then mate the two surfaces together and clean up with white spirit
The following user(s) said Thank You: Brian
Please Log in or Create an account to join the conversation.
- Chris73
-
 Topic Author
- Offline
- Platinum Member
-

Less
More
- Posts: 492
- Thank you received: 83
7 years 7 months ago #16105
by Chris73
Replied by Chris73 on topic New Toy
The following user(s) said Thank You: Brian
Please Log in or Create an account to join the conversation.
Moderators: DaveBright
Time to create page: 0.280 seconds
Latest Posts
-
-

- Ray Ivey's Models
- In WimborneMac Members / For Sale - Exchange - Wanted
- by Brian
- 1 week 1 day ago
-
-
-

- Various Gliders from Dave Ambrose ex W.M.A.C Membe...
- In WimborneMac Members / For Sale - Exchange - Wanted
- by 4Pedalsfly
- 2 weeks 3 days ago
-
©
2009 - 2025
WMAC PCF Design


