- Thank you received: 0

Scratch Built Hannibal
- Chris73
-

- New Member
-

Less
More
13 Jun 2018 12:52 #16817
by Chris73
Replied by Chris73 on topic Scratch Built Hannibal
You dont have a lot of choice now but to pay up, if you dont collect your parcel within x amount of days the Post Office will return it to the sender or destroy it, BUT you will still be liable for the charges, so you could end up with no goods and a bill from HMRC
Please Log in or Create an account to join the conversation.
- Brian
-
Topic Author
- New Member
-
Less
More
- Thank you received: 0
13 Jun 2018 13:38 #16819
by Brian
Replied by Brian on topic Scratch Built Hannibal
Thanks Chris, When I checked the package this morning, Hobbyking had boxed three more items that I felt sure were coming from the UK warehouse, so it wasn't just a replacement impeller after all.
Please Log in or Create an account to join the conversation.
- Phil Ford
-

- Offline
- Moderator
-

Less
More
- Posts: 3156
- Thank you received: 903
13 Jun 2018 18:57 - 13 Jun 2018 18:59 #16822
by Phil Ford
Replied by Phil Ford on topic Scratch Built Hannibal
Customs duty on a £7.00 fan? I thought that did not sound right. Then later you state there were other items. Now that sounds right. But why buy
from Global aka Hong Kong for stuff. If it ain't in the UK or Europe then I will go without. Be caught once, never again for peanut priced items.
But then of course you thought you would have a go at trying to get away with it just for the devilment. :lol:
from Global aka Hong Kong for stuff. If it ain't in the UK or Europe then I will go without. Be caught once, never again for peanut priced items.
But then of course you thought you would have a go at trying to get away with it just for the devilment. :lol:
Last edit: 13 Jun 2018 18:59 by Phil Ford.
Please Log in or Create an account to join the conversation.
- Brian
-
Topic Author
- New Member
-
Less
More
- Thank you received: 0
18 Jun 2018 15:12 #16875
by Brian
Replied by Brian on topic Scratch Built Hannibal
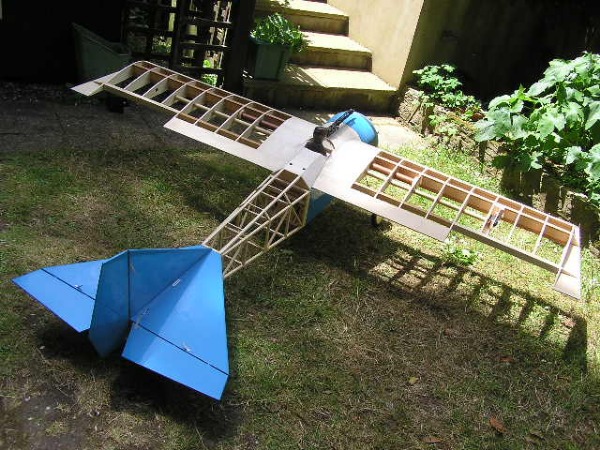
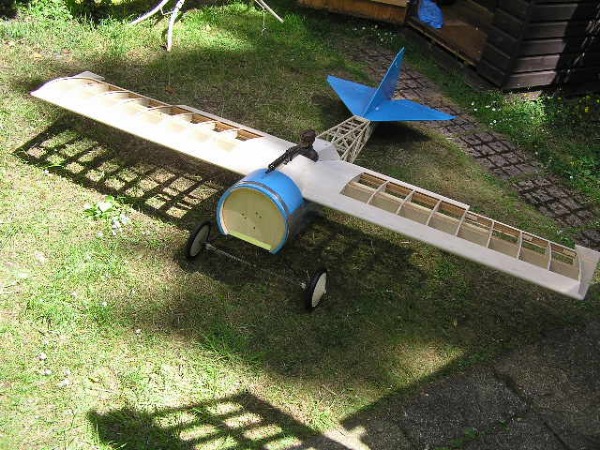
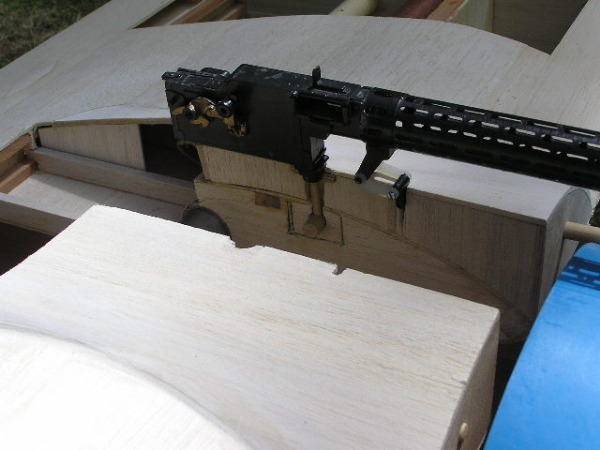
Bit more building finished, aileron servos are in, the wing/fairing/cockpit assembly was held down by the wing mount screws. The machine gun clamps securely between the wings. Quite surprising what can be done by using coarse carpentry and a dab or two of filler.
Please Log in or Create an account to join the conversation.
- Phil Ford
-
- Offline
- Moderator
-
Less
More
- Posts: 3156
- Thank you received: 903
18 Jun 2018 16:21 #16876
by Phil Ford
Replied by Phil Ford on topic Scratch Built Hannibal
Nice work! ")
The following user(s) said Thank You: Brian
Please Log in or Create an account to join the conversation.
- Brian
-
Topic Author
- New Member
-
Less
More
- Thank you received: 0
20 Jun 2018 12:40 #16893
by Brian
Replied by Brian on topic Scratch Built Hannibal
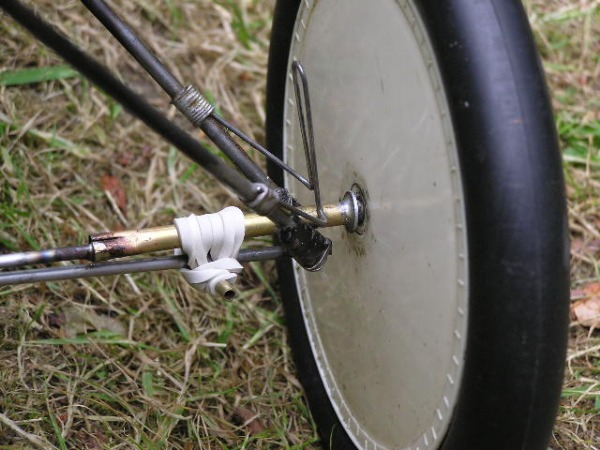
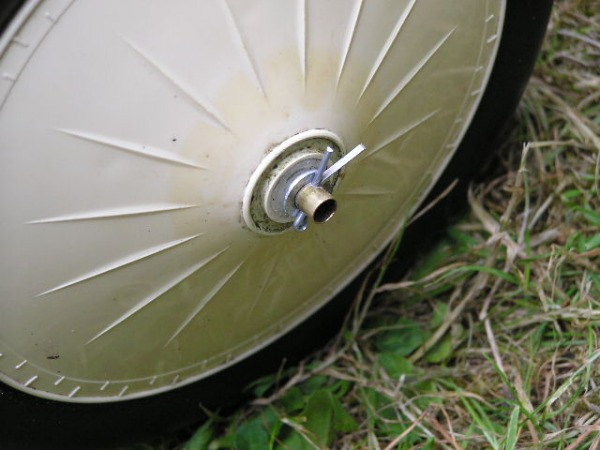
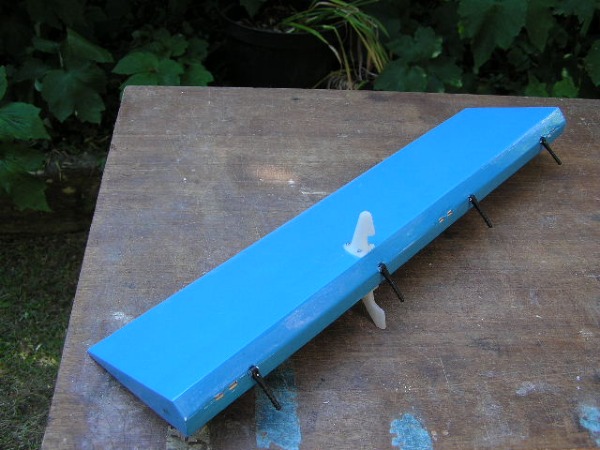
In an attempt to stop the Hannibal landing like a wheelbarrow flung out of a first floor window, I modified the main axle into a two part item. De-soldering the original was a lot of fun! Finally had to use a small gas torch. The white rubber bands are temporary, I have some black 3mm bungee cord in the post. Nothing original in the U/C modifications, I copied the "suspension" and axle guides from photos of WW1 undercarts shown in RCM+E. The wheel retaining washer and split pin is an attempt at "authenticity" as well as avoiding getting another set of wheel collets. Getting stuff was no problem before the Internet, a quick visit to the local model shop for the required bits and pieces, Usually there was something else as well.
Please Log in or Create an account to join the conversation.
- Brian
-
Topic Author
- New Member
-
Less
More
- Thank you received: 0
22 Jun 2018 19:54 #16917
by Brian
Replied by Brian on topic Scratch Built Hannibal
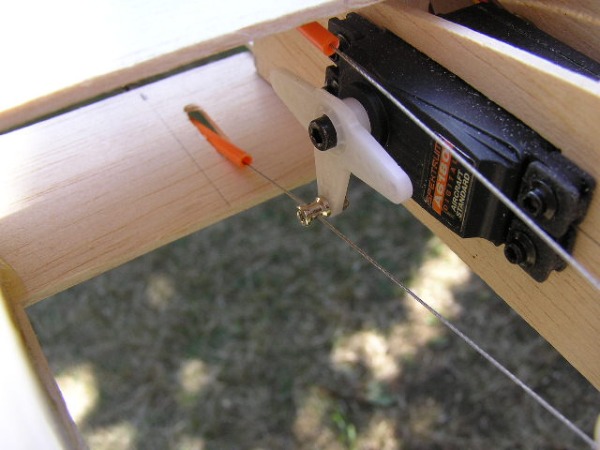
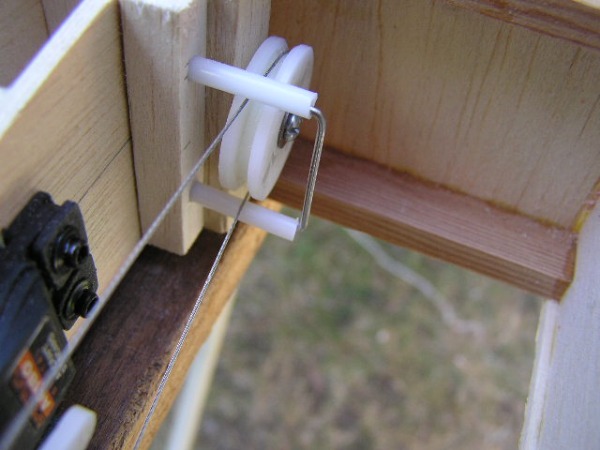
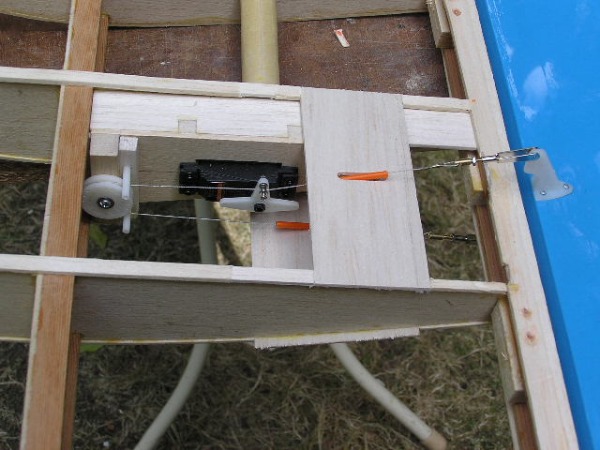
Today I fitted the starboard aileron and rigged the pull/pull system. There was a fair amount of remedial work to do in the servo area, due to the removal of the original hardwood servo mounting. I fitted a couple of delrin retainers adjacent to the idler pulley. Hopefully these will prevent the wire jumping out of the groove. After the retainers had been in place for a couple of hours, I noticed that they had "opened out" slightly, due to the pressure of the control wire I expect. I bent up a couple of wire inserts to hold the retainers in place. The Hannibal's wing tip has always looked a bit "odd". I had a really good look at it today. The tip has a pronounced dihedral, this appears to have been caused by previous repairs. The cure was a bit drastic. I cut the tip away from the end rib and removed the triangular supports. With the tip floating freely, it was an easy job to pull it into line with the end of the aileron. It needed to have the trailing edge of the last wing rib to be replaced, when this was done, everything lined up.Using pull/pull for controls is a bit complicated when it comes to covering the model. I've arranged the aileron controls to disconnect from the horns and drop through slots in the exit supports. After the covering is complete, the exit slots will be cut open and the guide tubes(the orange bits) glued in place. The final job is to centralise the aileron and the servo, then tighten the clamp screw on the servo arm. Sorted!

Please Log in or Create an account to join the conversation.
- Brian
-
Topic Author
- New Member
-
Less
More
- Thank you received: 0
24 Jun 2018 13:32 - 24 Jun 2018 13:33 #16935
by Brian
Replied by Brian on topic Scratch Built Hannibal
I wrote that I'd fitted the starboard aileron in my last post. In fact it was the port one! Lateral reversal, no wonder I can't fly properly! Anyway, today I got down to the mystery of the starboard aileron/wing T.E.and wingtip T.E. misalignment. Originally I thought it was due to a dodgy repair to the tip sometime before I bought the model. Having spent a lot of time dismantling the tip parts and re-assembling with new bits where required, I still couldn't get an alignment. The wing isn't warped, neither is the aileron, then quite by chance, after I'd spent an hour or two this morning dismantling the newly refurbished wingtip again in a final attempt to get things decently lined up, I dropped my balsa knife. I picked it up, and as I straightened up, I saw something I should have noted a long time ago. The reason for the misalignment is that the hinges have been incorrectly fitted in the wing. Still don't know how I missed it. The outboard hinge is exactly 1/8" lower than the inboard one. The latest wing tip is on the building board, and now I must decide whether to reposition all three hinges, or cut away the spar and hinges in one piece, and re-fit it with packing fitted to bring the hinge line into the correct position. Fortunately the hinge spar is balsa sandwiched between hardwood sub-spars, so cutting out and refitting shouldn't be too much of a problem.
Last edit: 24 Jun 2018 13:33 by Brian.
Please Log in or Create an account to join the conversation.
- Brian
-
Topic Author
- New Member
-
Less
More
- Thank you received: 0
24 Jun 2018 18:01 #16940
by Brian
Replied by Brian on topic Scratch Built Hannibal
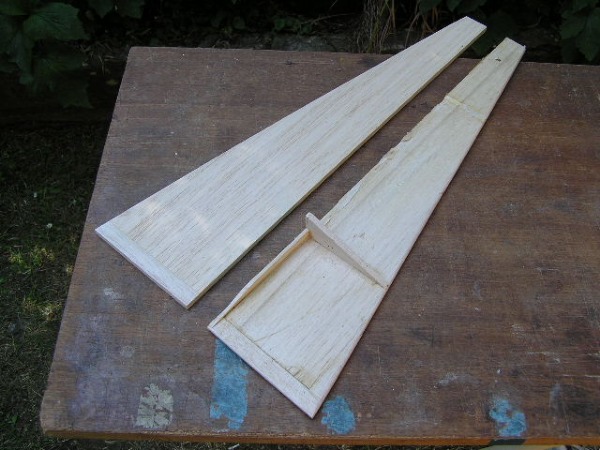
Correcting the misalignment between aileron, wing and wingtip was more complicated than I thought. Having measured a 1/8" (three and a bit mm for those who prefer Metric). Rather more detailed examination revealed that the hinge point in the spar and the hinge point in the aileron were both 1/16" (approx 1.6mm)out. However, aligning the aileron with the spar didn't solve the problem of aligning the tip. I turned the wing upside down and sighted the bottom surface with a pair of hardwood strips. There was the rest of the problem. The wing had washout of about two degrees, this was the main cause of the misalignment. After hunting around to see if I had some spare hinges, should I damage one or two in the extraction. I found the answer. Robart pin hinges. The Robart jig automatically centres the hinge, and its fairly easy to pitch the hinges along the centreline. To cure the washout, I sprayed the wing panel with water, with the inner wing weighted down I loaded the outer wing with a large piece of lead. By morning it should have dried out and with luck the warp will have been eliminated. The shot of the old and new wingtips shows the hard balsa stabilising strip glued to the trailing edge. This is to help prevent the tip from curving when the covering is shrunk.

Please Log in or Create an account to join the conversation.
- Brian
-
Topic Author
- New Member
-
Less
More
- Thank you received: 0
25 Jun 2018 08:27 #16946
by Brian
Replied by Brian on topic Scratch Built Hannibal
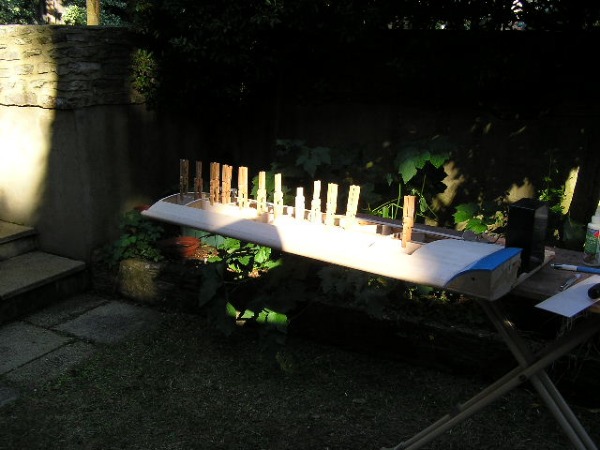
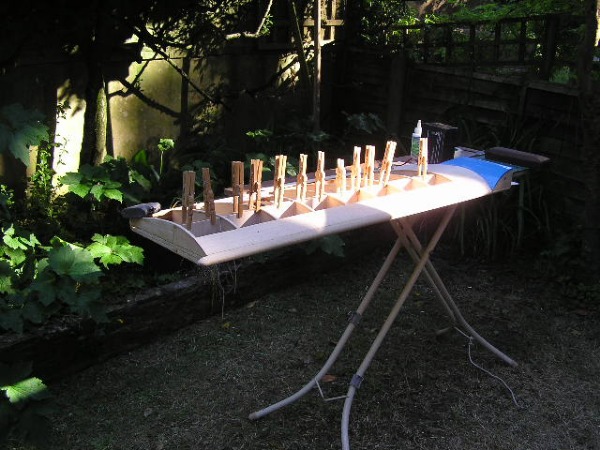
I left the wing well damped, weighted down and extra weight on the trailing edge at the tip to try to remove the washout. This morning the washout was very much reduced, but the wing now had a distinct upward curve. This seemed to be mainly down the centre of the wing.I removed all the spar webs, quite difficult as the original builder had used epoxy to fix them. Weighted the wing down again, and replaced all the spar webs. The strange looking bits of wood standing over the spar are home made pegs, very handy for clamping parts up to 5/8" (15mm) wide. Economical to make too, I made up about twenty five in various configurations, all for £1 per 100 wooden pegs from a car boot sale.
Please Log in or Create an account to join the conversation.
Moderators: DaveBright
Time to create page: 0.372 seconds
©
2009 - 2026
WMAC PCF Design