- Thank you received: 0

Gromit's Phase 5 Build
- Chris001
-
 Topic Author
- New Member
-

Less
More
15 Sep 2018 17:35 #17691
by Chris001
Gromit's Phase 5 Build was created by Chris001
I'm a little behind, as usual, Mike and I started the Phase 5 build at the same time, but I lost my enthusiasm for flying and so the build stalled!
Mike's build can be found here: wimbornemac.org/forums/glider-slope/1612...5-by-chris-fossPhase 5
But... I've been getting dusty again today, and as it's been a while since I spoke to Mike about the finer details of his build and my memory seems to be getting worse I thought I'd start posting my progress and asking questions along the way.
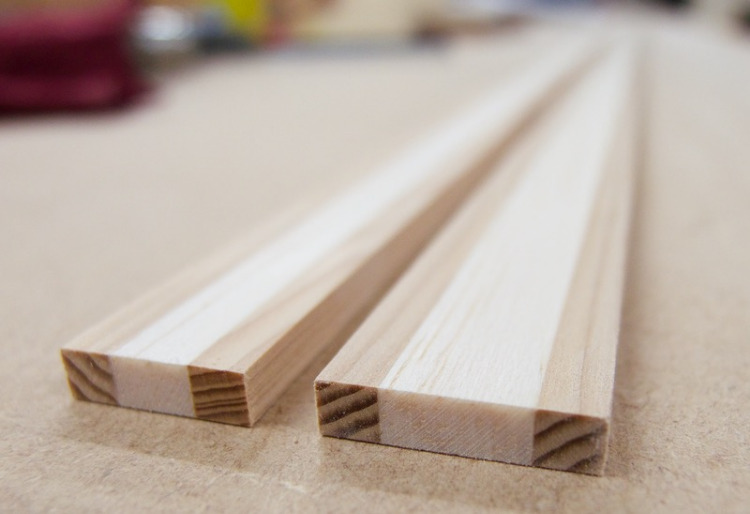
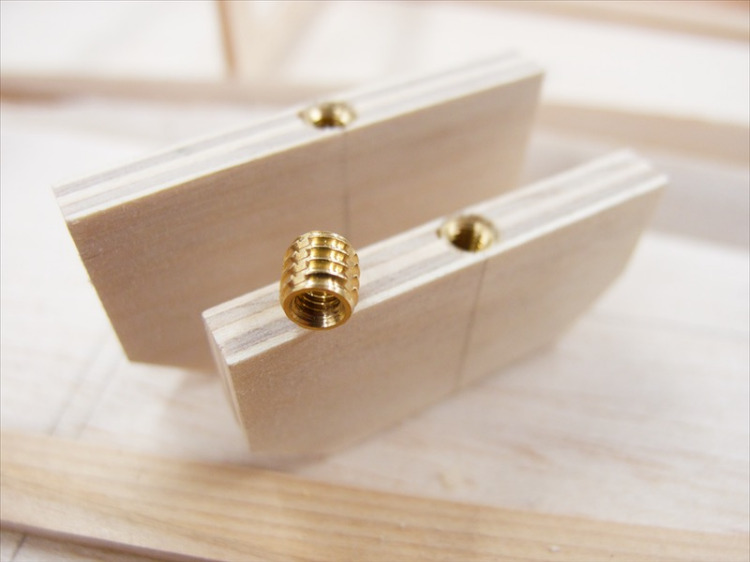
The wing cores are from Mike, I think my spars might be a little beefier than Mike's, but if anyone seen me land they'll understand why, it had nothing to do with ordering the wrong spruce.
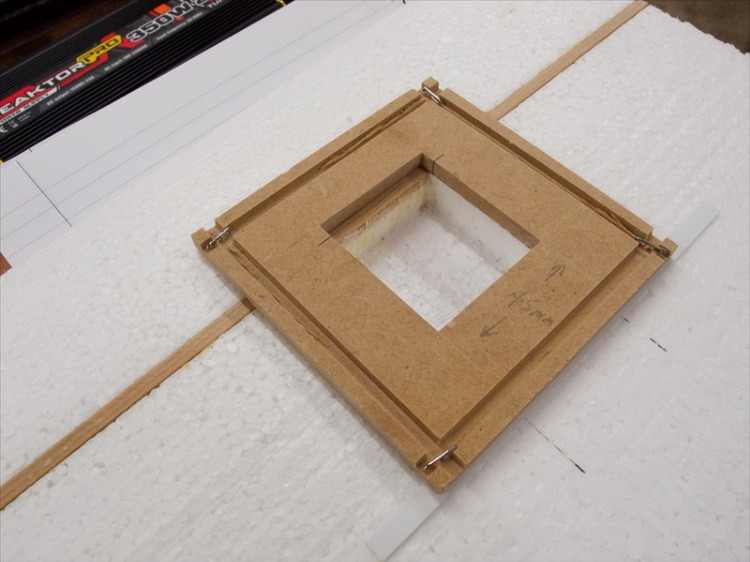
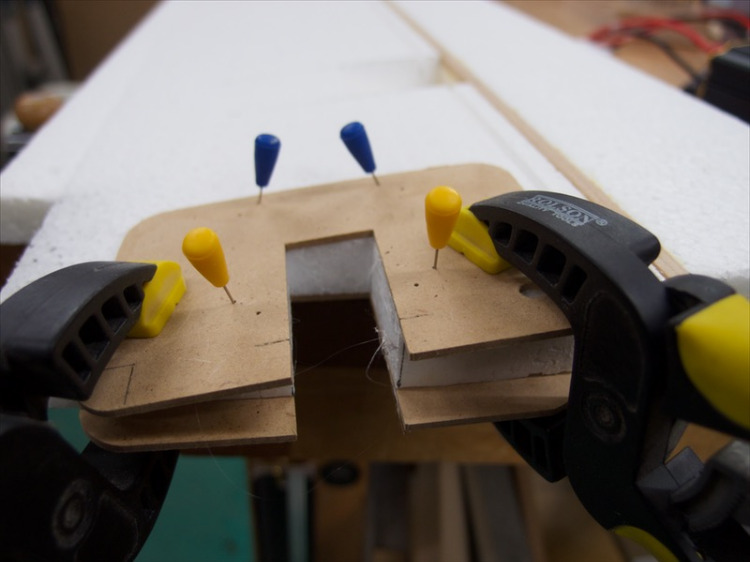
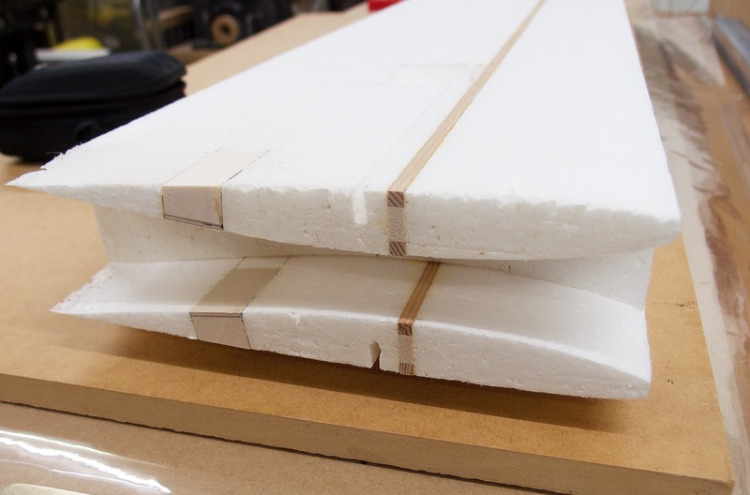
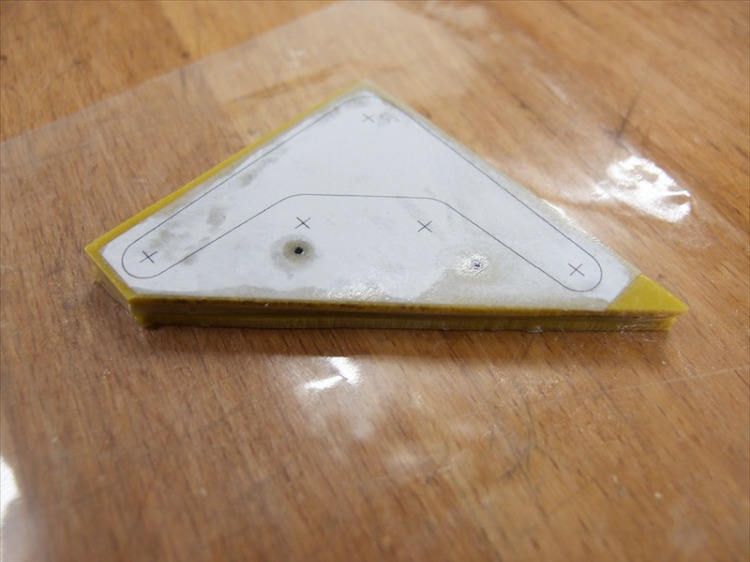
I've made a little mini hotwire cutter that I used to cut out the servo holes, wing bolt hard points and the servo wire trench.
Mike's build can be found here: wimbornemac.org/forums/glider-slope/1612...5-by-chris-fossPhase 5
But... I've been getting dusty again today, and as it's been a while since I spoke to Mike about the finer details of his build and my memory seems to be getting worse I thought I'd start posting my progress and asking questions along the way.
The wing cores are from Mike, I think my spars might be a little beefier than Mike's, but if anyone seen me land they'll understand why, it had nothing to do with ordering the wrong spruce.
I've made a little mini hotwire cutter that I used to cut out the servo holes, wing bolt hard points and the servo wire trench.
Please Log in or Create an account to join the conversation.
- Chris001
-
Topic Author
- New Member
-
Less
More
- Thank you received: 0
15 Sep 2018 17:51 - 15 Sep 2018 17:52 #17692
by Chris001
Replied by Chris001 on topic Gromit's Phase 5 Build
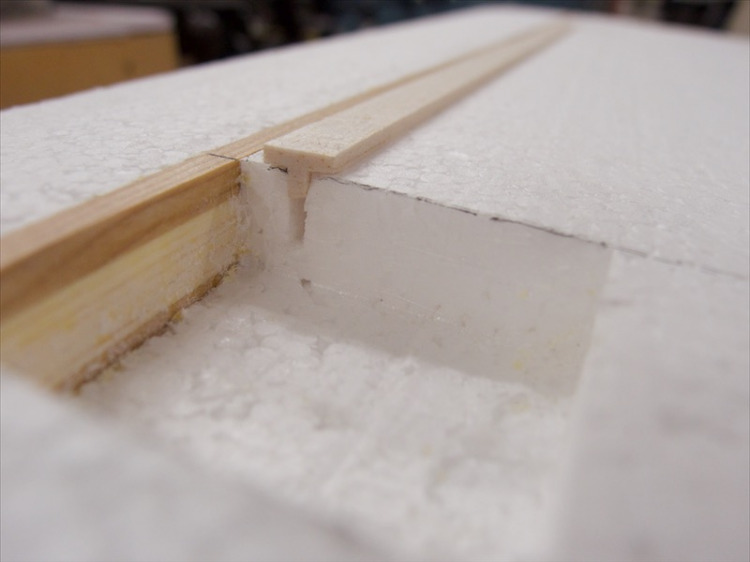
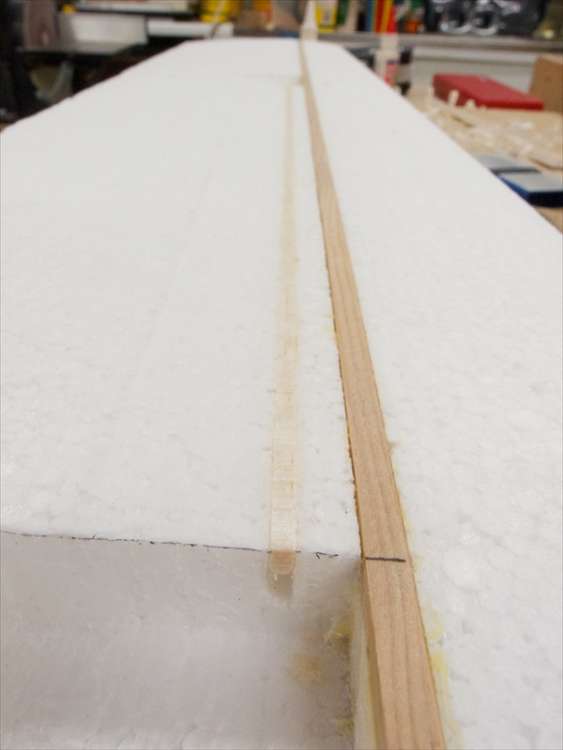
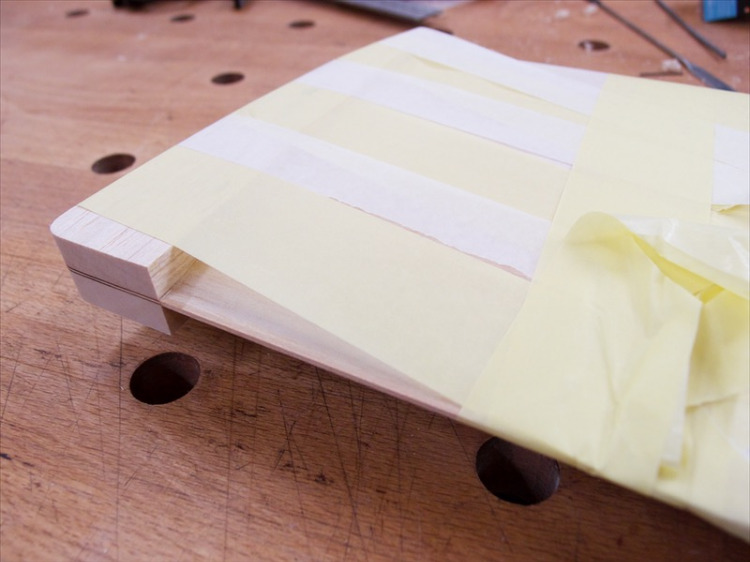
Covering the servo wire trench with a piece of wood became frustrating as I couldn't get it to sit just proud of the surface all the way along, so I made a balsa 'T' section that I could glue in and then just plane & sand it flush to the surface of the wing.
On the Atlas I used an old credit card to spread the polyurethane glue, this time I decided to use a foam roller, and learned a lesson that was probably predictable! Polyurethane glue is thick and sticky, and if you got back and forth with the roller on very thin balsa, it will rip it apart! Alas it was unsalvageable so I had to make up a second sheet, but if you always roll away from you the foam roller very quickly creates an even coating of glue.
On the Atlas I used an old credit card to spread the polyurethane glue, this time I decided to use a foam roller, and learned a lesson that was probably predictable! Polyurethane glue is thick and sticky, and if you got back and forth with the roller on very thin balsa, it will rip it apart! Alas it was unsalvageable so I had to make up a second sheet, but if you always roll away from you the foam roller very quickly creates an even coating of glue.
Last edit: 15 Sep 2018 17:52 by Chris001.
Please Log in or Create an account to join the conversation.
- Chris001
-
Topic Author
- New Member
-
Less
More
- Thank you received: 0
15 Sep 2018 18:16 - 15 Sep 2018 18:18 #17693
by Chris001
Replied by Chris001 on topic Gromit's Phase 5 Build
When cutting out the fuselage sides I spray mounted the two pieces of balsa together and then spray mount the plan on top, the spray mount holds it all together while I cut and sanded down to the outline, then lighter fluid releases them and I had two identical fuselage sides.
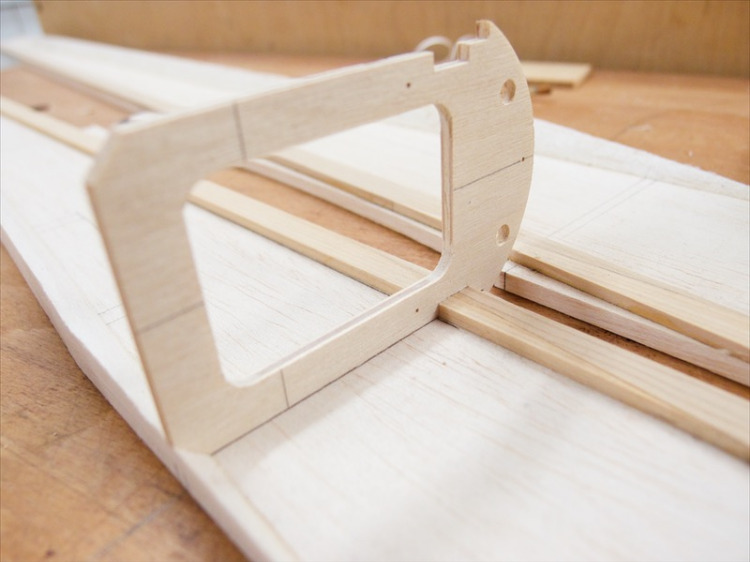
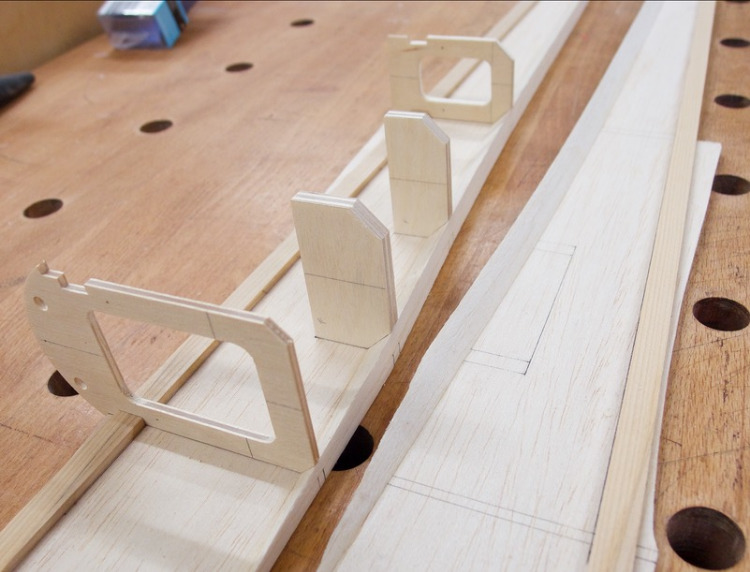
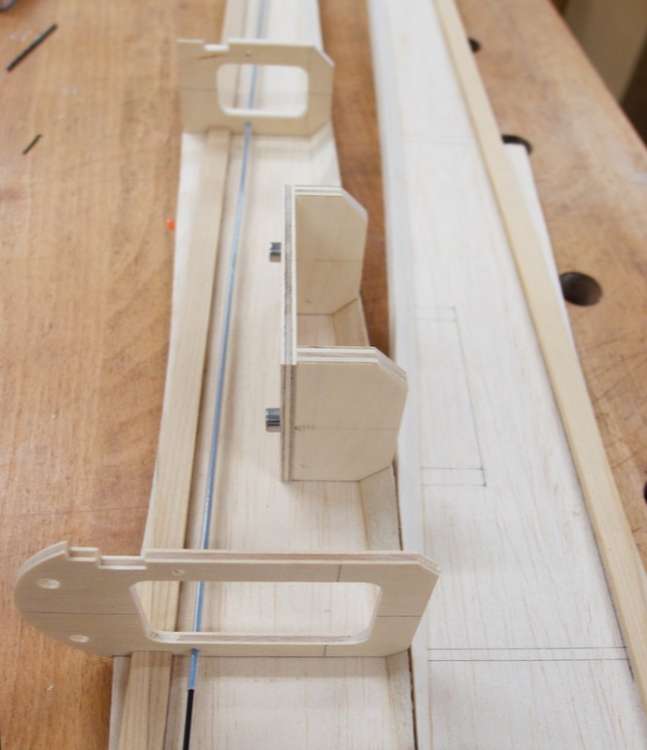
There aren't many formers to the Phase 5 but they needed to be gently fettled into position between the sprue longerons and the 45º bottom longerons.
The ballast box on the plans has no top, but I remember seeing Mike's and his does, I guess it has to otherwise what stops the ballast falling out.
Mike, I'd be grateful to know how you are securing the lead in the box, I figure you are using strips of lead, is it wedged in with a bit of foam or something?
I'll be using a carbon push rod in a PTFE tube for the rudder. I think it might be prudent to add another support or two after the last former before it exits at the tail.
Mike did your rudder push rod exit the fuselage before the Bell Crank box assembly?
Last edit: 15 Sep 2018 18:18 by Chris001.
Please Log in or Create an account to join the conversation.
- Chris001
-
Topic Author
- New Member
-
Less
More
- Thank you received: 0
15 Sep 2018 18:46 #17694
by Chris001
Replied by Chris001 on topic Gromit's Phase 5 Build
Now for two potentially bad moves...
Mike cut off and edged the ailerons and faced the trailing edge of the wing before gluing on the wing tips, I've been dithering about it because it will be much easier to shape the wing tip with the wing whole, and I can align the centre of the wing tip perfectly with the hardwood trailing edge... but is that going to lead to complications when I want to cut the ailerons off? I guess I'll find out as I glued the wing tips on today! I did cover the last part of the wing tip with tape so the aileron section of the wing isn't glued to the wing tip.
The thicker the bell crank the better, as long as it still fits, this will provide better support for the piano wire that holds the tail, but the linkage bit can't be any thicker than 2.5mm, so I've glued together three lots of 2mm fibreglass, and I just hope I can thin the bottom section cleanly without making a complete mess of it!
Please Log in or Create an account to join the conversation.
- kevinross
-

- Offline
- Platinum Member
-

Less
More
- Posts: 1023
- Thank you received: 583
15 Sep 2018 19:52 #17696
by kevinross
Replied by kevinross on topic Gromit's Phase 5 Build
very neat work Chris
The following user(s) said Thank You: Chris001
Please Log in or Create an account to join the conversation.
- Phil Ford
-

- Offline
- Moderator
-

Less
More
- Posts: 3156
- Thank you received: 903
15 Sep 2018 19:54 - 15 Sep 2018 19:56 #17697
by Phil Ford
Replied by Phil Ford on topic Gromit's Phase 5 Build
Your back Chris. Don't worry, it's just a Phase your going through :lol: I thought you had given up.
Last edit: 15 Sep 2018 19:56 by Phil Ford.
The following user(s) said Thank You: Chris001
Please Log in or Create an account to join the conversation.
- 4Pedalsfly
-

- Offline
- Platinum Member
-
Less
More
- Posts: 800
- Thank you received: 202
16 Sep 2018 10:48 - 16 Sep 2018 10:49 #17709
by 4Pedalsfly
Replied by 4Pedalsfly on topic Gromit's Phase 5 Build
Quote from Chris
"I've made a little mini hotwire cutter that I used to cut out the servo holes, wing bolt hard points and the servo wire trench".
Good to see you back on the forum.
I'm currently messing about with a foam flying wing & would be interested in details of your mini hot wire cutter.
I've been hacking out holes etc with saw / blades.
Thanks
Colin.
Last edit: 16 Sep 2018 10:49 by 4Pedalsfly.
Please Log in or Create an account to join the conversation.
- MikeSeale
-
- New Member
-
Less
More
- Thank you received: 0
16 Sep 2018 10:54 #17710
by MikeSeale
Replied by MikeSeale on topic Gromit's Phase 5 Build
Good to see progress being made. The fuselage design is simple and takes shape very quickly so you might be carving balsa before too long. To answer a few of your questions:
1. The pieces of lead are the same length as the ballast box so they do not rattle back and fore. A couple of pieces of foam below and above the lead stops them rattling up and down or sideways.
2. I think that shaping the wing with ailerons in place is a good idea but does make it a little more awkward later...swings and roundabouts.
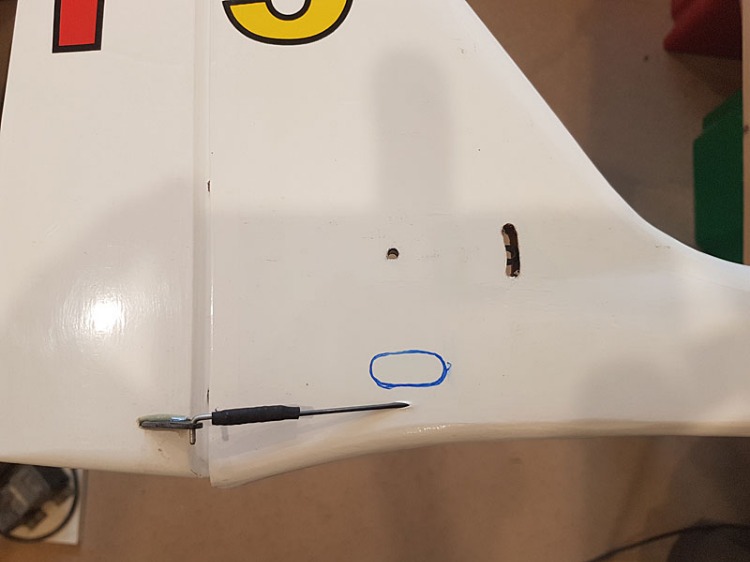
3. My rudder pushrod exits directly below the bellcrank but it can go anywhere if it does not foul the elevator control. In the attached image you can see I've marked the access hole for the elevator bellcrank in blue.
Phil...I've used a 1.5mm carbon pushrod for the rudder, running through a plastic guide tube. At the end I've bound a piece of wire to the carbon and glued it with thin CA. The joint is covered with a small piece of heatshrink. An L-bend is used for the ink to the rudder horn. This setup is, IMHO, a lot simpler than a closed loop setup and has zero slop compared to a closed loop setup. I think it is probably just as light as a closed loop setup too. If you do decide to use a closed loop setup you will experience the joy of threading those wires down a narrow fuselage and trying to ensure that they do not bind with the elevator pushrod.
1. The pieces of lead are the same length as the ballast box so they do not rattle back and fore. A couple of pieces of foam below and above the lead stops them rattling up and down or sideways.
2. I think that shaping the wing with ailerons in place is a good idea but does make it a little more awkward later...swings and roundabouts.
3. My rudder pushrod exits directly below the bellcrank but it can go anywhere if it does not foul the elevator control. In the attached image you can see I've marked the access hole for the elevator bellcrank in blue.
Phil...I've used a 1.5mm carbon pushrod for the rudder, running through a plastic guide tube. At the end I've bound a piece of wire to the carbon and glued it with thin CA. The joint is covered with a small piece of heatshrink. An L-bend is used for the ink to the rudder horn. This setup is, IMHO, a lot simpler than a closed loop setup and has zero slop compared to a closed loop setup. I think it is probably just as light as a closed loop setup too. If you do decide to use a closed loop setup you will experience the joy of threading those wires down a narrow fuselage and trying to ensure that they do not bind with the elevator pushrod.
Please Log in or Create an account to join the conversation.
- Phil Ford
-
- Offline
- Moderator
-
Less
More
- Posts: 3156
- Thank you received: 903
16 Sep 2018 11:10 - 16 Sep 2018 11:10 #17712
by Phil Ford
Replied by Phil Ford on topic Gromit's Phase 5 Build
Come to think of it Mike your spot on there. I had the same awful feeling too about the wires. Carbon the way to go. Thanks.
Last edit: 16 Sep 2018 11:10 by Phil Ford.
Please Log in or Create an account to join the conversation.
- MikeSeale
-
- New Member
-
Less
More
- Thank you received: 0
16 Sep 2018 11:42 #17713
by MikeSeale
Replied by MikeSeale on topic Gromit's Phase 5 Build
I get my guide tube from Hyperflight:
www.hyperflight.co.uk/products.asp?cat=M...als&subcat=PTFE+Tube
If you do go that route let me know and we can split the shipping cost because I will need some more carbon and tube soon.
And the L-bend is wrapped with kevlar or cotton thread before CA'ing in place. Let me know if you'd like to see how I do it?
Please Log in or Create an account to join the conversation.
Moderators: DaveBright
Time to create page: 0.668 seconds
©
2009 - 2026
WMAC PCF Design