- Posts: 171
- Thank you received: 153

Pilatus PT6 Turbo Porter - Renovation
- throttletothewall
-
 Topic Author
- Offline
- Senior Member
-

Less
More
7 years 11 months ago #14376
by throttletothewall
Replied by throttletothewall on topic Pilatus PT6 Turbo Porter - Renovation
Well eventually got out to the workshop Monday afternoon after sorting the house for family get together this coming weekend. Stripped out the ECU/Valve/Pump board and made a new larger one in an attempt to improve layout and reduce the bends in fuel tubing. Spent most of the afternoon trying various layouts and checking fit and alignment with existing firewall holes etc. This is the bit that cannot be rushed, however, no matter which layout I tried I still cannot fit a Festo isolation/tap valve in a position that it can be easily reached without lots of pipework (after the pump) back into the cockpit area, defeating all the attempts to reduce fuel line friction by reducing bends etc.
I have also decided to replace the BVM square type bubble trap with the barrel type and found a new iTrap on the BMFA website at less than half price. This bubble trap (as well as being the barrel style I like) has telemetry capability to let you know if any air is accumulating in it, to give you time to land before the engine flames out.
I have also ordered up two Xicoy proportional brake valves one for each wheel to allow differential braking as well as straight line braking. The programming is going to be very interesting as I want to only allow the brakes to only work if full up elevator is applied and power is below say 15% plus the giro preventing nose over by stopping the brake working if the tail lifts too much and all this for straight line braking. However, for differential braking I want to allow more power (but still full up elevator) to be used for the differential braking (and still using the giro to stop nosing over) by mixing the brakes in with the rudder. With the sophistication of both the Jeti & Powerbox software this should be achievable but it is going to be one very steep learning curve, can't think of a better way to learn about the new radios capabilities!!!
Ed came round Mon eve to have some Deans connectors put on his new Lipos and have the battery compartment in his trainer enlarged a tad to make the batteries not such a tight fit, so no progress on the PT6. Looking after grand daughters all day Tues and then visit mother-in law Wed so a while before any more progress.
Tue; brake valves turned up, along with new 3mm Festo tube & new filter for fuel system. hopefully will have the iTrap by Thur. Just need to source a mount for the small fuel pump (with flats) that comes with the Wren 44i turbo prop think Geoff at Zedjet may have some. Pump was previously just held with Tie Wraps and moving about quite a bit, not good especially as the cap over the wires had moved off the end of the motor meaning solder joints not properly supported. No point monitoring the air in the bubble trap if the pump is just going to stop working!!!
Please Log in or Create an account to join the conversation.
- throttletothewall
-
Topic Author
- Offline
- Senior Member
-
Less
More
- Posts: 171
- Thank you received: 153
7 years 10 months ago #14596
by throttletothewall
Replied by throttletothewall on topic Pilatus PT6 Turbo Porter - Renovation
Well having spent a couple of weeks doing central heating repairs and getting TV aerial working in the house, I have now had a little time to get back to the workshop for a few days before the household winter decorating starts.
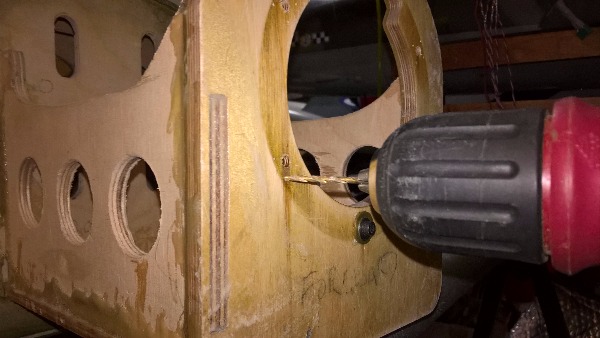
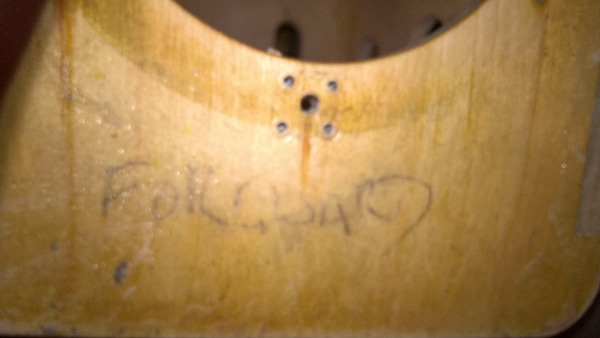
First task was to sort the engine mounting. The overlong M3 bolts were just screwed through the firewall with washers and nuts on the back (the plywood firewall has a firberglass sheet backing of about 1.5mm). That is of course where there were bolts, as one was missing completely and another had no nut at all. I want the engine to be securely mounted but to be able to remove the engine easily for any checking/maintenance etc. so I have removed the engine and drilled the firewall bolt mounting holes out a bit to take M3 captive nuts (Steel, not Aluminium) bit of a problem getting them to bite into the fiberglass sheet backing of the firewall, so I had to put the problem solving hat on. I could not get a drill into the back of the firewall so I marked the front by tapping the captive nuts into the holes at the front and then drilled through (from the front) with a very small drill bit where the four teeth of the captive nut would go. I then installed the captive nut at the back with a little Hysol to ensure it all stayed put and tightened then up with high tensile M3 cheesehead bolts & washers, to dry a bit. I then gave the plywood mount and support a couple of coats of resin for protection in case any fuel should spill or leak in this area. Before the Hysol had completely set I reinstalled the engine to ensure everything lined up correctly and the Hysol still had a little 'give' to ensure everything could be lined up without cross threading risk etc. Really pleased with the result and the engine is now secure but easily removable if required.
First task was to sort the engine mounting. The overlong M3 bolts were just screwed through the firewall with washers and nuts on the back (the plywood firewall has a firberglass sheet backing of about 1.5mm). That is of course where there were bolts, as one was missing completely and another had no nut at all. I want the engine to be securely mounted but to be able to remove the engine easily for any checking/maintenance etc. so I have removed the engine and drilled the firewall bolt mounting holes out a bit to take M3 captive nuts (Steel, not Aluminium) bit of a problem getting them to bite into the fiberglass sheet backing of the firewall, so I had to put the problem solving hat on. I could not get a drill into the back of the firewall so I marked the front by tapping the captive nuts into the holes at the front and then drilled through (from the front) with a very small drill bit where the four teeth of the captive nut would go. I then installed the captive nut at the back with a little Hysol to ensure it all stayed put and tightened then up with high tensile M3 cheesehead bolts & washers, to dry a bit. I then gave the plywood mount and support a couple of coats of resin for protection in case any fuel should spill or leak in this area. Before the Hysol had completely set I reinstalled the engine to ensure everything lined up correctly and the Hysol still had a little 'give' to ensure everything could be lined up without cross threading risk etc. Really pleased with the result and the engine is now secure but easily removable if required.
Please Log in or Create an account to join the conversation.
- throttletothewall
-
Topic Author
- Offline
- Senior Member
-
Less
More
- Posts: 171
- Thank you received: 153
7 years 10 months ago #14597
by throttletothewall
Replied by throttletothewall on topic Pilatus PT6 Turbo Porter - Renovation
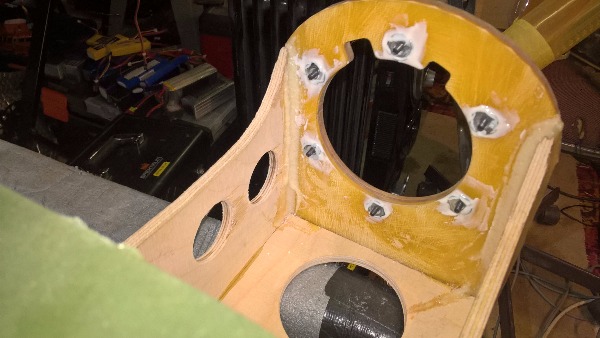
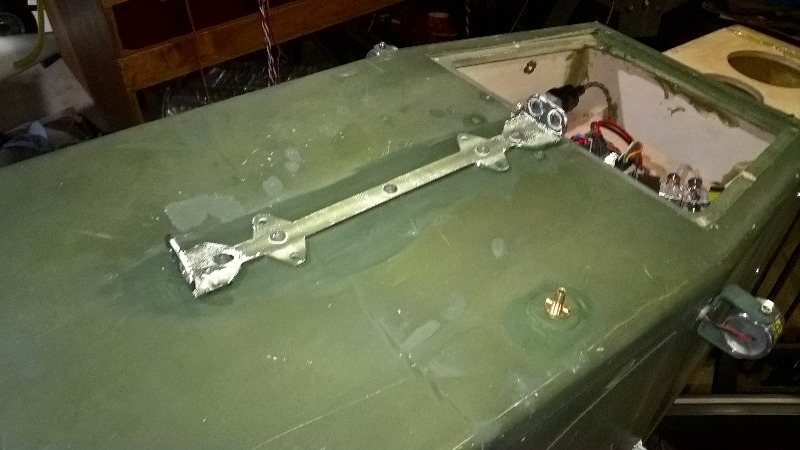
The next job was to replace the rather Heath Robinson bolt threads for the cowl, which although proper captive nuts had been installed for two of the six holes a type of brass expanding threaded insert had been installed for another 3 and these were very loose and probably would turn in the wood. So 4 more captive nuts were installed internally. to ensure all six bolts had good solid support.
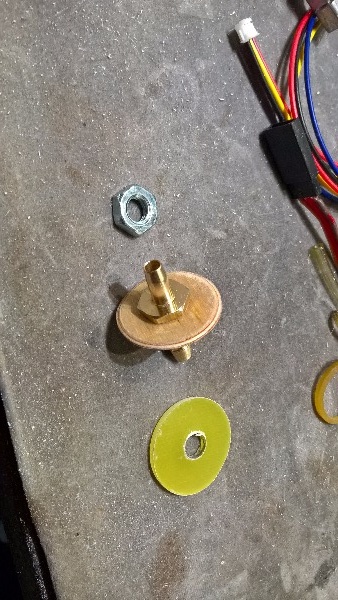
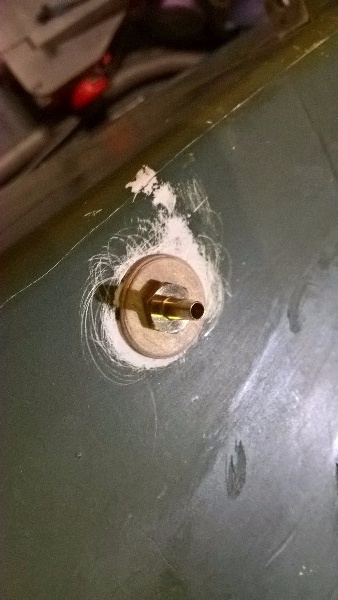
Then I tackled the fuel vent this had been a 6mm Festo fitting, which in my experience is a real pain to disconnect a taxi tank from when the engine is running and being underneath andthis being a model with a big (22/12 carbon 3 balder) wirring prop close by I did not think was sensible. I made up a fibergalss circle with a hole in the middle for inside the fuselage and a ply circle for outside so that I could mount the much smaller push on/pull off (using plain Tygon tube) vent fitting.
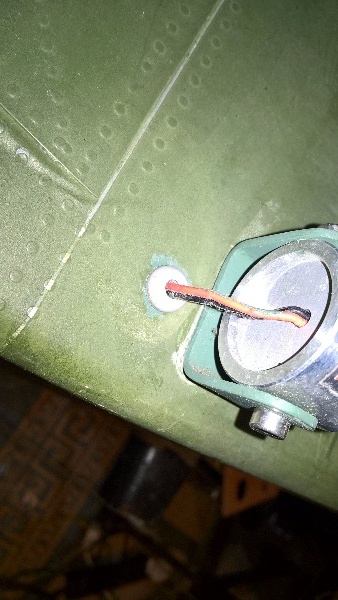
Put some grommets into the exit holes for the air tube to the brakes and also around the cable exit holes for the landing lights just to tidy things up and offer some protection to the tube/cable.
Then I tackled the fuel vent this had been a 6mm Festo fitting, which in my experience is a real pain to disconnect a taxi tank from when the engine is running and being underneath andthis being a model with a big (22/12 carbon 3 balder) wirring prop close by I did not think was sensible. I made up a fibergalss circle with a hole in the middle for inside the fuselage and a ply circle for outside so that I could mount the much smaller push on/pull off (using plain Tygon tube) vent fitting.
Put some grommets into the exit holes for the air tube to the brakes and also around the cable exit holes for the landing lights just to tidy things up and offer some protection to the tube/cable.
Please Log in or Create an account to join the conversation.
- throttletothewall
-
Topic Author
- Offline
- Senior Member
-
Less
More
- Posts: 171
- Thank you received: 153
7 years 10 months ago #14598
by throttletothewall
Replied by throttletothewall on topic Pilatus PT6 Turbo Porter - Renovation
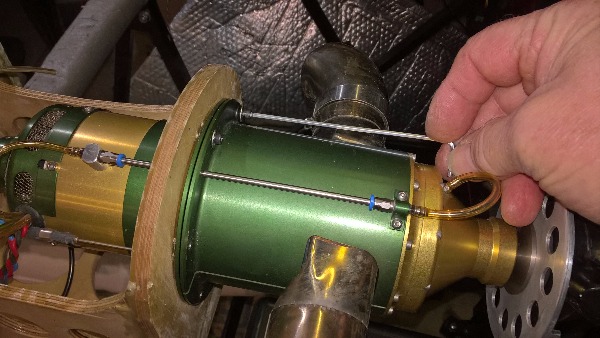
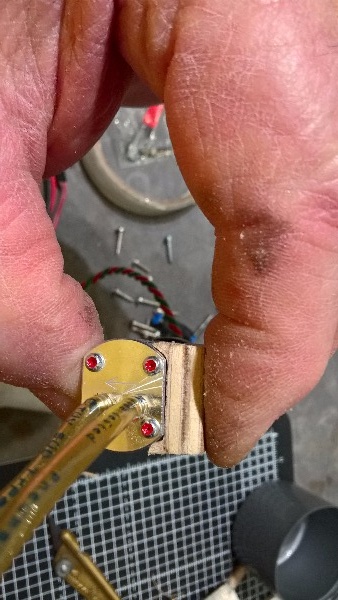
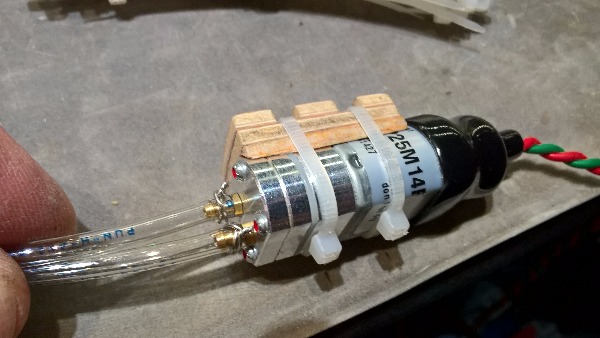
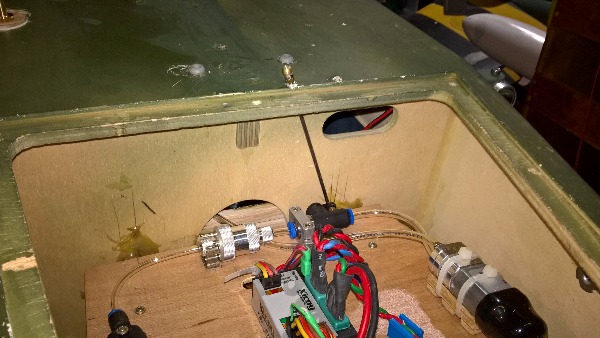
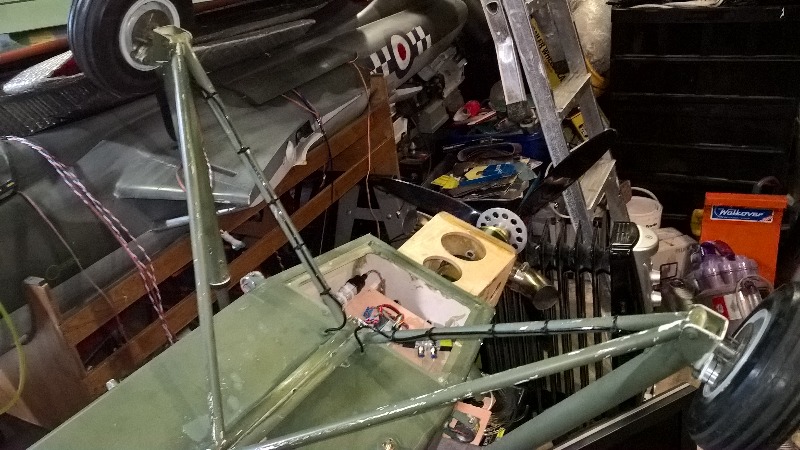
Final job today was to start the installation of the turbine ancillary equipment. The pump mount I had previously thought I could get from ZedJet was not suitable when I checked with Geoff, so I had to resort to making a more solid mount that would not allow the pump to move or twist from side to side. This was duly done with 3mm ply and some hard balsa and the pump is very secure in it. The added advantage is that the mount can be screwed (from the bottom) to the equipment mounting plate.
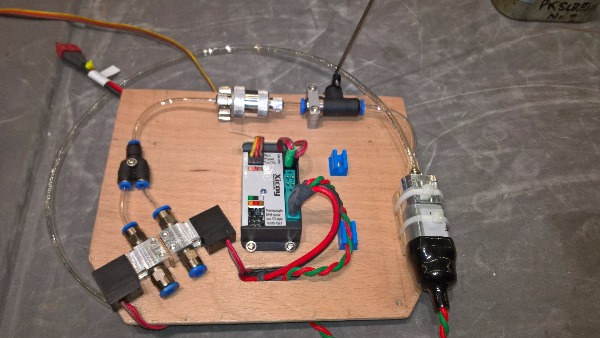
As I have previously mention in an earlier post I want to install a cut off valve after the fuel pump but didn't want to route fuel tubing back into the cockpit area then back to the filter and Kero valves. So I have decided to mount the valve sideways on the equipment plate and drill a hole in the end of the handle to allow some 16 gauge piano wire to protrude through the bottom of the fuselage to allow operation of the valve. I have started to drill and mount the various items on the board but have taken them all off again to give the board a coat of resin to dry overnight. Hopefully I can get this completed tomorrow before Shed Club starts.
As I have previously mention in an earlier post I want to install a cut off valve after the fuel pump but didn't want to route fuel tubing back into the cockpit area then back to the filter and Kero valves. So I have decided to mount the valve sideways on the equipment plate and drill a hole in the end of the handle to allow some 16 gauge piano wire to protrude through the bottom of the fuselage to allow operation of the valve. I have started to drill and mount the various items on the board but have taken them all off again to give the board a coat of resin to dry overnight. Hopefully I can get this completed tomorrow before Shed Club starts.
The following user(s) said Thank You: DaveBright
Please Log in or Create an account to join the conversation.
- throttletothewall
-
Topic Author
- Offline
- Senior Member
-
Less
More
- Posts: 171
- Thank you received: 153
7 years 10 months ago #14605
by throttletothewall
Replied by throttletothewall on topic Pilatus PT6 Turbo Porter - Renovation
Wed 15th Nov 17.
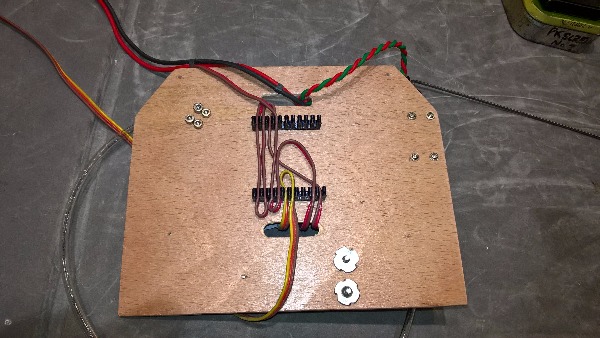
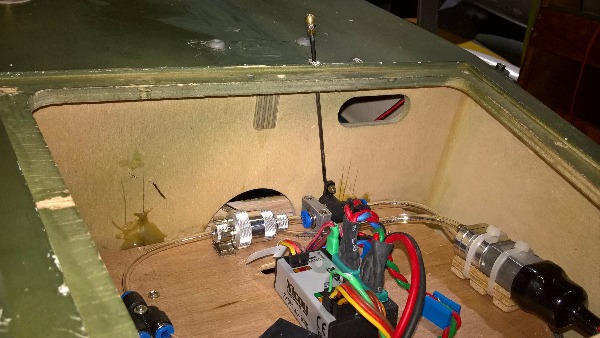
Well managed to get into the workshop reasonably early and installed the engine equipment onto the board and secure it all reliably and ensure no loose wires flopping around. As the ECU will be hanging upside down I even managed to get a couple of wire retainers for the larger cables to stop them dropping out in a hard landing or two!!!
Shed Club then intervened but only Tim today so having sorted his issues, I was free to spend a little more time softening the 16 gauge piano wire and then cutting an 8BA thread onto both ends for the fuel valve remote operation. I then installed the equipment board and drilled and lined a hole for the piano wire valve handle extension. works really well and very pleased with the outcome. So model now compliant with the rules and still not had to route yards of fuel tubing into the cockpit area.
Please Log in or Create an account to join the conversation.
- throttletothewall
-
Topic Author
- Offline
- Senior Member
-
Less
More
- Posts: 171
- Thank you received: 153
7 years 7 months ago #15908
by throttletothewall
Replied by throttletothewall on topic Pilatus PT6 Turbo Porter - Renovation
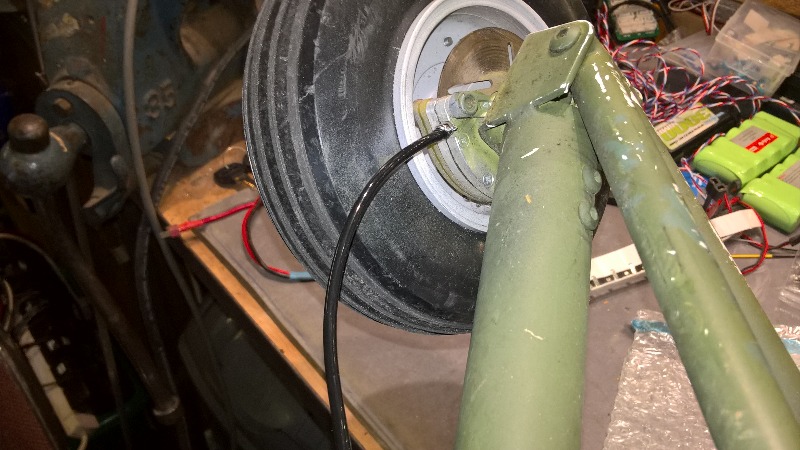
I know I haven't posted an update for a while but have been making quite a bit of progress recently. A week or two ago I reinstalled the undercarriage plate that had been straightened out, reattached the undercarriage the installed new 3mm air pipe to the brakes, routed it carefully through new grommet lined holes into the fuselage and put a little grease on the brake discs to ensure they are not too vicious when applied.
Please Log in or Create an account to join the conversation.
Moderators: DaveBright
Time to create page: 1.396 seconds
Latest Posts
-
-

- Various Gliders from Dave Ambrose ex W.M.A.C Membe...
- In WimborneMac Members / For Sale - Exchange - Wanted
- by 4Pedalsfly
- 1 week 1 day ago
-
-
-

- Ray Ivey's Models
- In WimborneMac Members / For Sale - Exchange - Wanted
- by Phil Ford
- 2 weeks 11 hours ago
-
©
2009 - 2025
WMAC PCF Design