- Posts: 886
- Thank you received: 129
3D Printing
- DaveBright
-

- Offline
- Moderator
-

Less
More
6 years 2 months ago #20622
by DaveBright
Replied by DaveBright on topic 3D Printing
Looking good Brian! Clever stuff. How long does it take to print something? Presumably an ‘over night’ job?
Please Log in or Create an account to join the conversation.
- Brian
-
 Topic Author
- Offline
- Platinum Member
-

Less
More
- Posts: 1045
- Thank you received: 415
6 years 2 months ago #20624
by Brian
Replied by Brian on topic 3D Printing
3D printing is very much a "press a button and go find something else to do." The article showing two parts of the new flying wing's centre section, finally turned out at thirteen hours forty something minutes. That was my fault, the printing speed can be adjusted over a wide range. When starting a print, the layers are thin (0.013mm) and the extruder is hot at 230 degrees C, the bed is hot too, 60 degrees C. The centre section took a long while because I'd omitted to increase the printing speed after the initial layers had been established. At the moment, another wing section is printing, the projected time is 7 hours 37 minutes. I'm not bothering to make any samples for testing, this one's going to fly........I hope!
The following user(s) said Thank You: Phil Ford
Please Log in or Create an account to join the conversation.
- Brian
-
 Topic Author
- Offline
- Platinum Member
-

Less
More
- Posts: 1045
- Thank you received: 415
6 years 2 months ago #20625
by Brian
Replied by Brian on topic 3D Printing
I think it might be interesting to print a prop Phil, there's quite a choice of diameters and pitches. I haven't looked at the prop program, but from the names of the files it seems that it a hub-and-blade arrangement. To be honest, I don't know if I'll ever be able to design something that can be printed. I've been struggling with the P-47 design. I can get an image of the parts into "3-D" mode, but so far I haven't been able to make any alterations to the joint areas. The flying wing by Eclipson has a much stronger joining arrangement, with lots of surface area for the glue to hang on to.
Please Log in or Create an account to join the conversation.
- Brian
-
 Topic Author
- Offline
- Platinum Member
-

Less
More
- Posts: 1045
- Thank you received: 415
6 years 2 months ago #20631
by Brian
Replied by Brian on topic 3D Printing
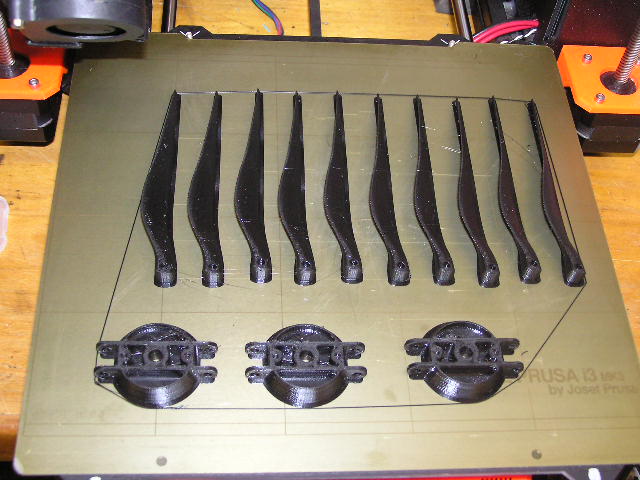
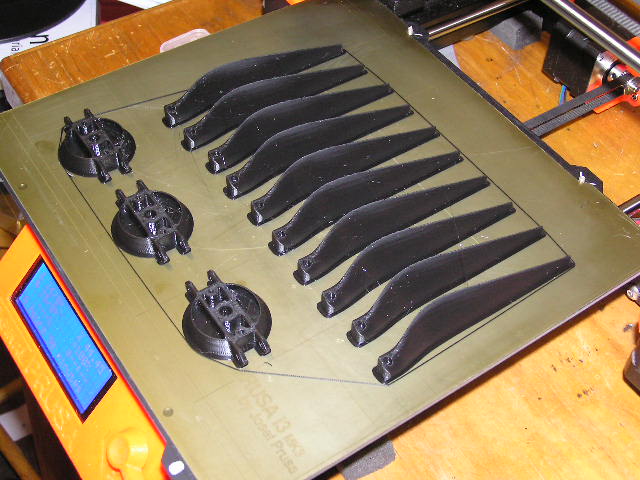
Recently I bought an upgrade kit for the printer, part of the kit contents was a reel of black PET-G. I used the leftovers to print the props and hubs.
The assembled propeller will be 10" X 4.7" CCW. There is a spinner for the hub, I didn't find the data for it until I'd started the print. There are three or four props of differing diameters and pitches in the program. I'll print some of each type when I print the spinner
The assembled propeller will be 10" X 4.7" CCW. There is a spinner for the hub, I didn't find the data for it until I'd started the print. There are three or four props of differing diameters and pitches in the program. I'll print some of each type when I print the spinner
Please Log in or Create an account to join the conversation.
- Brian
-
 Topic Author
- Offline
- Platinum Member
-

Less
More
- Posts: 1045
- Thank you received: 415
6 years 2 months ago - 6 years 2 months ago #20633
by Brian
Replied by Brian on topic 3D Printing
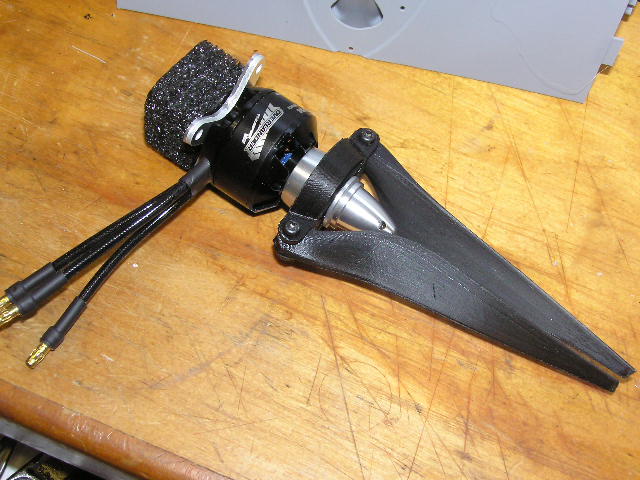
The prop blades needed to have their leading edges tidied up, apart from that, A gentle sanding with 400 grit paper around the leading and trailing edges was all that was needed. The blades and hub have all the mounting holes printed in. The blades fitted snugly into the hub with no additional work at all. The blades are held in with M2.5 screws, The screws are a clearance fit in the blade and one arm of the hub. The other arm has an undersize hole which is perfect to allow the retaining screw to be screwed in. The design showed its American origin at this stage, the width over the hub's arms is 1/2" exactly. The motor is an Overlander 1100kV. My only criticism of the hub's design is that both arms have the "tapped" hole for the retaining screw on the same side. The fact that the screw heads are on the same side of the hub centre line will probably cause vibration. In any case I shall keep well away from the side of the model when running the motor.Perhaps I'll alter the arrangement and use studding and nuts instead of screws.
Last edit: 6 years 2 months ago by Brian.
Please Log in or Create an account to join the conversation.
- Brian
-
 Topic Author
- Offline
- Platinum Member
-

Less
More
- Posts: 1045
- Thank you received: 415
6 years 2 months ago #20637
by Brian
Replied by Brian on topic 3D Printing
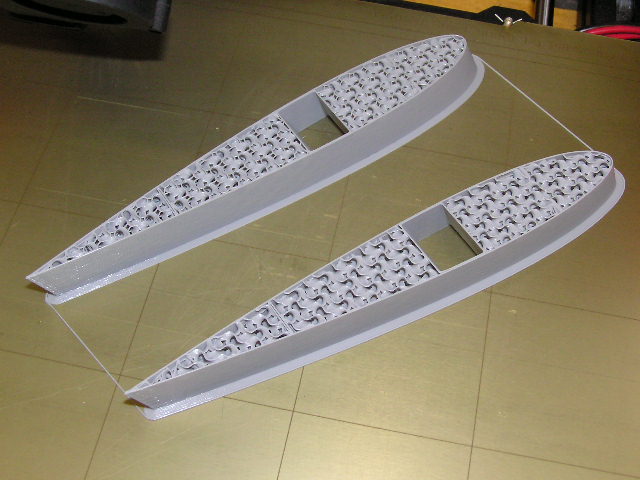
I was feeling quite pleased with myself, I'd transferred a couple more wing sections to be printed, and I hadn't referred to the prompt sheet. Good job I checked the print before it got too far. I had completely forgotten to alter the "infill" box from the default 15% to the new one, which is zero. As you can see from the photo, there's a lot of material doing nothing much but adding needless weight and stiffness to the section. I should have twigged it when the print time for these two sections was greater than the previous ones, which were a lot larger. Still, not to worry, all part of the learning curve.
Please Log in or Create an account to join the conversation.
Moderators: DaveBright
Time to create page: 0.281 seconds
Latest Posts
-
-

- Ray Ivey's Models
- In WimborneMac Members / For Sale - Exchange - Wanted
- by Brian
- 3 weeks 3 days ago
-
©
2009 - 2025
WMAC PCF Design

