- Posts: 3156
- Thank you received: 903

3D Printing
- Phil Ford
-

- Offline
- Moderator
-

Less
More
22 Nov 2019 09:29 #21151
by Phil Ford
Welcome back to divided Britain.
Steam it Brian. Ask Simon O about Sabre crinkles. Although Tim Sullings did sort it out for him. Wonderful things kettles and glue.
Replied by Phil Ford on topic 3D Printing
Brian wrote: Perhaps I'll be able to find something from Motion RC that appeals, their little EDF Mig 15 flew very well, but only for about half a minute before I completely lost it, however it may still fly again, a little shorter in the nose and more wrinkles than the average tortoise, at least it doesn't need cyano to hold it together.
Welcome back to divided Britain.
Steam it Brian. Ask Simon O about Sabre crinkles. Although Tim Sullings did sort it out for him. Wonderful things kettles and glue.
The following user(s) said Thank You: Brian
Please Log in or Create an account to join the conversation.
- Brian
-
 Topic Author
- New Member
-

Less
More
- Thank you received: 0
08 Jan 2020 09:30 #21397
by Brian
Replied by Brian on topic 3D Printing
I started this thread in the hope that I would eventually have a fairly cheap 3d printed model. I have had a few problems with the printer's extruder, finally I bought an upgrade kit for it and fitted the rebuilt extruder with a new "hot end". I thought that upgrading the extruder and upgrading the printer's software would have improved things a bit, I didn't realise just how long it takes to "tune" a printer! Since I started the project I've managed to turn about 4kg of PLA filament into unusable bits of what I thought would be either a P_47N with retracts, or the later project of the Black Wing 160. The project hasn't been a total waste of time and materials though. After a lot of emails to the model designers, I have a t last managed to get some of the printed parts aligned and glued. One "good thing" is that the cyano glue from HobbyKing not only works very well, but I seem to have no bad side effects from using it, and as a bonus you get quite a lot of it for the money.
Until recently, I believed that the problem I was having with the model printing was probably caused by my inexperience and initial failure to take any notice of what was written in the handbook. This week after some dialogue with the team at 3dLabPrint I found that the problems were being caused by the "slicer" program supplied by the printer's maker. To buy a program costs around $US 150, this program is used by the model's designers. I found a freely available one on the Internet which has most of the features of the American one, in fact I think it does about everything only a bit slower. It took a couple of days to get the general idea of how the program worked, and another couple of days tinkering with files and settings.The good thing was that the weather was awful, and the challenge took all my concentration, so what was going on outside didn't matter at all.
The first print took almost twenty hours to complete, and was not successful, the joints weren't straight as the wing sections had warped away from the build plate, and most of the internal detail was missing from the structure of the first wing section. I should have looked at the computer display a bit closer, then I would have seen what was going on, its easy to see when the print is examined in its individual layers.
The downloaded program from the designers is in several formats, the complete model is in G-Code, STL files and "factory" files. STL files are the ones I used. These files are representations of the parts of the model. Each part has to be added to the build plate of the printer then "sliced" to enable the printer to produce the part. Printing parts using the data from STL files enables the printer's settings to be adjusted to give the best results, unfortunately and for some reason the designer's haven't explained, the internal structure is removed when the part is prepared for printing. I was told to forget about STL files and slicing etc. and just use the G-Codes
Feeling a bit frustrated at spending so much time on what seemed to be wasted effort, I tried to print from the G-Codes, unfortunately, all the printer settings are embedded in the codes and editing things like speeds and temperature, material flow and retract distance is not possible.
If anyone would like a copy of my P-47N, and I don't think there's anything in the paperwork that prevents me from giving it away, and you'd like to have a go at it, send me your email address and I'll send you the files. You'll be able to download all the other info you need from the 3dLabPrint website.
Please Log in or Create an account to join the conversation.
- Brian
-
Topic Author
- New Member
-
Less
More
- Thank you received: 0
16 Jan 2020 18:24 #21431
by Brian
Replied by Brian on topic 3D Printing
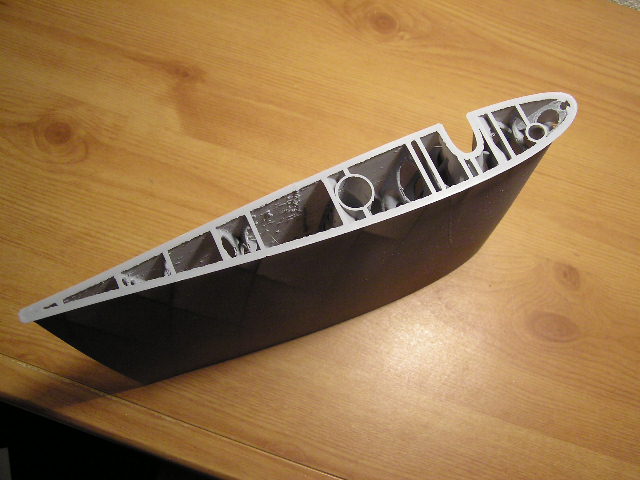
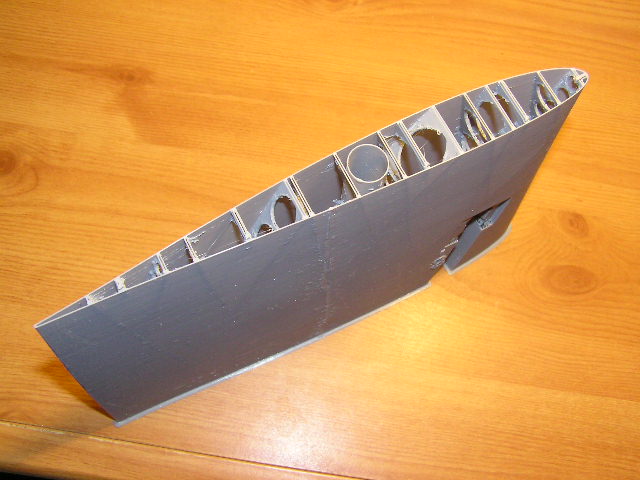
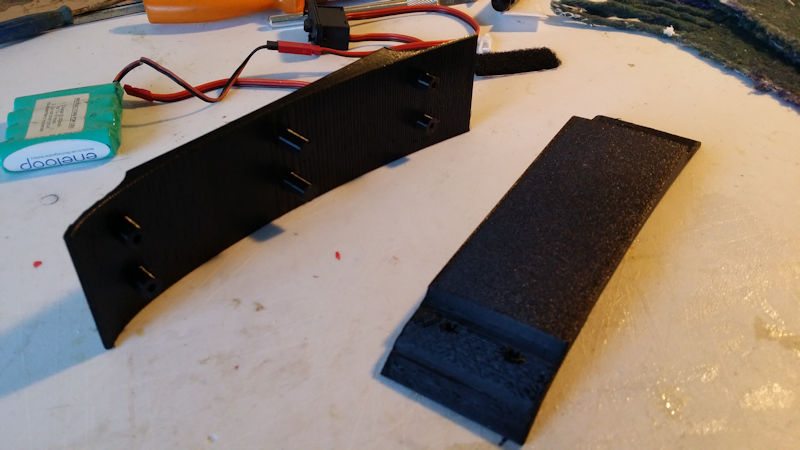
Finally I gave in and bought the expensive printer control program, fortunately there is a "get out" option and I can get a refund up to 20 days from the original purchase. I felt a bit uncomfortable using the program as I really didn't want to have to learn another set of disciplines. However, after a fair bit of head scratching and stop-start programming, at long last the printer produced a pretty good print. Suitably encouraged, I went ahead and printed all ten sections of the P-47 wing. Today I started to fit the parts together, there's a small amount of "fettling" to do on the mating surfaces, not a lot, but must be done with some care as the wing skins are only 0.40 mm thick. The first three sections of the right wing went together just as described in the manufacturer's videos. I started to feel a bit relaxed about the whole thing. I should have paid more attention when I loaded the files to the printer. For some reason, one section of the wing was too big by roughly 10%. I haven't a clue how this could have happened. I've deleted the appropriate files and re-written them, the printer is now working away in the dark and , I hope its printing the section to the correct scale. The photos are of the oversized wing section, finish is pretty good, the views of the end sections show just how thin the wing skin is. The thickened section is the end that goes on to the build plate, the extra width helps to prevent the part from warping away from the plate during the print process by giving more surface area to "grip" the build plate.This widened section is formed by adding five layers outside the wing profile.
Please Log in or Create an account to join the conversation.
- DaveBright
-
- Offline
- Moderator
-
Less
More
- Posts: 886
- Thank you received: 129
16 Jan 2020 18:46 #21432
by DaveBright
Replied by DaveBright on topic 3D Printing
Clever stuff!
Please Log in or Create an account to join the conversation.
- DaveBright
-
- Offline
- Moderator
-
Less
More
- Posts: 886
- Thank you received: 129
16 Jan 2020 18:46 #21433
by DaveBright
Replied by DaveBright on topic 3D Printing
‘Whistle’ while you work Brian? I’ll pop over at the weekend to collect
Please Log in or Create an account to join the conversation.
- Phil Ford
-
- Offline
- Moderator
-
Less
More
- Posts: 3156
- Thank you received: 903
17 Jan 2020 09:02 - 17 Jan 2020 09:03 #21441
by Phil Ford
Replied by Phil Ford on topic 3D Printing
I have three Phoenix gliders but only one wing joiner/securing plate. The originals were ABS plastic but have since cracked and broken up. That left just one joiner, from the last purchase, the pate has now been made of a nylon sort of a stuff and i think not really up to the job long term. So, scratching my head as how to solve this problem I went on thingys to make and found a 3D printer file for a Phoenix with top flat surface for accessories. But I don't own a printer.
Contacted Brian who immediately downloaded the file and who "said no problem". By the time I had had two dinners he got back to me and said "all done". Went over with the wing set and they fitted very well. 10 times more sturdy than HK's flimsy effort. The Guy who created the file needed the plate to carry a GoPro hence the flat surface with a slight downward tilt.
My thanks to Brian. Forgot to ask on Thursday. WhaddoIoweyou.")
Contacted Brian who immediately downloaded the file and who "said no problem". By the time I had had two dinners he got back to me and said "all done". Went over with the wing set and they fitted very well. 10 times more sturdy than HK's flimsy effort. The Guy who created the file needed the plate to carry a GoPro hence the flat surface with a slight downward tilt.
My thanks to Brian. Forgot to ask on Thursday. WhaddoIoweyou.
Last edit: 17 Jan 2020 09:03 by Phil Ford.
The following user(s) said Thank You: Brian
Please Log in or Create an account to join the conversation.
- Brian
-
Topic Author
- New Member
-
Less
More
- Thank you received: 0
17 Jan 2020 17:43 #21452
by Brian
Replied by Brian on topic 3D Printing
Something I should have checked before starting the P-47 project has now put a stop to it. I should've checked the availability of the servoless retracts. Apparently they come from Hobby King, apparently they haven't been available for several months, and Hobby King won't commit to an availability date either.
Perhaps all the previous print failures were trying to tell me something?
Perhaps all the previous print failures were trying to tell me something?
Please Log in or Create an account to join the conversation.
- Phil Ford
-
- Offline
- Moderator
-
Less
More
- Posts: 3156
- Thank you received: 903
17 Jan 2020 20:05 - 17 Jan 2020 20:05 #21455
by Phil Ford
Replied by Phil Ford on topic 3D Printing
HobbyKing are virtually out of everything or anything useful. I blame Trump and his trade war or Hong Kong playing up.
Last edit: 17 Jan 2020 20:05 by Phil Ford.
Please Log in or Create an account to join the conversation.
- Brian
-
Topic Author
- New Member
-
Less
More
- Thank you received: 0
18 Jan 2020 20:06 - 18 Jan 2020 20:23 #21464
by Brian
Replied by Brian on topic 3D Printing
3DLabPrint sent me an offer yesterday...20% off the price of their new model called Joker. Its a 1.7M sort of hotliner/electric glider. It uses Corona thin wing servos and a 9 X 6 folding prop/spinner assembly, both items from the well known warehouse! I checked with HobbyKing, both items are on back order. The video of the model being built is interesting,( the parts take 84hrs to print) at last they've got the joints easier to assemble and probably a lot stronger than plain butt joints as used on the P_47. The attention that they've paid to aiding construction is quite encouraging, the new method eliminates all the slight misalignments between sections. There are a couple of videos of the model, and if you look around, there is a video of the prototype, which looks all "pale and frail" as its made from translucent PLA. It was indeed "frail" as during the second test flight, the rear fuselage broke off during a fairly tight turn. The "production" model has a 6mm diameter carbon tube from the wing root to the end of the fuselage. Definitely worth thinking about, must be a source other than HobbyKing, pretty grim if an alternative isn't available. The P_47 project is on hold until I can source suitable retracts, thats the snag with a printed model, there's no chance at all of modifying the printed parts to accept an alternative unit.
I thought the Joker would be a good model to carry on with, perhaps there are suitable alternatives to the recommended prop and servos, we'll see!
I thought the Joker would be a good model to carry on with, perhaps there are suitable alternatives to the recommended prop and servos, we'll see!
Last edit: 18 Jan 2020 20:23 by Brian.
Please Log in or Create an account to join the conversation.
- Brian
-
Topic Author
- New Member
-
Less
More
- Thank you received: 0
20 Jan 2020 09:27 - 20 Jan 2020 09:28 #21491
by Brian
Replied by Brian on topic 3D Printing
I was looking at the P_47 wing parts yesterday, bit fed up with the whole thing, then I realised that I could tape over the U/C mount slots and wheel wells, and with luck, the model might survive until the proper retracts are delivered.
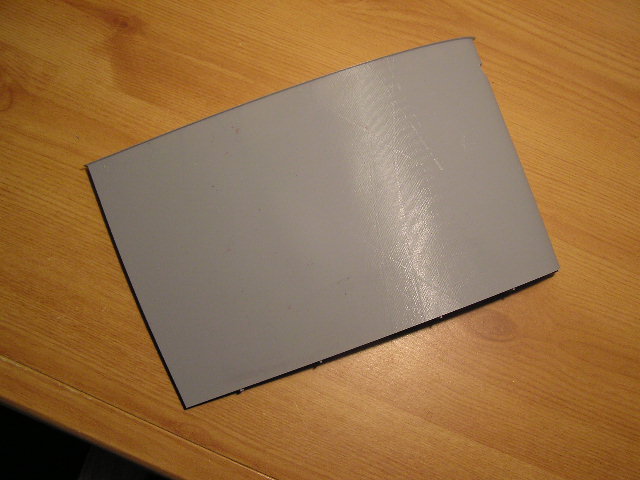
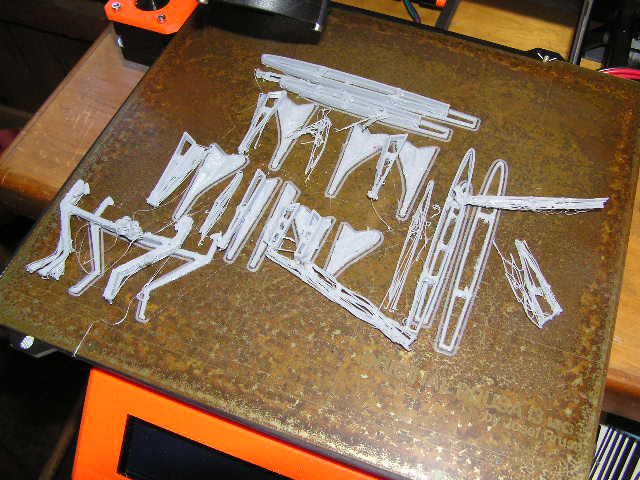
Filled with new but misplaced enthusiasm, I downloaded the program for the ailerons and elevators, loaded the printer and pressed "GO". I didn't do any pre-processing of the files, according to the designers, their files are meant to be used straight into the printer, I have an e-mail that confirms it too! According to the program, the parts would take about 23 hours to complete. Fortunately I checked the progress after a couple of hours. The picture says it all. From the state of things, it looked as though the program had overridden the crash detection built in to the printer. I must be missing something vital somewhere, it would seem that I can manage to print almost anything apart from model aeroplane parts.
Filled with new but misplaced enthusiasm, I downloaded the program for the ailerons and elevators, loaded the printer and pressed "GO". I didn't do any pre-processing of the files, according to the designers, their files are meant to be used straight into the printer, I have an e-mail that confirms it too! According to the program, the parts would take about 23 hours to complete. Fortunately I checked the progress after a couple of hours. The picture says it all. From the state of things, it looked as though the program had overridden the crash detection built in to the printer. I must be missing something vital somewhere, it would seem that I can manage to print almost anything apart from model aeroplane parts.
Last edit: 20 Jan 2020 09:28 by Brian.
Please Log in or Create an account to join the conversation.
Moderators: DaveBright
Time to create page: 0.380 seconds
Latest Posts
-
-
- Valkyrie Slope Soarer
- In Activities / Glider & Slope
- by Phil Ford
- 22 Feb 2026 13:03
-
©
2009 - 2026
WMAC PCF Design