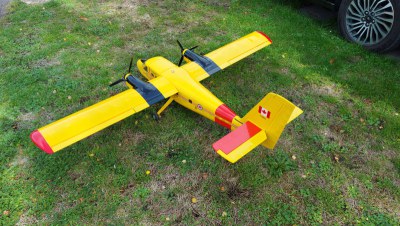
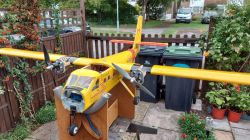
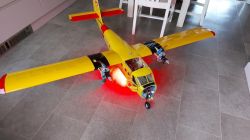
Last year in late Summer I had the opportunity to buy a second-hand Nexus Twin Otter. I love these aircraft. As they were out of stock everywhere I grabbed the chance to acquire one. It had been already built by the first owner. I did not look it over too much when I picked it up as I was excited to get hold of one. After getting it home and looking it over, it was a mash up.
The motors EDF in runners (flipping heavy too) had been mounted on to the cowls along with some ply wood. The original motor mounts had been hacked to bits to give clearance for the In-runners. The two Turnigy 80amp ESCs were stuck on the underside of the wings and the servo were old Futaba 3003s. The wings had a few cuts and holes and not necessarily hangar rash. The fin and stabiliser had been modded to take apart for transit (I assume). What have I bought? Can I rebuild it and make it flyable?
After some plan of action was written down I estimated I would need new cowls, new motor mounts, new out-runners, possibly new ESCs (the Turnigy 80s wiring was less than acceptable to me), recover the wings and the sort out the tail section.
Motion RC had the cowls, the fin and stabiliser (the latter just in case things don't go well with the re-mod) in stock but no motor mounts. I ordered what was in stock and also bought new 4-Max 3547 700kvmotors and Mantis 60 ESCs from Motion RC.
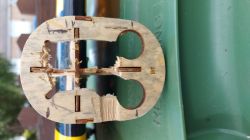
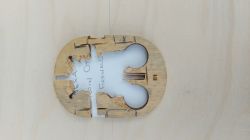
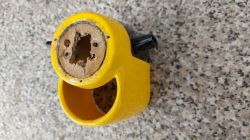
Checking over the motor mounts which had a generous amount of Epoxy to secure them it was obvious to me I am not going to get them out. After pondering for a while I decided to leave the side walls and carefully remove the motor mounting plates by using a scalpel to cut through the white glue in the slots. Using the best hacked up mounting I made up a template so I could make my own out of 3mm ply doubled up giving me 6mm thick mountings.
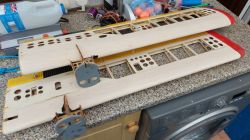
Gradually over the next few weeks the parts I ordered turned up although not necessarily in the rebuild order. The motor mountings where now glued into place. The wings has been stripped of covering. The so-called Bright Yellow from HobbyPlastic was not , more like Cub Yellow or somewhere in between. Fortunately, a club member was visiting a model shop in Sussex and sent some pictures of their stock. As it happened Easycoat Bright Yellow is the nearest to the original sticky back printed covering. So he picked a few rolls for me.
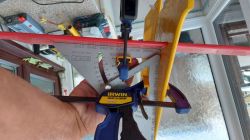
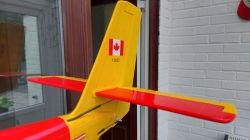
The tail fin complete with rudder and the stabiliser also complete with elevator turned up and after a few dry fittings I decided I would use the new items rather then repair the old one and glue them in permanently. Slotting it in it seemed out of line horizontally so with the combination of angle finder and laser level I had to insert a little slice of thin balsa on the port side to correct the alignment. After ensuring it was right I then glued the the whole section in to place. With the glue set I now got on with fitting the rudder complete with a control horn already fitted and the elevator hinged. I would fit the horns for the latter at a later stage once I have a radio fitted.
Wings
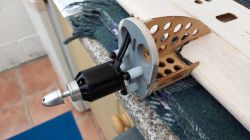
Now the 4-Max motors had been fitted using their X plate and sat on 12mm nylon spacers between the firewalls and motor plate. I was hoping to mount the ESCs behind the motors but there just not enough room. With the motors fitted I now temporarily fitted the nacelles to check for prop spinner clearance and if there room for the ESCs. Yes, but it will be a bit tight. At least the Mantis ESCs are quite slim. I always try and mount ESCs in the airflow wherever possible and this was the compromise. Bear in mind a Twin Otter does not get thrashed about like other sport models.
If your wondering about the fuselage there was not much to there as such.
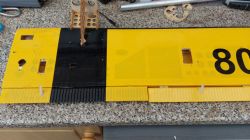
Back to the wings for a bit. With the covering off I had to alter/mod the servo bays for the Hitec Digital servos. Aileron and flaps. Without covering it was also easier to work out the wiring routing. There is going to be 3 signal leads and the silicon power cable for the motors. Best find out now if there is an issue getting all these wires through the rib holes.
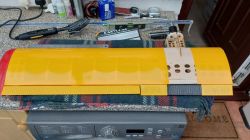
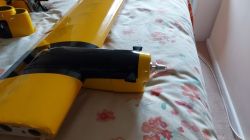
With the above checked, I recovered the wings and was quite pleased with the outcome. Now time to find and carefully cut out the film covering the servo bays. Servos fitted in no time. With this done and my faithful pull-through I now had the servo and leads at hand. The ESCs were connected to the motors and their signal leads pulled through the root rib. The ESCs were fitted with XT60 plugs so the next job was to make up some power cables with XT60 connectors at one end only so I could connect them to the ESCs. Other ends I would worry about later as I had cut them over length so I can later worked out how and where they would routed in the fuselage knowing that the battery packs are going to be right up front to help CG. I had the same issue with my Hangar 9 Twin Otter although it's batteries are in the nacelles it still needed a fair bit of weight up front for balance.
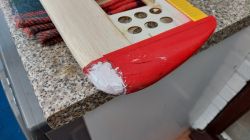
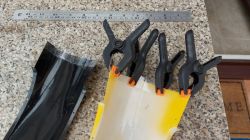
With the wiring in place I could now set about fitting the nacelles but the next important job is temporarily to give the ESCs some signal and power to check direction of rotation. After having to only switch only one motors wiring. Good, now I can concentrate on fitting the nacelles which come as upper and lower halves. One of the nacelles plastic had been cut short at the backend so did not cover some of the wiring. Rummaging through the recycle bin I found some plastic from a meat tray cut it to shape and glued it on and then a quick spray of black gloss paint. Who is going to notice? The wings are nearly complete except for the control rods and horns. I was unable to use the original rods but did use the original horns as they were well made. I like to check things as I go along so with my HiTec servo tester I centred the servo arm and then made up the control rods to fit. All servos working well. Ailerons are neutral and the flaps were set with them at half position. ATV will set them for proper operation at a later date.
Fuselage
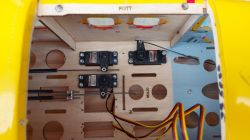
The elevator is operated by dual rods in guide tubes by one servo using a twin joiner. The joine rwas quite well made so I kept it as is. The rudder is operated by one servo and a single rod also passing through a guide tube. The same servo also adds steering. I am not in favour of the rudder servo also operating the steering except when there is no room or option for another servo. Looking at how it was set up it be binding randomly which is not good. Option was to opene up the holes where the guide tube and rod pass through and re-route slightly. This worked out well in the end. Where the rod sand guide tubes exit at the tail I was not happy that they did not line up to well with the horns therefore the clevises would trying to act link ball links and could unclip. With a little bit of scalpel use I managed to correct the alignment.
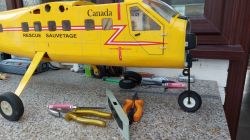
Sitting on its wheels there was something wrong, something does not look right. It sits to high up on it's wheels. The Twin Otter sits quite low to the ground enabling pilots to access the cockpit via the front doors with just the use of a step-up box. The steering gear supplied is standard sport length wire. I removed this and after calculating the length it needed to be comparing with the full size version, I cut some 30mm off and refitted. This entailed re-bending the main gear to suit as well and cutting a little bit off of excess aluminum. Now it sits more scale like!
Electronics
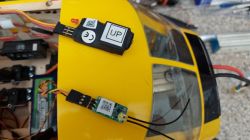
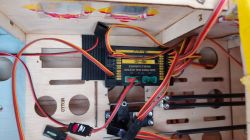
The Twin Otter is fitted with a Frsky 16 channel hub. Power is supplied by a LifePo4 6.6v pack. The main radio is an X8R and XM+ as a satellite receiver. Main receiver has a GPS V2 connected via the Smart Port. The receivers are connected by Sbus in to the two sbus radio slots. Every servo has it's own channel so can be sub trimmed for whatever reason. Two channels switch the led beacons on.
The power cables from the motors/ESCs run through the fuselage to reach the twin 4 cell 3600 Mah 35C Lipo packs. These power cables clipped up in the fuselage but allow a bit of movement when fitting the wings or disassembling. The weight of the two Lipos up front is 650 gms which balances the Otter just right.
Motors develop 400 watts each at full throttle. Factoring in the total weight of the plane it is about 90/100 watts per lb. Props are Master Airscrew three blade 11 x 8s painted with whitebands as per the full size versions. Flies quite comfortably at half throttle and lifted off at ¾ throttle, no flap, light 6 mph head wind.
Maiden Flight
Twin Otter was kindly maidened by Jon Tappin our most experienced pilot on Saturday. Just a little nose heavy (move battery packs back a little) and take out some mix of my flap to elevator.
A few days later I flew it myself, low passes over the field's runway and had the first landing had a little gentle bump. Next flight borught in with a bit more power, full flap and it touched down so lightly I was impressed with it, a real greaser and then also my myself.
Now I have two Twin Otters. Looking forward to our next Open Scale Day Event 2023.

