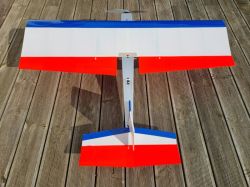
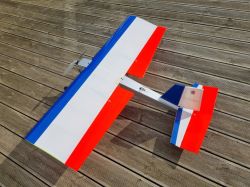
What do an engineer’s vice, a blow torch and a kettle have in common? Well, if you build this model, you’ll probably also use each one of them to do it. This is an electric Fun Fly model designed and kitted by Chris Morris – he of our alley. It’s my 1st foray into this type of plane. It all started at the club’s own Fun Fly event last year, when I was ‘roped in’ to have a go and Chris was basically supplying the plane that most people used. It was his own design and he offered to kit it, so I and several others of us got one!
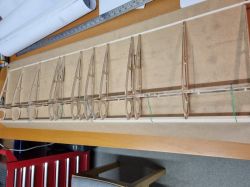
The kit comes as a number of balsa and plywood sheets with CNC cut parts to pop out, some strip wood, some plain balsa sheet and 2 pieces of bent wire to form the undercarriage. The instructions were downloaded. They’re set out in bullet points under principle component headings and there’s plenty of photo illustrations. To finish it, you need to decide which of the 2 power options to purchase and also source the other hardware, as listed, plus the covering. A few of the parts have useful positioning tabs and, otherwise, being CNC cut, they go together reasonably accurately without much adjustment needed. It is though important to use a flat board of at least 1.3 metre length to build the one-piece wing and plenty of set squares to ensure the relevant parts are at right angles. Kevin and Phil started theirs before me and wrote useful building blogs as they progressed.
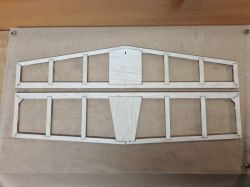
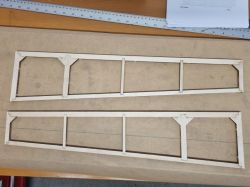
The tail feathers and ailerons went together very simply. They’re little more than outline frames, with a few intermediate struts. Unusually, I thought, the wing’s top and bottom spars were each made of 2 lengths of CNC cut balsa and glued at approximately three quarters of their length at a preformed step type splice. The leading and trailing edges are also formed by joining 2 lengths of balsa together, this time with more conventional spliced joints and it was useful to follow Kevin’s tip, which involved the engineer’s vice, for a neat result. Kevin’s other tip was also very worthwhile. It’s tempting just to bend the leading-edge sheeting by hand, but there’s a risk of it splitting or pulling away whilst the glue sets. It’s much easier to pre-bend it with steam; hence the kettle.
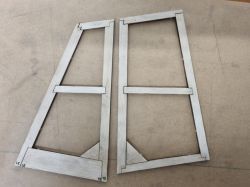
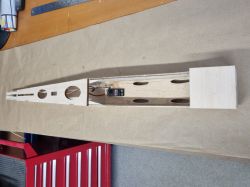
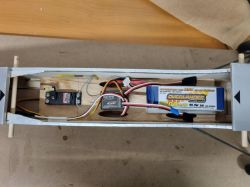
Though not mentioned in the instructions, it’s helpful to install rolled paper conduits in the wing to route the servo cable through. Another good idea is to beef up the tips with an extra solid balsa rib, to protect against breakage if it touches the ground with a wing down. The fuselage sides are made of CNC cut ply doublers with sheet balsa outer skin. Though it seems obvious, when gluing on the doublers, be sure to make opposite sides! Around the inside edges of the sides, triangular balsa stock is fixed, as a ground for the top and bottom sheeting to be glued to. Frustratingly for some reason, it didn’t form a perfect right angle and needed sanding back to accommodate close joints. Another useful tip that I incorporated was to put an access panel underneath the fuselage, just behind the ESC, to enable the battery to be disconnected, without having to take the wing off. Also, Phil had the idea of a stand off platform between the undercarriage legs for the ESC to be more conveniently retained with cable ties.
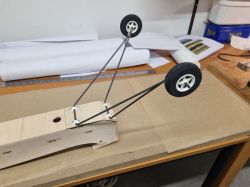
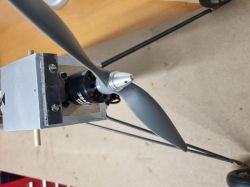
The undercarriage is a bit of a challenge. Unusually it’s designed for the wheels to project beyond the arc of the propeller and to achieve this, the 2 pre-bent pieces of steel wire need to be soldered together, whilst being held at a very specific angle. The answer is to build a jig. The blow torch was used to get the wire hot enough to solder.
Being a Fun Flyer, traditionally the plane would be covered in clear tinted film, though I chose a scheme of bright opaque colours to assist with orientation, given that it’ll be whirling around the sky presenting all sorts of aspects.
Unfortunately, those tail feathers and ailerons, being of such flimsy construction, are rather prone to distortion when shrinking the covering. Just a mention about the wing bands. The instructions recommend 150mm but they’re so tight there’s a risk of crushing the wing, so I used 180mm. All up, the plane weighed 1.56 kg, including power option 1 (900kv motor, ESC, a 3S 2200 mha lipo battery) and 100 grams of lead on the firewall to get the COG at mid-point in the range stated in the instructions.
The club’s next Fun Fly event is in July. Hopefully by then there’ll be a few of us competing with Morris Dancers.
You also view Kevin's and Phil's build blog on the Forum here: https://wimbornemac.org/forum/kits-and-scratch-build/3342-morris-dancer-build
If anyone is interested in building this simple but fun model then contact Chris Morris for more info.


