- Thank you received: 0

3D Printing
- Brian
-
 Topic Author
- New Member
-

Less
More
26 Jan 2020 12:44 #21538
by Brian
Replied by Brian on topic 3D Printing
The print process slowed up a bit yesterday. On Friday night, I'd left the printer working on ten parts for the Joker's wing and flaps, the program predicted twenty three hours. I was disappointed to find the printer hadn't completed the job. It had stopped printing at a height of about 60mm. The display was reading a time in excess of 23 hours, so the failure to print was due to lack of filament. I checked the extruder and the filament was loaded alright, I reheated the nozzle area to around 260 degrees just in case the nozzle was blocked, usually this produces a few drops of melted plastic. This time it didn't, even probing with a tiny needle didn't improve things at all. I tried to clear the extruder by unloading the filament, that's when I found the cause of the print failure, the extruder motor wasn't driving the filament. My fault, when I assembled the rebuilt extruder head, the filament drive gear has a tiny grub screw that locates on a flat on the motor shaft. This screw is only accessible with a long Allen key, unfortunately all my long keys are ball ended, so getting a screw really tight isn't an option. At the time of the assembly I'd thought of using Loctite, but I couldn't find it, so I forgot all about it. I suppose I've been pretty lucky so far, the screw only came loose after a lot of printing. Anyway, its now screwed in with a proper plain ended Allen key and for peace of mind, it has a drop of Loctite as well. The next print stage will be the six parts that form the fuselage, I'll have to wait until six 'o clock tomorrow to find out if ot has worked.
Please Log in or Create an account to join the conversation.
- Brian
-
Topic Author
- New Member
-
Less
More
- Thank you received: 0
26 Jan 2020 15:36 #21542
by Brian
Replied by Brian on topic 3D Printing
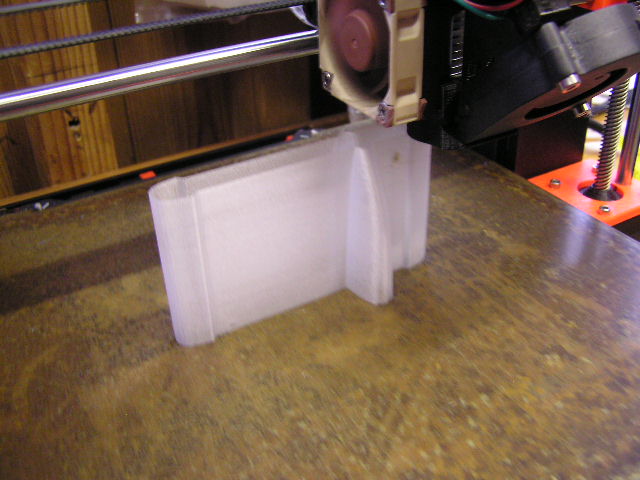
Checked the progress after three hours, I think the Loctite and newly tightened grub screw are working well. Six pieces of fuselage on the build plate, bit fuzzy as it moves quite quickly,and I didn't use flash for the shot, the actual colour of the print is a bit "bluer" than shown in the photo. More printing tomorrow, with a bit of luck.
Please Log in or Create an account to join the conversation.
- Phil Ford
-

- Offline
- Moderator
-

Less
More
- Posts: 3156
- Thank you received: 903
26 Jan 2020 16:15 #21544
by Phil Ford
Replied by Phil Ford on topic 3D Printing
Them bits look quite good. Can't wait to see the finished article. ")
Please Log in or Create an account to join the conversation.
- Decks5712
-
- New Member
-
Less
More
- Thank you received: 0
27 Jan 2020 13:06 - 27 Jan 2020 13:09 #21553
by Decks5712
Replied by Decks5712 on topic 3D Printing
Good Luck Brian. You have more patience then me. Also its good idea to clean your toothed gear which feeds your filament with a small paint brush, which dose get clogged up with filament dust.
Last edit: 27 Jan 2020 13:09 by Decks5712.
Please Log in or Create an account to join the conversation.
- Brian
-
Topic Author
- New Member
-
Less
More
- Thank you received: 0
27 Jan 2020 14:49 - 27 Jan 2020 14:52 #21554
by Brian
Replied by Brian on topic 3D Printing
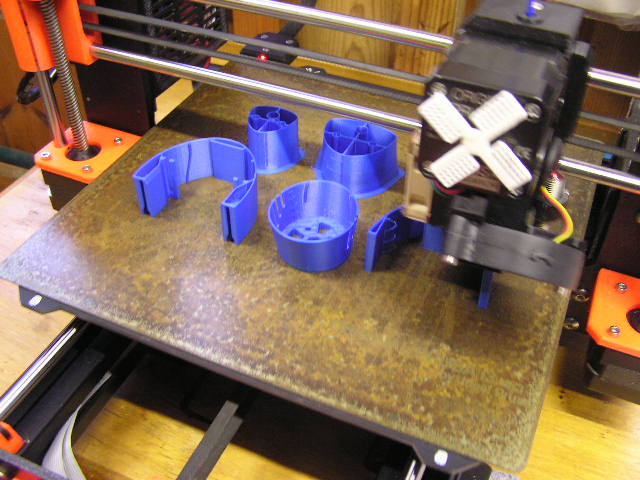
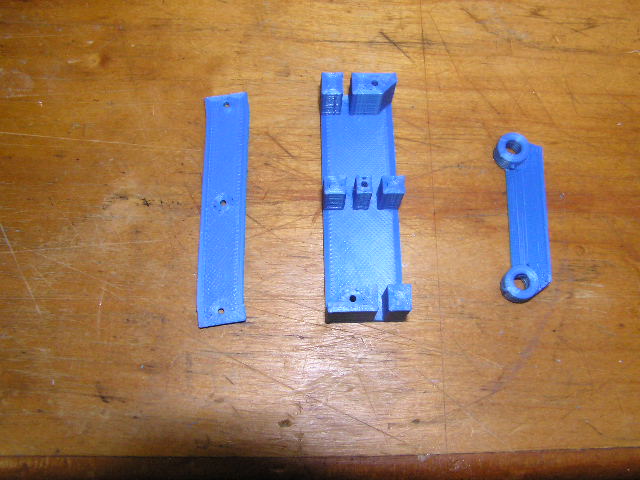
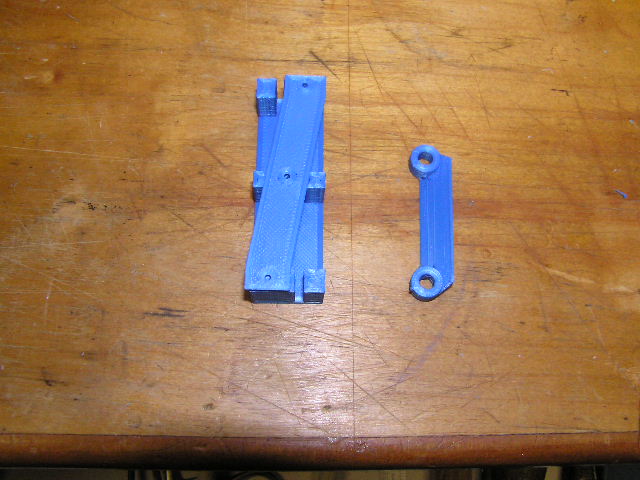
The final parts for the Joker printed out today, happy to see that last night's printing had been a success. There are still some niggles with the print quality. According to the troubleshooting guide, it might be something to do with the distance the filament being retracted coupled with the speed of retraction. I'll have to juggle the settings again, and print a couple of the smaller parts to test it out. The fuselage sections have printed with surprisingly accurate joints, they are so good that the whole fuselage can be "plugged" together without glue. Today's parts are the servo covers which are printed as joined pairs, the servo mount for the elevator servos and the wing joining strap. All the holes are generated during the print process, no drilling required at all. I won't be able to assemble the fuselage until I get a delivery of 6mm carbon tube, this has to be threaded through holes in four sections of the fuselage, and as the holes are a good fit on a 6mm drill bit, the slightest misalignment on assembly will prevent the tube from fitting the full length of the rear fuselage.
Thanks for the tip about keeping the extruder gears clean Alan, fortunately the new design extruder I'm using has a good view of the gears without having to take anything apart, I can get a modified toothbrush into the space quite nicely. If I can remember to do it!
Thanks for the tip about keeping the extruder gears clean Alan, fortunately the new design extruder I'm using has a good view of the gears without having to take anything apart, I can get a modified toothbrush into the space quite nicely. If I can remember to do it!
Last edit: 27 Jan 2020 14:52 by Brian.
Please Log in or Create an account to join the conversation.
- Phil Ford
-
- Offline
- Moderator
-
Less
More
- Posts: 3156
- Thank you received: 903
27 Jan 2020 17:18 #21555
by Phil Ford
Replied by Phil Ford on topic 3D Printing
Good stuff Brian. So when we can expect the maiden voyage into the atmosphere?
Please Log in or Create an account to join the conversation.
- Brian
-
Topic Author
- New Member
-
Less
More
- Thank you received: 0
27 Jan 2020 19:14 #21556
by Brian
Replied by Brian on topic 3D Printing
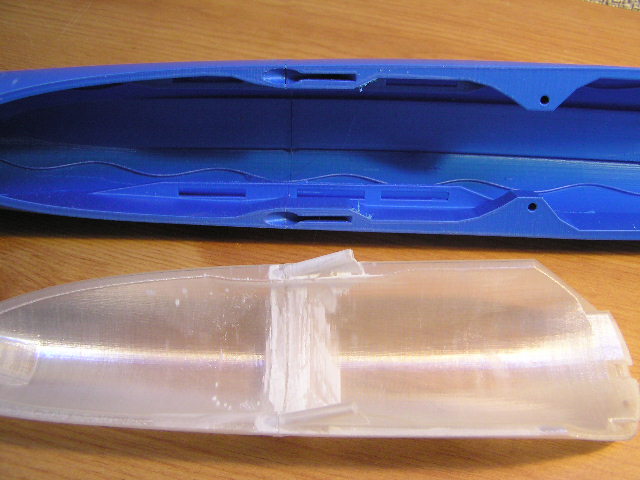
First I must master the art of accurately gluing the parts together Phil, if this afternoon's fiasco was anything to go by, well all I can say is that I think it'll be sometime late Summer, perhaps. I'm waiting for some 6mm carbon tube to reinforce the rear fuselage, so that bit is definitely on hold. But being keen to see how it went together, I glued up the first two sections of the fuselage. I couldn't believe how easily it went together, just a hint of a glue line and the two parts perfectly aligned. So as not to make any silly mistakes, I watched the build video for the canopy, it showed the two parts being lined up using a piece of aluminium angle section. Feeling a bit competent, I applied the glue as per instructions, I aligned the canopy parts as per instructions. Applied a little pressure, and had a perfect bond. So far so good. When I tried to fit the canopy to the fuselage, the whole scene changed. The canopy wouldn't fit properly, trying to slide it into position was hopeless. There it sat with a gap of around 2mm all round the edge. I should explain that the canopy has a pretty neat method of holding it in place. It has two locating "pegs" at an angle and close to the joint between the fuselage parts. The "pegs" locate in two holes in the rim of the cockpit area, the canopy is slid down and back which should leave it fitting closely to the cockpit rim and neatly up against the wing root. The video looked so easy that I couldn't figure out why it hadn't worked.Looking at the joint with a magnifier, the reason became clear, the front part of the canopy has a tiny bit of the locating "pegs", and if these aren't perfectly aligned with the "pegs" on the rear canopy, the whole thing won't go far enough to seat properly. Fortunately I had some de-bonder, so I spent a jolly hour or so, slopping the stuff on and trying to get the joint apart. Eventually it let go, and after cleaning the parts, I assembled them on to the fuselage. The two parts fitted perfectly, no gaps anywhere. I tack glued the canopy halves, making sure that there wasn't a chance of the glue getting anywhere near the fuselage. Now the canopy could be taken of and re-fitted quite easily. I re-glued it and then set about getting the white bloom that had appeared after using the debonder. Unfortunately it wouldn't come off, I tried alcohol, no effect, acetone just made it worse. Tonight the printer will be retracing its steps as it prints another couple of canopy parts. Fortunately for me. all I have to do is push the "go" button.
Please Log in or Create an account to join the conversation.
- Phil Ford
-
- Offline
- Moderator
-
Less
More
- Posts: 3156
- Thank you received: 903
28 Jan 2020 09:23 #21558
by Phil Ford
Replied by Phil Ford on topic 3D Printing
If Airfix made larger scale aircraft you could have avoided all this stress. All that would be needed is a tube of plastic cement and some Humbrol paint....:lol:
Please Log in or Create an account to join the conversation.
- Brian
-
Topic Author
- New Member
-
Less
More
- Thank you received: 0
28 Jan 2020 10:26 #21559
by Brian
Replied by Brian on topic 3D Printing
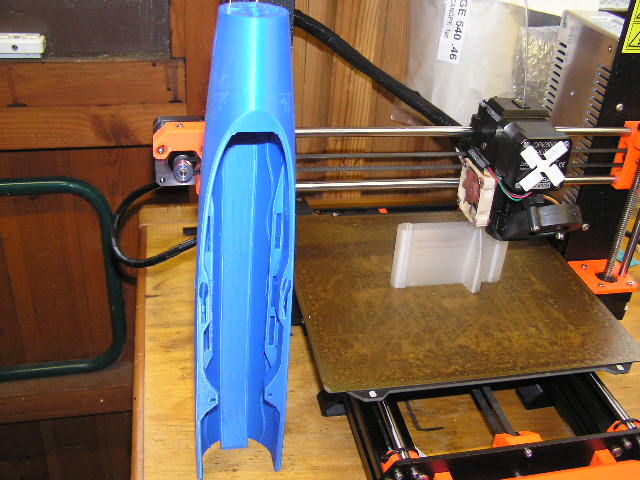
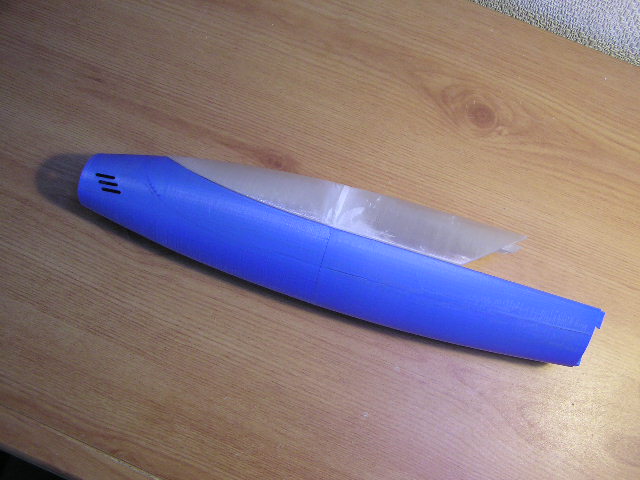
Here's the messed up canopy, and I've spoiled the fuselage by trying to "improve" the finish. Two things came to mind, first was to cut off the "pips" from the front part of the canopy, that should prevent any misalignment and ensure easy fitting/removal. Second was to stop trying to get a clear canopy and paint the foggy one black.
Your reference to Airfix took me back to the 1950s Phil. I can't remember who discovered that you can "fly" an Airfix model in water, but "fly" them we most certainly did. The Saunders-Roe apprentices residential centre was situated in the old Naval College at Osborne, Isle of Wight. The grounds housed various test facilities as well as the mock up department. The test tank used for trials on ditching various aircraft was situated just behind our dormitory, a huge tank of water which was somehow prevented from turning green and smelly, was where we gathered from time to time to "fly" our latest plastic creations. My vampire went quite well, but I never did manage to trim the Meteor. I think the craze came to an end when we couldn't get any more volunteers to climb into the tank to retrieve the models. I can still remember my Vampire's first go, I hadn't got the CG quite right, and it stalled early in the "flight" and continued to stall and recover until it hit the bottom of the tank. Fortunately, for some reason I can't remember, there was always a plentiful supply of grey Plasticene. Not enough and the models stalled, too much and they "flew" to the bottom quite quickly. I don't suppose we'd have messed around like that if we'd had iphones, earbuds, blue tooth and wi-fi. Etc.
Your reference to Airfix took me back to the 1950s Phil. I can't remember who discovered that you can "fly" an Airfix model in water, but "fly" them we most certainly did. The Saunders-Roe apprentices residential centre was situated in the old Naval College at Osborne, Isle of Wight. The grounds housed various test facilities as well as the mock up department. The test tank used for trials on ditching various aircraft was situated just behind our dormitory, a huge tank of water which was somehow prevented from turning green and smelly, was where we gathered from time to time to "fly" our latest plastic creations. My vampire went quite well, but I never did manage to trim the Meteor. I think the craze came to an end when we couldn't get any more volunteers to climb into the tank to retrieve the models. I can still remember my Vampire's first go, I hadn't got the CG quite right, and it stalled early in the "flight" and continued to stall and recover until it hit the bottom of the tank. Fortunately, for some reason I can't remember, there was always a plentiful supply of grey Plasticene. Not enough and the models stalled, too much and they "flew" to the bottom quite quickly. I don't suppose we'd have messed around like that if we'd had iphones, earbuds, blue tooth and wi-fi. Etc.
Please Log in or Create an account to join the conversation.
- Phil Ford
-
- Offline
- Moderator
-
Less
More
- Posts: 3156
- Thank you received: 903
28 Jan 2020 12:38 - 28 Jan 2020 12:40 #21560
by Phil Ford
Replied by Phil Ford on topic 3D Printing
That's an ingenious cockpit fixing. Slide in and lock. Shame you fiddled with it. Don't worry Brian you are not the only one out there that decides to fiddle with something and make it worse. There are many in the club and at Boeing, names withheld, who can attest to this fact. :whistle:
Last edit: 28 Jan 2020 12:40 by Phil Ford.
Please Log in or Create an account to join the conversation.
Moderators: DaveBright
Time to create page: 0.661 seconds
Latest Posts
- No posts to display.
©
2009 - 2026
WMAC PCF Design