- Thank you received: 0

Back to Basics
- Brian
-
 Topic Author
- New Member
-

Less
More
08 Mar 2022 14:45 - 08 Mar 2022 14:49 #25691
by Brian
Replied by Brian on topic Back to Basics
Painting over the scorch wasn't really practical. Fortunately I've kept all the leftover bits of balsa sheet that held the laser cut parts. Slicing off a short length from the end of the sheet that had held one part of the fuselage side gave a piece of balsa which had approximately the same grain pattern as the area around the dovetail joint. I made a shallow cut either side of the joint and chiselled out a recess approximately 1/32" deep. Glued in the piece and left it weighted down for a few hours. Now its sanded down, the joint isn't quite perfect, but I think that after a couple of coats of sanding sealer and a final rub down before covering, I think that'll look a lot better than a burnt line showing a dovetail. There's a faint line showing either side of the patch, and I think the patch shows up as I found that the grain runs in the opposite direction to the grain of the fuselage side.
Last edit: 08 Mar 2022 14:49 by Brian.
Please Log in or Create an account to join the conversation.
- Brian
-
Topic Author
- New Member
-
Less
More
- Thank you received: 0
09 Mar 2022 11:49 - 09 Mar 2022 11:50 #25692
by Brian
Replied by Brian on topic Back to Basics
The top decking is 1/2" balsa sheet, this is on order at Balsa Cabin. This morning I realised that the bottom decking is 3/16" balsa sheet, haven't got any that's suitable, only really hard stuff for a different model. The section of the underside of the fuselage is a fairly gentle curve. Not having suitable light sheet to hand I cut a couple of 5/16" X 3/32" wide strips from the scrap left from the wing rib sheets. These strips are glued to the lower edge of the fuselage sides, and set in by about 1/16". I have some suitable 1/8" sheet, this will be cut and fitted on to the strips. This gets the bottom of the fuselage longitudinal shape correct, and leaves a much lighter piece of balsa to carve and sand to section.
Last edit: 09 Mar 2022 11:50 by Brian.
Please Log in or Create an account to join the conversation.
- Brian
-
Topic Author
- New Member
-
Less
More
- Thank you received: 0
10 Mar 2022 08:52 - 10 Mar 2022 08:55 #25697
by Brian
Replied by Brian on topic Back to Basics
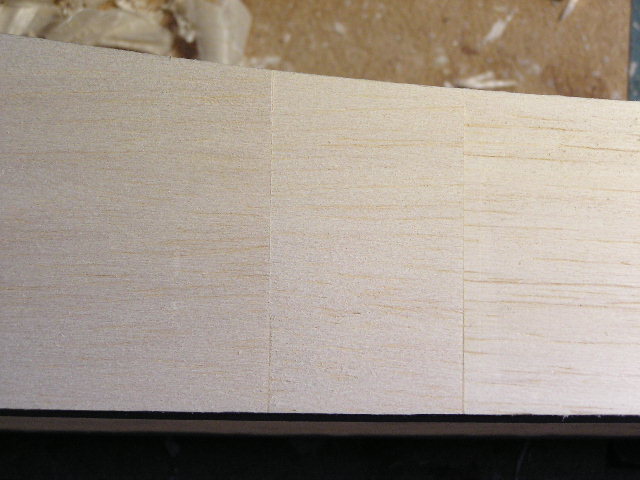
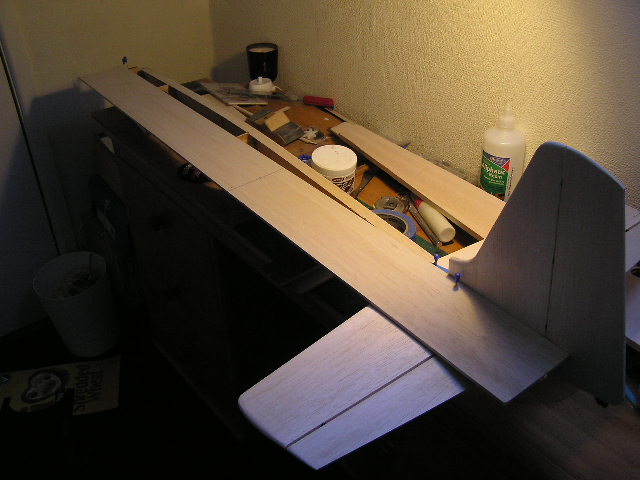
The lower rear fuselage sheet has been planed down and sanded with the Permagrit coarse sanding block. The packing strips worked alright as there was no sanding through the sheet at all.
The joints between the packing strip, fuselage sides and bottom sheeting give a good indication of the progress of the shaping, easy to keep the same appearance of the joints from side to side.
The joints between the packing strip, fuselage sides and bottom sheeting give a good indication of the progress of the shaping, easy to keep the same appearance of the joints from side to side.
Last edit: 10 Mar 2022 08:55 by Brian. Reason: Additional information added
Please Log in or Create an account to join the conversation.
- Phil Ford
-

- Offline
- Moderator
-

Less
More
- Posts: 3156
- Thank you received: 903
10 Mar 2022 09:48 #25700
by Phil Ford
Replied by Phil Ford on topic Back to Basics
That finish looks nice Brian.
The following user(s) said Thank You: Brian
Please Log in or Create an account to join the conversation.
- Brian
-
Topic Author
- New Member
-
Less
More
- Thank you received: 0
11 Mar 2022 08:45 #25704
by Brian
Replied by Brian on topic Back to Basics
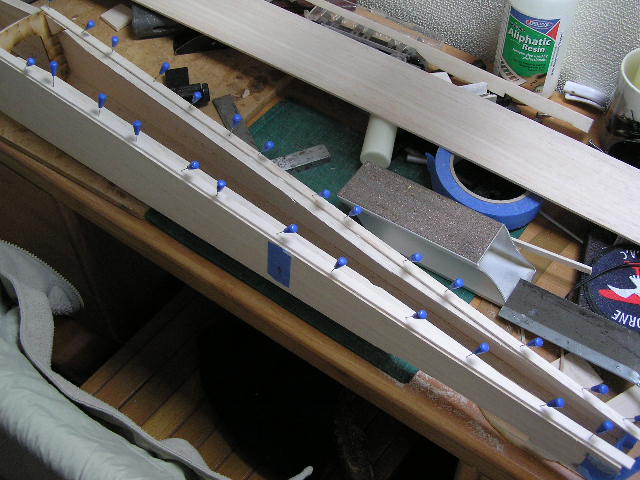
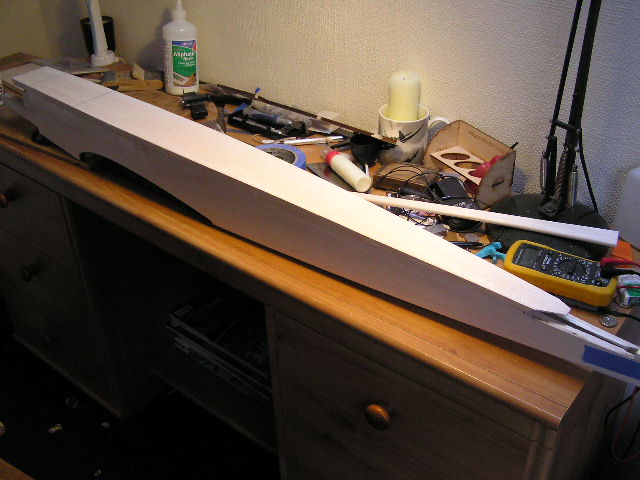
The top deck has been cut to length and marked out ready for cutting. Can't do that until the rain stops and I can get the bandsaw outside. Before shaping I'll cut the sheet at the forward end to form a hatch to enable access to the fuel tank. Tail unit awaits final sanding/sealing and self locates on the fuselage.
The plan calls for 1/2" square hardwood for the main U/C mounting in the wing, I have 3/4" X 1/2", so once again I'll have to wait for the rain to stop, or modify the wing ribs to take the larger size mounting. 3/4" wide certainly makes it easier to fit the saddle clamps, think I'll modify the wing ribs to suit.
Yesterday, while waiting for the Postman (person), and suitably fuelled up with three Weetabix, I attempted to bend a three turn spring nose leg. I got it almost right on the second try. Unfortunately the first turn of the wire isn't a good radius, more oval than round. Found out the hard way how to get the spring coils to sit side by side, but the first turn is a problem. I've run out of Weetabix now, so wire bending will be on hold today.
Please Log in or Create an account to join the conversation.
- Brian
-
Topic Author
- New Member
-
Less
More
- Thank you received: 0
11 Mar 2022 15:58 #25705
by Brian
Replied by Brian on topic Back to Basics
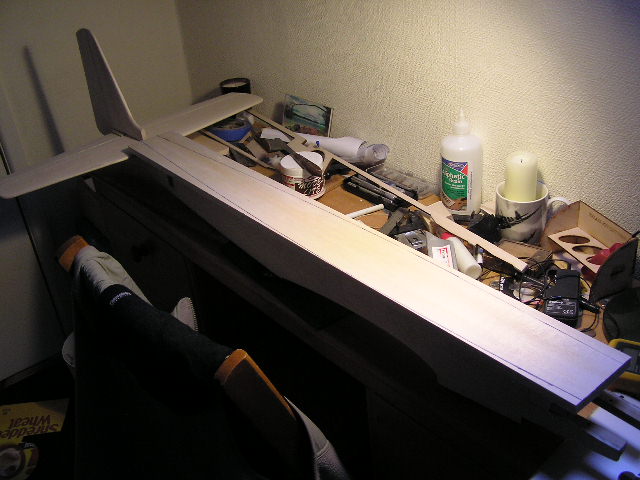
Fortunately the rain stopped long enough for me to get the bandsaw out and cut the top deck sheet to the plan profile. Where the deck meets the tail plane, its cut away to go over the top surface, took a bit of fiddling to get the fit between the two surfaces. The tail plane can't be fitted to the fuselage with the top decking in place, that was a snag I hadn't anticipated, the second but only slight snag was that with the bottom decking fitted, the fuselage sides are no longer vertical between the former at the wing TE and the fin post. I clamped the fuselage sides vertical and glued in a spacer to hold things together until the deck is glued on. I'll tack glue the deck for the shaping, remove it and re-fit the tail plane, then finally glue the top deck in position. The tail plane is firmly pinned in position and has been squared up using a pin stuck into the C/L of the top of front former and measuring from the pin to the TE at the tip of the tail plane. After pinning, the two dimensions were within 1/32", I guess that makes it about right. The plan leaves a fair bit to the imagination, a sketch of what things look like around the area where the fin and dorsal fairing meet the top deck, and blend into the tail plane, would have been handy.
Please Log in or Create an account to join the conversation.
- Brian
-
Topic Author
- New Member
-
Less
More
- Thank you received: 0
11 Mar 2022 16:45 #25706
by Brian
Replied by Brian on topic Back to Basics
The alignment of the fin has been sorted, the lower front end of the fin has to blend in with the rather long dorsal fairing, the whole lot has to be on the centre line of the top decking. My method of aligning the fin was to mark a line on the top of the front former 3/16" from the pin on the CL. The fin is 3/8" wide at the base. With a piece of straight balsa sheet pinned at the 3/16" mark at the front former, and laid tight against the fin enabled the position where the dorsal fairing meets the fin to be marked.
Please Log in or Create an account to join the conversation.
- Brian
-
Topic Author
- New Member
-
Less
More
- Thank you received: 0
11 Mar 2022 19:18 #25707
by Brian
Replied by Brian on topic Back to Basics
The top deck sheet has been reduced in thickness slightly as it goes towards the fin. The dorsal strake had to be reduced in height to match the fin fairing. With everything aligned and pinned, after final checking of the tail plane squareness and the central position of the fin, the top deck will be tack glued in place and left to dry overnight.

Please Log in or Create an account to join the conversation.
- Brian
-
Topic Author
- New Member
-
Less
More
- Thank you received: 0
13 Mar 2022 07:59 - 13 Mar 2022 08:23 #25708
by Brian
Replied by Brian on topic Back to Basics
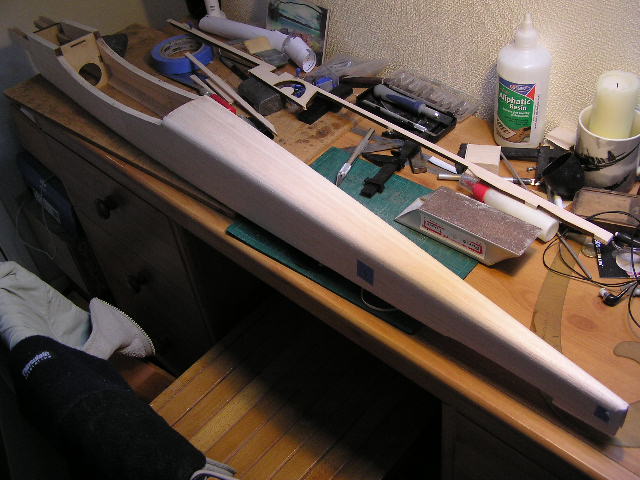
The top decking is now ready for shaping. It has been planed flush with the fuselage sides. The final shaping starts with planing the top corners of the decking at 45 degrees. The angle doesn't have to be precise, as long as its "about right" is OK. The depth of the shaping will be correct when the joint between the inner skin of the side sheet and the top decking is exposed. When both sides have been shaped with the plane, the high sides of the angled face will be planed down to form a slightly oversized radius. The radiused corners and curved profile of the decking will be sanded with a Coarse Permagrit block, changing to a fine block before final finishing. The tank hatch will be cut and fitted with a detent and latch before cutting the top decking away from the fuselage. With any luck, I'll be knee deep in balsa shavings by lunchtime.
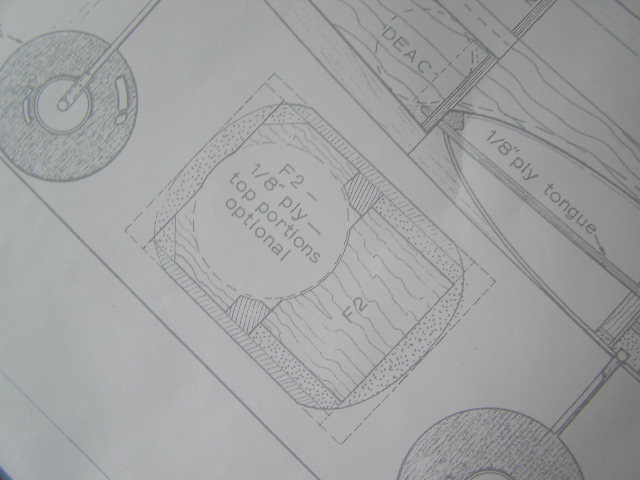
Last edit: 13 Mar 2022 08:23 by Brian. Reason: Added photo of fuselage section
Please Log in or Create an account to join the conversation.
- Brian
-
Topic Author
- New Member
-
Less
More
- Thank you received: 0
13 Mar 2022 11:17 #25709
by Brian
Replied by Brian on topic Back to Basics
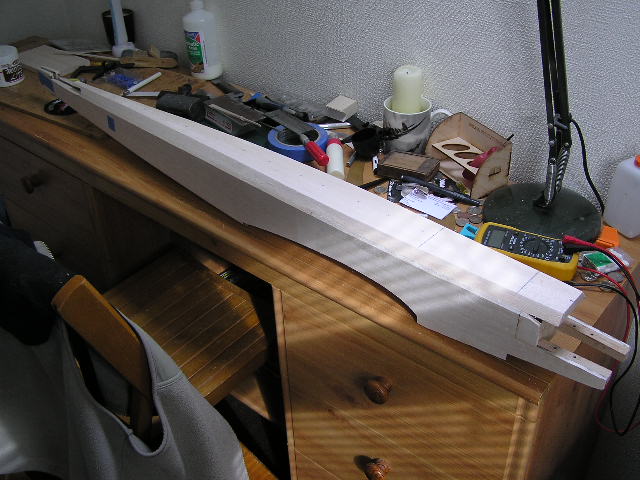
Preliminary shaping complete, the edge of the triangle reinforcement is just visible. Next job is to make a couple of templates to check the final steps. Unfortunately the laser cut dovetail I tried to hide has re-emerged, and will be even more prominent as the fuselage radius cuts into it. Perhaps a large SMAE sticker would cover it up?
Please Log in or Create an account to join the conversation.
Moderators: DaveBright
Time to create page: 0.390 seconds
©
2009 - 2026
WMAC PCF Design