- Posts: 1028
- Thank you received: 583

Back to Basics
- kevinross
-

- Offline
- Platinum Member
-

Less
More
3 years 8 months ago #25712
by kevinross
Often wondered why they had the name DEAC, apparently its Deutsche Edison-Akkumulatoren-Company GMBH
Replied by kevinross on topic Back to Basics
Brian - Progressing well,
reference to " Deac" on plan certainly dates the design.
Pleased to see you are now allowed indoors to bash balsa.
Regards
Colin
Often wondered why they had the name DEAC, apparently its Deutsche Edison-Akkumulatoren-Company GMBH
The following user(s) said Thank You: 4Pedalsfly
Please Log in or Create an account to join the conversation.
- Brian
-
 Topic Author
- Offline
- Platinum Member
-
Less
More
- Posts: 1045
- Thank you received: 415
3 years 8 months ago #25713
by Brian
Replied by Brian on topic Back to Basics
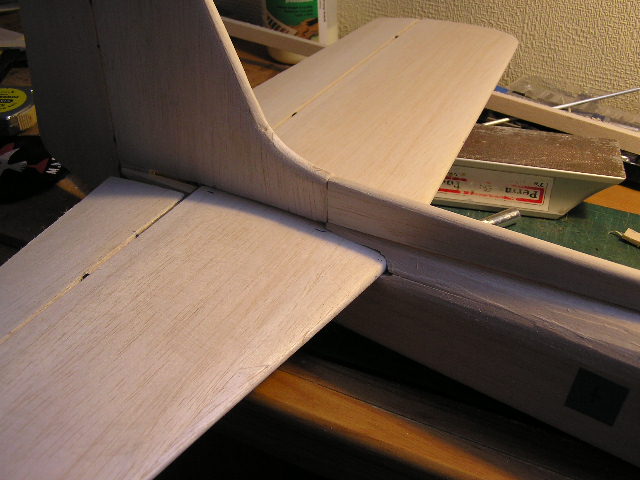
Colin, I'm permitted to use the spare room only on condition that I "don't make a mess". The build is taking a bit longer due to the hourly whizz round with the hand held vac, and the proximity of the biscuit tin. Apart from a slight ridge here and there, the fuselage is ready for the first sanding. I had to assemble the bits to see what it looked like.
Please Log in or Create an account to join the conversation.
- Brian
-
Topic Author
- Offline
- Platinum Member
-
Less
More
- Posts: 1045
- Thank you received: 415
3 years 6 months ago - 3 years 6 months ago #25795
by Brian
Replied by Brian on topic Back to Basics
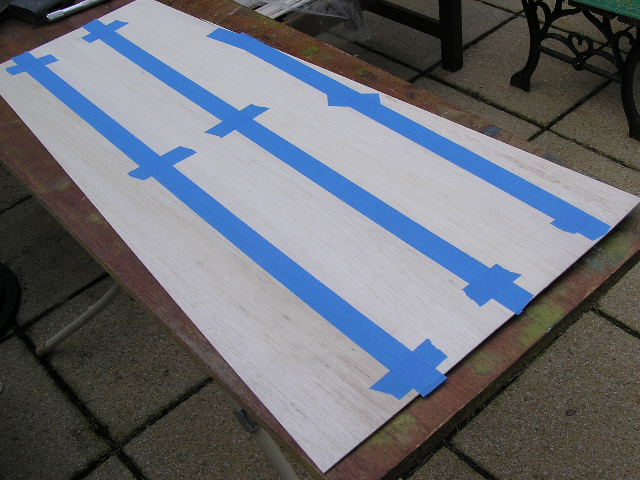
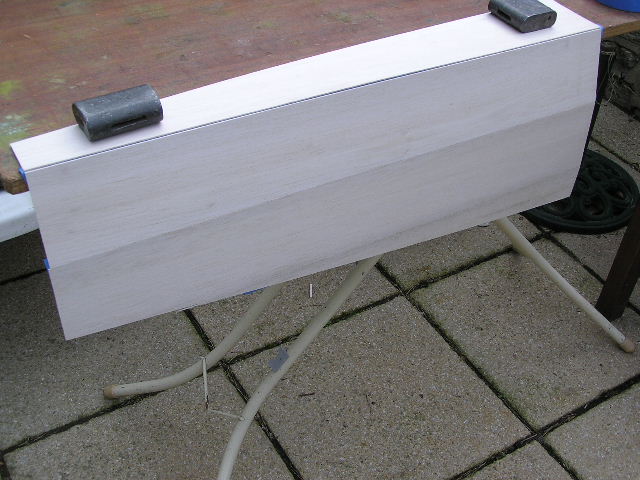
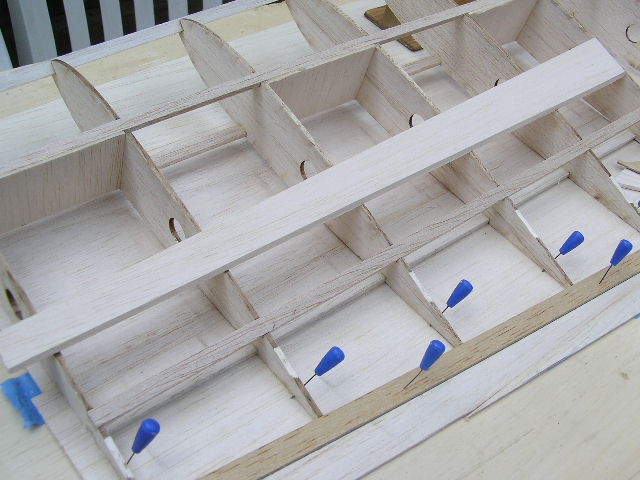
I didn't realise how long it has been since I did a bit more work on Moonglow, that's the trouble with having fun! Today I've started to make the 1/16" sheet panels for the wing skins. I cut the wing plan from the main drawing, this saved a lot of time messing about with pencil, ruler, square etc. also minimised the risk of getting it wrong, something I do quite often these days. Fortunately the balsa sheet was straight, and the edges needed no cleaning up before gluing. I've tacked on a couple of pictures as there might be a few who've never seen the way a large sheet of balsa is made. Two things help the job go smoothly. First, always use fresh masking tape, this ensure the tape won't let go before the glue dries, second, use a fine tipped glue applicator, its all too easy to squirt too much glue into the joint with messy consequences. I got mine from a craft shop, think it might have been HobbyCraft, not sure. With the sheets firmly taped, the whole thing is flipped over and held on to the building board by one panel. This gives an open "vee" joint which helps guide the tip of the applicator quite nicely. The panel is then slid across the building board, closing the newly glued joint and opening the second one. I scraped off any excess glue with an old credit card before wiping the joint over with a piece of kitchen paper. Finally, the joints are covered with polythene film and weighted down. I made the panels as "handed pairs", this will give matched surfaces for both wings.

Last edit: 3 years 6 months ago by Phil Ford.
The following user(s) said Thank You: kevinross
Please Log in or Create an account to join the conversation.
- Brian
-
Topic Author
- Offline
- Platinum Member
-
Less
More
- Posts: 1045
- Thank you received: 415
3 years 6 months ago - 3 years 6 months ago #25797
by Brian
Replied by Brian on topic Back to Basics
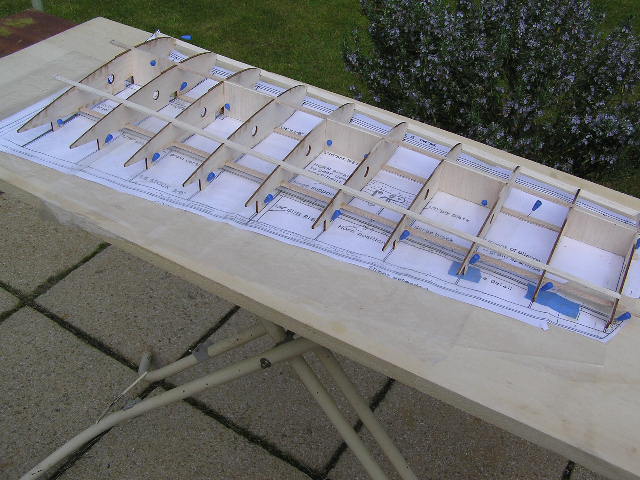
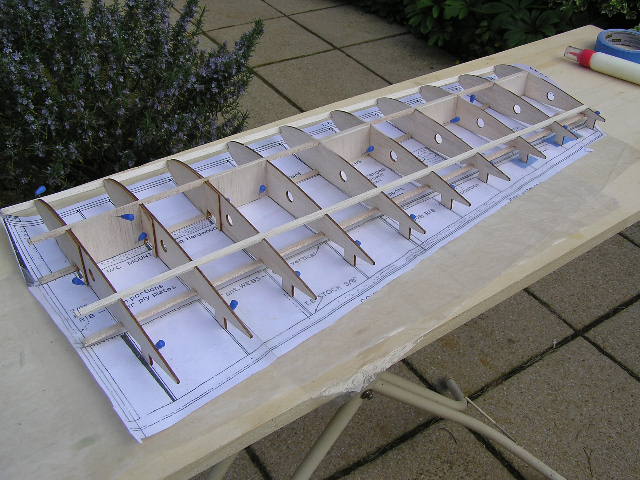
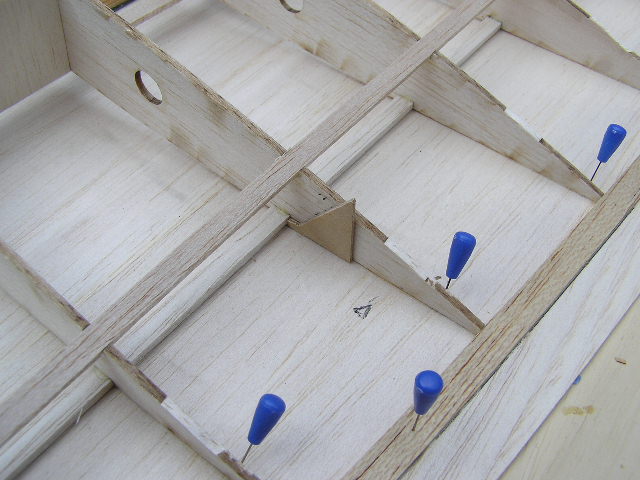
Made a start on building Moonglow's right wing this afternoon. The plan is a bit vague about the structure and hinging of the ailerons, I'll have to work out a way which will ensure that they don't warp when they are cut away from the main structure. I have the original build article written by Mike Birch, and that is lacking in places. I'm going to try to use the method that Peter Miller favours for building sheeted wings, that is to remove the wing structure from the building board, invert it, then pin and glue the structure to the sheet, working from the TE towards the LE. This will enable the fragile 3/8" X 1/8" TE section to be supported by the sheet. At the moment the plan shows the TE butted to the trailing edges of the ribs, and with the structure being "up in the air" so to speak, getting it accurately placed and fixed isn't really practical. With the top skin fixed to the structure, this should allow me to add a leading edge to the aileron. This will be built clear of the rear spar using a 1/32" spacer, also a new "riblet" will be needed to close the inboard end of the aileron, once again spaced 1/32" from the wing rib. After the aileron structure and hinge points are made, it'll be possible to mark the position of the aileron on to the wing skin, making it easier to cut away from the main structure. I'll take a few pictures of the build as I go, should help make sense of the above description.
Last edit: 3 years 6 months ago by Brian. Reason: Added extra information to help clarify the procedure.
The following user(s) said Thank You: 4Pedalsfly, kevinross
Please Log in or Create an account to join the conversation.
- Brian
-
Topic Author
- Offline
- Platinum Member
-
Less
More
- Posts: 1045
- Thank you received: 415
3 years 6 months ago #25799
by Brian
Replied by Brian on topic Back to Basics
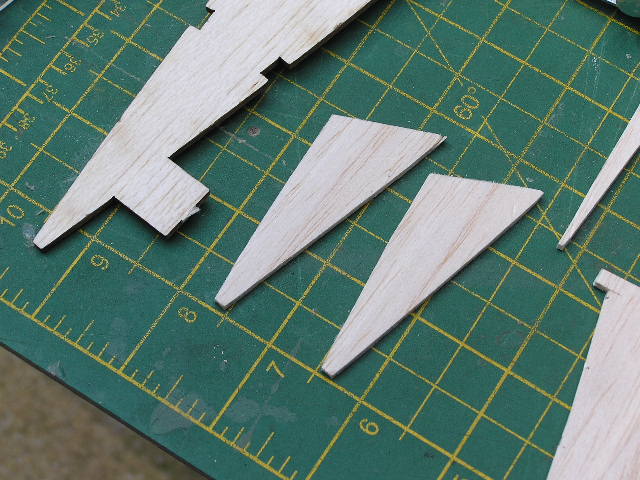
Those who have a nervous disposition, read no further, the following part of the article contains descriptions of extreme violence towards laser cut parts, as well as photographic proof. I don't know why I fretted about Moonglow's ailerons, the answer was easy, ignore the plan and use the building and hinging method I used for the SIG Kadet. This is a top hinged aileron, using a stitched fabric covering instead of a mechanical hinge. The wing structure was laid on to the top sheet and juggled to get the spars parallel to the joints in the sheet. The TE section was glued and pinned to the sheet, I kept it true using a straight edge. The structure was then offered up to the TE, glued and pinned, the front section being packed up with a piece of wood. An extra riblet was made using a wing rib as a pattern, the riblet was eased into the TE structure and marked off. Using a small piece of scrap 3/32" balsa, the marking off was adjusted and the nose of the aileron riblet was cut. When a satisfactory fit was established, I made a small ply template for marking and cutting the rest of the aileron riblets. A piece of 3/32" balsa for the LE of the aileron was cut, and one edge was planed to match the angle of the noses of the riblets. The riblets were cut, first at an angle to accept the LE strip, a second cut, flush with the edges of the rear spars was made and the scrap wedges of balsa removed.
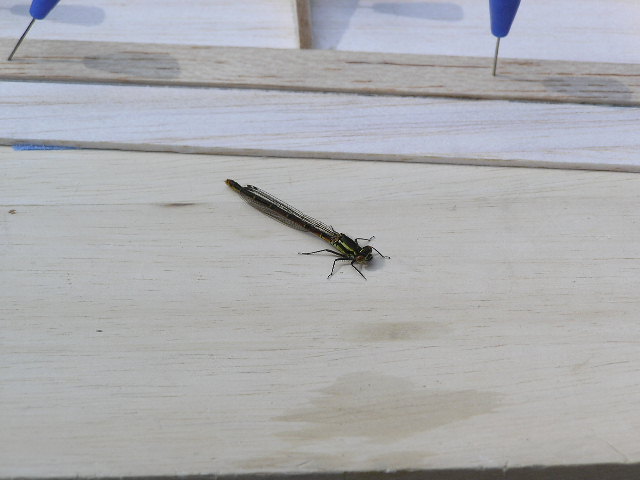
The little Demoiselle paid a visit, wasn't impressed and shortly flew off.
The little Demoiselle paid a visit, wasn't impressed and shortly flew off.

The following user(s) said Thank You: 4Pedalsfly
Please Log in or Create an account to join the conversation.
- Brian
-
Topic Author
- Offline
- Platinum Member
-
Less
More
- Posts: 1045
- Thank you received: 415
3 years 6 months ago #25800
by Brian
Replied by Brian on topic Back to Basics
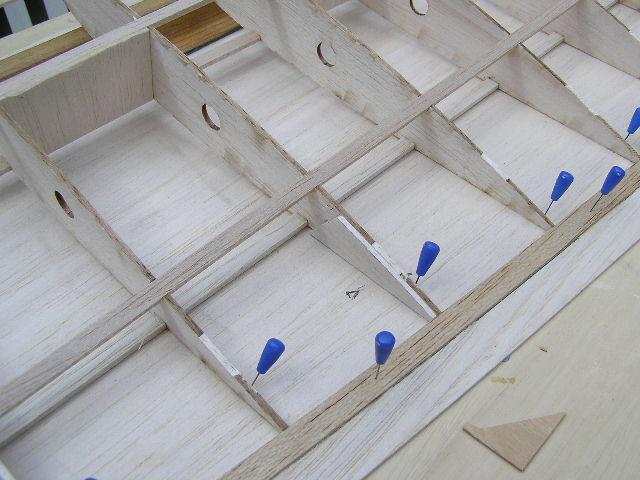
I used the arrival of the "miniature dragonfly" as an excuse for a break for coffee and a chocolate digestive.I fitted the extra riblet which forms the closing end of the aileron, it is spaced away from the adjacent rib using a piece of 2mm ply. The prepared LE for the aileron was glued and pinned, and the structure left for the glue to dry over lunchtime.The aileron horns will be made from epoxy-glass sheet, they will be held between pairs of riblets ( which I must remember to make and fit).I hope to be able to fit the aileron servos on their sides leaving a small slot in the wing surface for the servo arm.Bit more laying out and measuring to do before continuing the build.
Please Log in or Create an account to join the conversation.
Moderators: DaveBright
Time to create page: 0.347 seconds
Latest Posts
- No posts to display.
©
2009 - 2025
WMAC PCF Design