- Posts: 1045
- Thank you received: 415

Back to Basics
- Brian
-
 Topic Author
- Offline
- Platinum Member
-

Less
More
3 years 6 months ago #25801
by Brian
Replied by Brian on topic Back to Basics
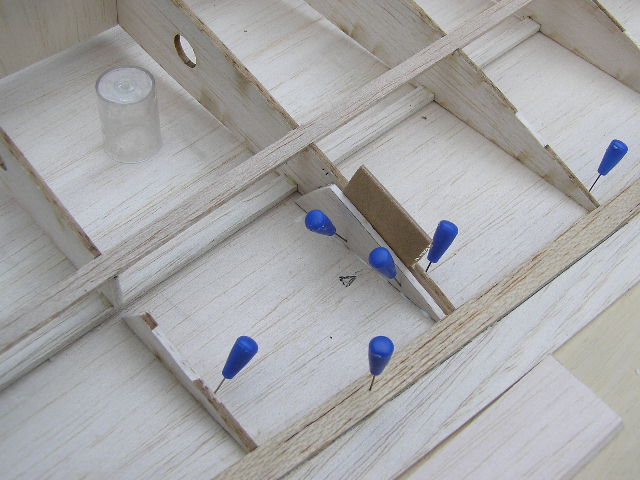
A few more "pix" to look at while I do some simple sums and marking out.

The following user(s) said Thank You: 4Pedalsfly, kevinross
Please Log in or Create an account to join the conversation.
- Brian
-
Topic Author
- Offline
- Platinum Member
-
Less
More
- Posts: 1045
- Thank you received: 415
3 years 6 months ago #25802
by Brian
Replied by Brian on topic Back to Basics
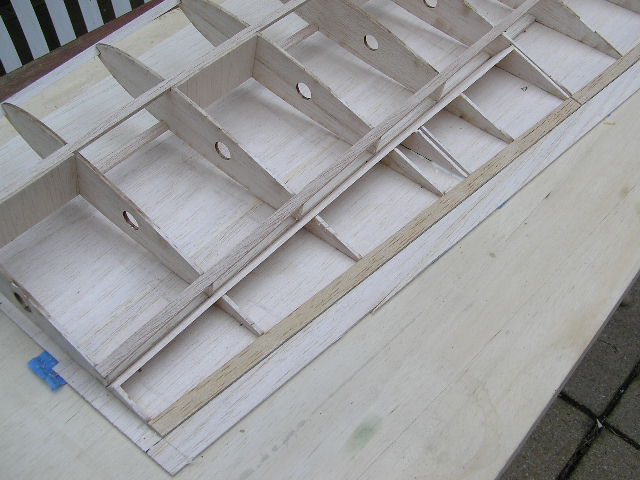
The LE of the aileron added and riblets to support the aileron horn fitted, TE of wing cut so that exact position of the inboard end of the aileron can be found after sheeting is complete. The wing structure will now be rolled on to the sheet and glued in two or three stages. The "hit and miss" spar webs are deliberate, the build instructions state that until the wing has been checked and no warps found, then complete the webs on front and rear spars. The webbing will be omitted from the bays in the aileron area, webs will be fitted between the spars after the aileron is cut away from the wing structure. This webbing forms an area to be sanded flat to give a mounting face for the sewn cloth aileron hinge.
The following user(s) said Thank You: 4Pedalsfly, Phil Ford
Please Log in or Create an account to join the conversation.
- Brian
-
Topic Author
- Offline
- Platinum Member
-
Less
More
- Posts: 1045
- Thank you received: 415
3 years 6 months ago #25804
by Brian
Replied by Brian on topic Back to Basics
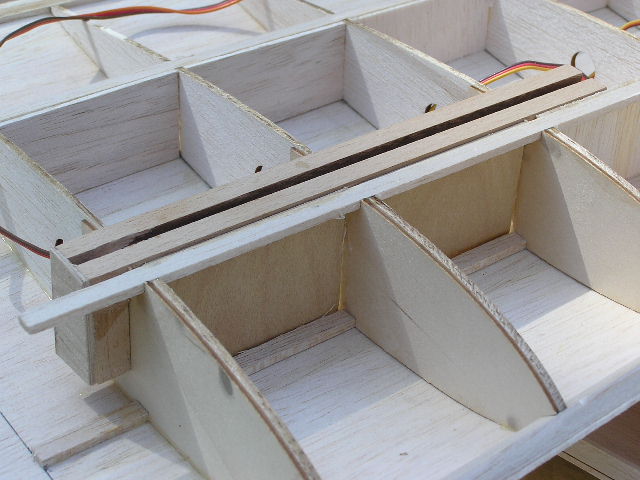
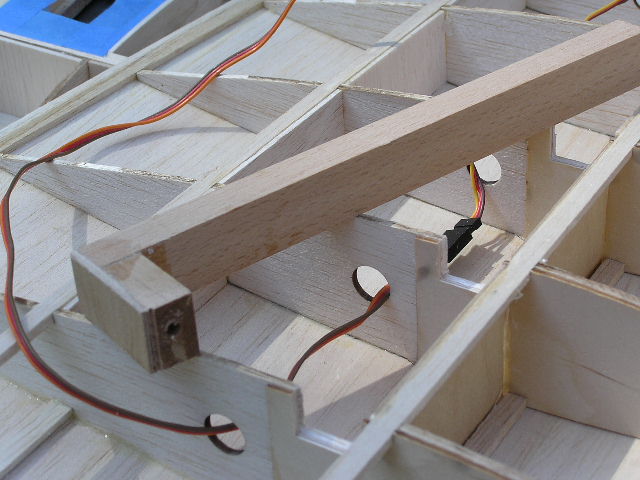
The weekend fairly flew by as I measured, re-measured and then cut the parts for the servo mounts and servo cover plates. I'd left the wings glued, pinned and weighted overnight, this morning the pins etc were removed and I was relieved to find no warps. Today I fixed the first servo onto its mount and attached the mount to its bearers with tiny screws only 8mm long. I cut and fitted some scrap balsa to use as a support frame for the servo cover, made the servo cover from 2mm liteply and cut a slot in it for the aileron pushrod and clevis. With everything glued up, I took a break for lunch, and then wasted an hour watching David Attenborough's programme on the last day of the dinosaurs. Not wasted really! Sewed up the mystery of where all the dinosaurs went overnight.
Returning to the building board I did a final check on the alignment of the servo arm and elevator horn. Something wasn't right, almost 1/4" out. It took a while to sort out what had happened, I'd fitted the servo the wrong way round, fortunately it was only a case of taking out the screws and re-positioning the servo mount in the right place.
Repeating the procedure for the other wing (correctly this time) was a lot quicker.
No pix today, forgot to change camera the batteries again.
The following user(s) said Thank You: 4Pedalsfly, kevinross
Please Log in or Create an account to join the conversation.
- Phil Ford
-

- Offline
- Administrator
-

Less
More
- Posts: 3170
- Thank you received: 903
3 years 6 months ago - 3 years 6 months ago #25805
by Phil Ford
:oops:
Had you worried for a bit though didn't it?
Replied by Phil Ford on topic Back to Basics
. Something wasn't right, almost 1/4" out. It took a while to sort out what had happened, I'd fitted the servo the wrong way round.
:oops:
Had you worried for a bit though didn't it?
Last edit: 3 years 6 months ago by Phil Ford.
Please Log in or Create an account to join the conversation.
- Brian
-
Topic Author
- Offline
- Platinum Member
-
Less
More
- Posts: 1045
- Thank you received: 415
3 years 6 months ago #25823
by Brian
Replied by Brian on topic Back to Basics
Four days late with the reply, but... yes Phil I was a bit rattled at the time, at least it didn't take a lot of effort to get things straightened out. Since the last posting I've done very little, apart from making a few more mistakes. The plan calls for a 1/2" square hardwood undercart mounting, I had 3/4" X 1/2". No problem, I cut the ribs and ply doublers to accept the wider mounting. Then I decided to add a block to the end of the mounting, drilled for the U/C wire, and (hopefully) take the load imposed when landing and not get " floppy" due to lack of bearing area. I had some plain 3/4" X 1/2" beech, sawed off a couple of 1" lengths and epoxied them to the ends of the U/C mounting. With the epoxy nicely cured, I epoxied the U/C mounts into the wing. Should have had a better look at the plan. There's about an inch and a half of mounting block extending beyond the outer rib. I should have cut the mounting and used the offcut instead of gluing on a piece of 3/4" X 1/2" and drilling it. So much for trying to keep the structure light, now I've introduced a load of hardwood that's doing nothing at all. Perhaps I'll be able to use a cutting disc in the Dremel and saw it off.
Please Log in or Create an account to join the conversation.
- Brian
-
Topic Author
- Offline
- Platinum Member
-
Less
More
- Posts: 1045
- Thank you received: 415
3 years 6 months ago #25824
by Brian
Replied by Brian on topic Back to Basics
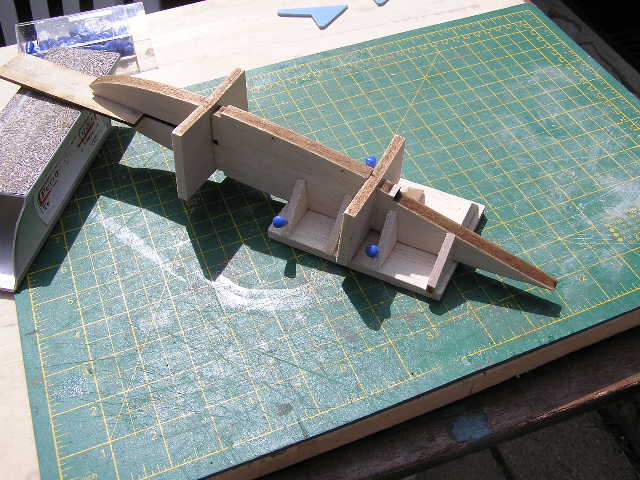
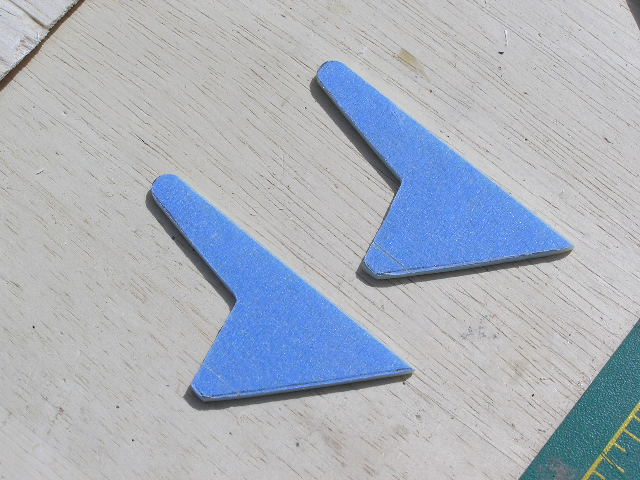
The centre rib in the wing is about 3/8" thick. It has to be cut into three parts to accommodate the two dihedral braces. To help get a fairly accurate assembly of the three ribs parts and the two dihedral braces, I knocked up a jig from scrap balsa. While the glued up jig dried, I made a pair of aileron horns from 2mm epoxy glass sheet. These were sawn out using a metal cutting blade in a 1930s Hobbies fretsaw frame. This saw cost me the princely sum of 2/6 or 2s6d or "Half a Crown" (12 1/2p) way back in 1957. The chap who sold it to me really didn't want to sell it at all, only because the frame had slight traces of rust on it. I think perhaps he was persuaded to sell it as I was doing my National Service and was in uniform at the time, woefully short of cash, and it must have had some bearing on the deal.
The following user(s) said Thank You: 4Pedalsfly
Please Log in or Create an account to join the conversation.
Moderators: DaveBright
Time to create page: 0.291 seconds
Latest Posts
- No posts to display.
©
2009 - 2025
WMAC PCF Design