Goldberg Super Chipmunk

More
4 years 2 months ago #21701 by 4Pedalsfly
Replied by 4Pedalsfly on topic Goldberg Super Chipmunk

Brian wrote: I used to get fed up when a spike nut fell off, and it would always be the one you couldn't reach. I replaced all my spike nuts with threaded inserts, they cost a bit more, but they do make engine fitting a breeze.


Phil /Brian - "Spike" Nuts a.k.a "Tee" Nuts - My technique for fitting "Tee" nuts is to first drill a hole slightly less in dia than the body
of the Tee nut.
Then using an oiled Socket Head Capscrew & suitable washer engage into the Tee nut and tighten the screw drawing the Tee nut
into the plywood motor mount until it feels solid, for extra safety a dab of cyno on the prongs may be added.
Todate I've never had one drop out - oops ! tempting fate.

Colin.

Please Log in or Create an account to join the conversation.

  • Phil Ford
  • Topic Author
  • Offline
  • Administrator
  • Administrator
More
4 years 2 months ago - 4 years 2 months ago #21703 by Phil Ford
Replied by Phil Ford on topic Goldberg Super Chipmunk
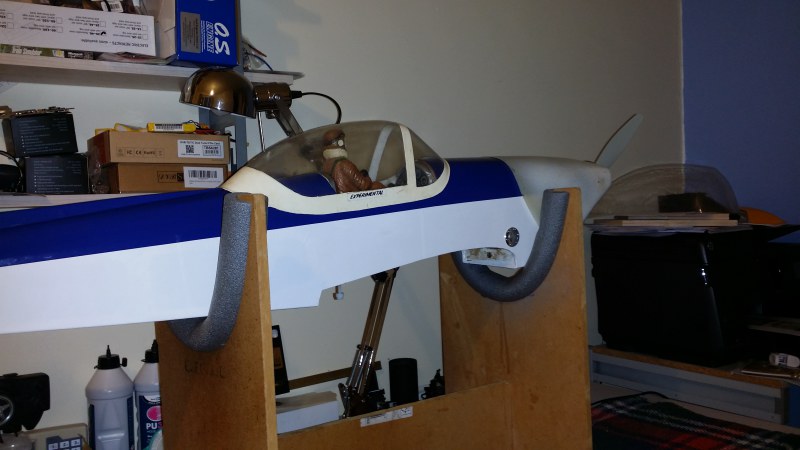
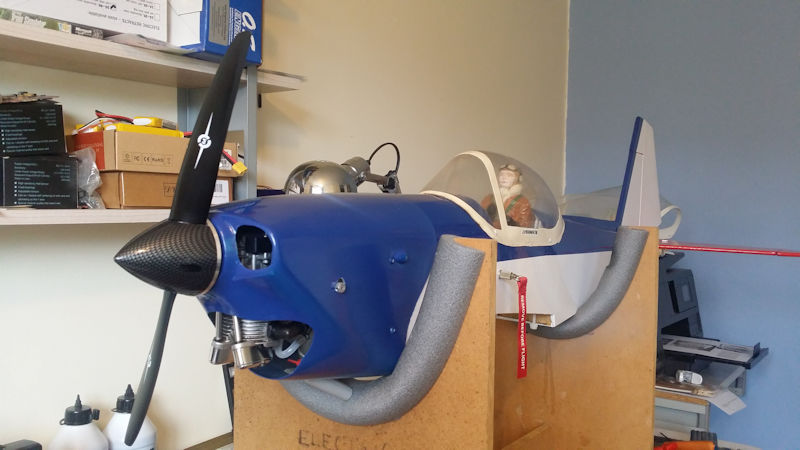
Guys the issue was where the lower engine mounting holes needed to be lined up with a bearer/brace on the inside of the firewall. This brace was not flat it was made up of a 45% angle of spruce. I believe it would've been required to support the original tank or spacer. As you know spike nuts need a flat surface or indeed so does threaded inserts so I realised I was stuffed. I have 3/4 balsa but not Spruce so I could create and opposite angle to the bearer therefore the nut sees a flat surface (Still following?). Scratching my head I found a little bit of Obechi strip that was 18mm x 10mm. I figured that if I cut down through it at 45% I have what I needed.

The most annoying and get angry moment is how the hell to I get my "big mits" inside that tank bay to stick them on? I decided to drill the holes required in the blocks and press the spike nuts in. Easy! Now get a bolt with a big flat washer and pull the new blocks into place and hopefully the glue will hold them in place. I cannot confirm this 100% because I just cannot get right in there! It appeared to work but after having to remove the engine mounting again this is when I realised the glue had not held sufficiently. Hence my earlier post and rantings.

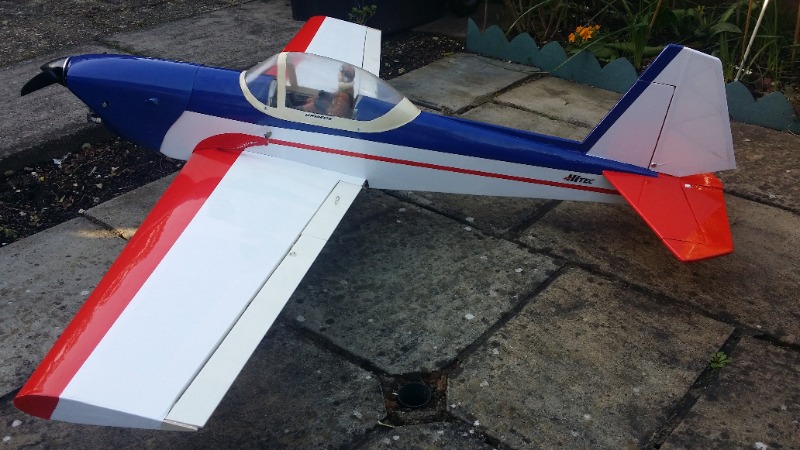
The reference to Ebay was I found the Chippy on Ebay. It looked okay from the image but after driving up to Coventry and seeing it in the flesh I could see it was in not that good a nick. T. As I still had my original wing virtually intact I only wanted the fuselage, so I took it on. Of course who ever built it used the methods at the time, like gluing in the tank rail! (What happens if you get a tank problem?) In fact gluing everything in. :( The covering was fading and lifting and until I started to try and tidy it up that I discovered it had been covered in that damn Monokote. Lost interest then until now.
Last edit: 4 years 2 months ago by Phil Ford.

Please Log in or Create an account to join the conversation.

  • Phil Ford
  • Topic Author
  • Offline
  • Administrator
  • Administrator
More
4 years 2 months ago #21709 by Phil Ford
Replied by Phil Ford on topic Goldberg Super Chipmunk
Progressing well now. Cowl has final cut for exhaust outlet. Ailerons, rudder, elevator have been set up with dual rates.
flaps with some elevator compensation and the throttle set up with engine cut. Voltage regulator fitted with failsafe switch. Fuel dot it bit over the top but I had it to hand. I have ordered some chipmunk graphics from Callie Graphics in the USA. Just waiting on the spinner and remote glow to turn up. When or If the wind dies back I may be able to get out and paint the cowl sometime. :unsure:
Attachments:

Please Log in or Create an account to join the conversation.

  • Phil Ford
  • Topic Author
  • Offline
  • Administrator
  • Administrator
More
4 years 2 months ago #21733 by Phil Ford
Replied by Phil Ford on topic Goldberg Super Chipmunk
Virtually done now, waiting on some graphics and a bit of tarting up and get outside to balance it out with hopefully just batteries. Prop size is 13x8 scimitar but have bought a 14x8 too if under propped. Not sure of the weight yet either.
Attachments:

Please Log in or Create an account to join the conversation.

  • Phil Ford
  • Topic Author
  • Offline
  • Administrator
  • Administrator
More
4 years 2 months ago #21736 by Phil Ford
Replied by Phil Ford on topic Goldberg Super Chipmunk
Today made up a battery tray that slides in below tank so the pack can be moved forward or back. Plane balances at mid point of CG according to Goldberg with empty tank. AUW weight empty = 7.7lbs (3.5Kgs).

Please Log in or Create an account to join the conversation.

  • Phil Ford
  • Topic Author
  • Offline
  • Administrator
  • Administrator
More
4 years 2 months ago - 4 years 2 months ago #21739 by Phil Ford
Replied by Phil Ford on topic Goldberg Super Chipmunk
Decided on some extra livery. Fuselage line follows on from red leading edge of wing. Hopefully the sponsor graphics by Callie Graphics will be here soon to enhance the looks. Just noticed that the wing tip ends by the ailerons have not been covered. Out with the iron again.:oops:
Attachments:
Last edit: 4 years 2 months ago by Phil Ford.

Please Log in or Create an account to join the conversation.

Moderators: DaveBright
Time to create page: 0.300 seconds