- Thank you received: 0

Back to Basics
- Brian
-
 Topic Author
- New Member
-

Less
More
19 Jul 2021 19:43 #24914
by Brian
Replied by Brian on topic Back to Basics
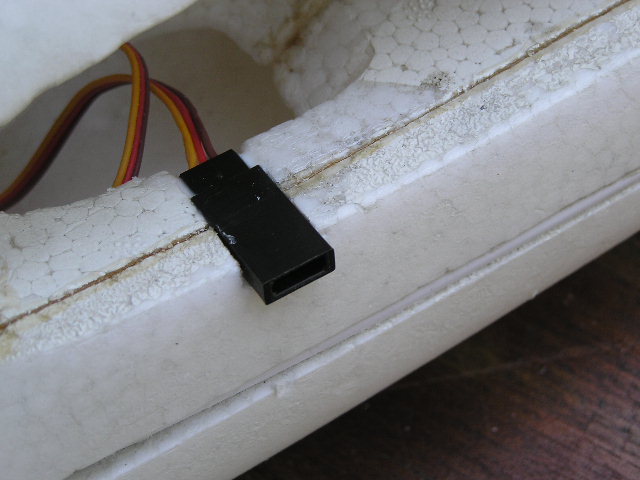
There isn't much space for anything in the front bay of the Easy Glider. I wondered about using the generously moulded "canopy" to house the receiver and satellite. After cutting away a bit of foam, things got easier. The receiver fitted without fouling anything and the satellite fitted but has a bit of one aerial stuck out of the canopy. With the electrics looking tidier, I sat a while and watched a video of the Easy Glider 4. That model is a lot different! I replayed the video a couple of times to make sure of the way the aileron servo leads are connected. The Mk 1 needs a wire hook and some nimble fingers to get the connectors through to the receiver. Not much fun on a cold day. Suitably enthused, I cut slots in the lower wing seating and fitted a pair of sockets, ran the leads through the newly cut access slot and connected them to the receiver. Then the real fun started, I re-routed the servo leads so that they exited the wing in a spot clear of the fuselage, closed the slots with the scrap foam generated during the process. I cut the leads a trifle long "just in case". Using a new plug and terminals, I tried to fit the female pins. After something like twelve failures and no amount of adjusting the crimp tool made things any better. Now one set of leads were becoming clos to being too short. I had a final "go" using a length of wire from an old JR extension lead. Apparently I hadn't lost the knack! The failures were due to the Multiplex leads being smaller in diameter, this lead to the crimp tool crushing the terminals. As a last resort, I soldered on the original connectors, ugly but effective.

Please Log in or Create an account to join the conversation.
- Brian
-
Topic Author
- New Member
-
Less
More
- Thank you received: 0
21 Jul 2021 14:54 #24925
by Brian
Replied by Brian on topic Back to Basics
The Easy Glider flies, but only just. Lack of power from the Multiplex geared motor led to some interesting moments during the first flight. The control surfaces seem to be quite powerful, and set -up with generous throws, it was all too easy to overcontrol and induce a stall. Landing was surprising, power off and gliding in, the model got to a couple of feet and wanted to stay there. The first landing attempt had the model so far down the field I had to go round again. Today I removed the motor, lubed the gearbox and put a couple of drops of contact cleaner on the motor's commutator. With the motor back in the model, a test run showed a distinct improvement in performance.
Please Log in or Create an account to join the conversation.
- Brian
-
Topic Author
- New Member
-
Less
More
- Thank you received: 0
22 Jul 2021 13:05 #24933
by Brian
Replied by Brian on topic Back to Basics
The next part of the tale of the Easy Glider should be in "Tales of Stupidity". When I pulled the original NiMh battery out of the model, I assumed it was a six cell 7.2V. I must admit I didn't really look at it. Today the awful truth came to light, the battery is in fact an eight cell 9.6V item. No wonder there was a lack of power from the 7.4V LiPo that I'd fitted to replace it. I spent an hour or so vandalising the battery stowage to enable a 3S 2200mAh LiPo to be fitted.
On test, the motor is very lively indeed on 11.1V. I ran it for about fifteen seconds. There was a distinct smell of something hot and electric. The brushed motor was quite hot, and I assumed that the coating that had formed on it during years in storage had something to do with the smell. Anyway, I'm sure the cool clear upper air of Cashmoor will provide adequate cooling. Looks as though the flight pattern will be powering to height on modest throttle, then gliding as long as practical before powering up again. I don't think going brushless will be an option due to the slim nose section of the fuselage not providing enough support for a motor mount. Perhaps a 40mm EDF in a pod on top of the fuselage would be an option? Either that or a heat sink for the motor.
On test, the motor is very lively indeed on 11.1V. I ran it for about fifteen seconds. There was a distinct smell of something hot and electric. The brushed motor was quite hot, and I assumed that the coating that had formed on it during years in storage had something to do with the smell. Anyway, I'm sure the cool clear upper air of Cashmoor will provide adequate cooling. Looks as though the flight pattern will be powering to height on modest throttle, then gliding as long as practical before powering up again. I don't think going brushless will be an option due to the slim nose section of the fuselage not providing enough support for a motor mount. Perhaps a 40mm EDF in a pod on top of the fuselage would be an option? Either that or a heat sink for the motor.
Please Log in or Create an account to join the conversation.
- Brian
-
Topic Author
- New Member
-
Less
More
- Thank you received: 0
23 Jul 2021 16:08 #24937
by Brian
Replied by Brian on topic Back to Basics
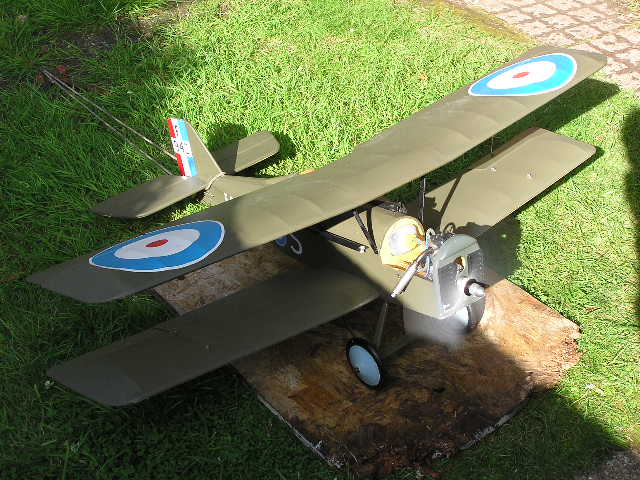
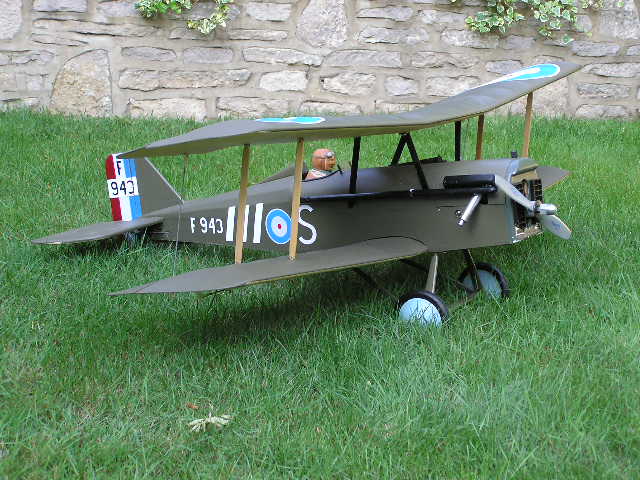
Dusted off the Se 5A yesterday, finished covering the wing tip of the upper wing and completed the covering on the lower wing. Today I thought would be a good day to install and set up the receiver. Unfortunately it didn't turn out like that. The original receiver was fitted into a recess built into the lower wing centre section, bit fiddly if the wing needs to come off. I fitted a receiver tray into the fuselage so that the receiver could stick up into the existing recess. That worked out, and I carried on setting up the servos. They were rather old Fleet types, they are a bit awkward sometimes due to the square output shafts, rather limiting on adjusting the servo arm position. Throttle and elevator were OK as were the two aileron servos. The rudder proved to be a problem. The servo wouldn't centre. I'd noticed that when I first picked up the model, the rudder was jammed hard over. I spent a while removing three Fleet servos and replacing them with JR NES 591s. Elevator was good, as was the throttle. Unfortunately the rudder servo was the same as before, it wouldn't centre and there's more travel one way than the other. Now I've spent half a day and ended up exactly where I started. Looks as though the problem might be the transmitter, don't suppose I can do much about that, apart from check it out on other models. I'll try that after I've had a chocolate digestive and a cup of tea.
Please Log in or Create an account to join the conversation.
- Phil Ford
-

- Offline
- Moderator
-

Less
More
- Posts: 3156
- Thank you received: 903
24 Jul 2021 11:29 #24939
by Phil Ford
Replied by Phil Ford on topic Back to Basics
I am not sure about NES servos but generally most servos consider centre as a signal of 1500ua although I believe Futaba consider centre as 1520ua. 20ua would not make much difference in your case. Swap servo or check TX again, sub trims?
The following user(s) said Thank You: Brian
Please Log in or Create an account to join the conversation.
- Brian
-
Topic Author
- New Member
-
Less
More
- Thank you received: 0
24 Jul 2021 19:02 #24940
by Brian
Replied by Brian on topic Back to Basics
Thanks Phil, I finally got the servo to centre reliably using the sub-trim function. I'm not really happy with that as something has caused the transmitter to alter. Perhaps the Radio Workshop at Southampton can advise.
Please Log in or Create an account to join the conversation.
- Brian
-
Topic Author
- New Member
-
Less
More
- Thank you received: 0
24 Jul 2021 19:21 #24941
by Brian
Replied by Brian on topic Back to Basics
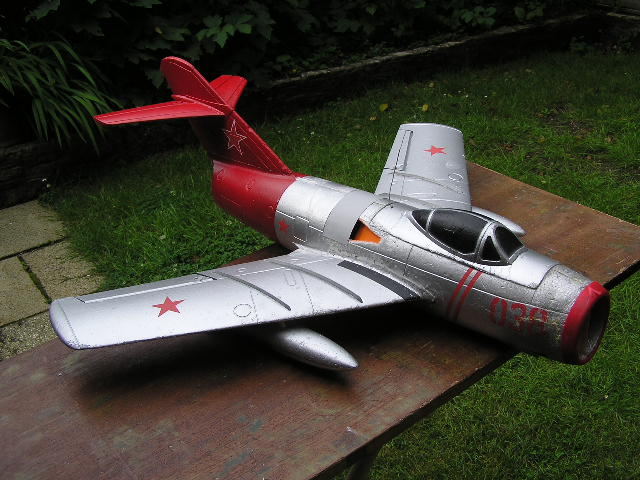
The receiver in the SE5A is a Lemon Rx seven channel with stabiliser. I've set up the model with the stabiliser switched off. Final assembly went along with no real problems at all. Along the way a couple of screws had gone missing, but the junk box yielded up some replacements. After sorting out the reversed throttle, the Saito started vey easily and ran reliably. Fuelling up was a bit of a problem as the model is fitted with a filler that needs a matching nozzle. Fortunately I had one and pumping fuel in was clean, no drips on disconnection either. After sorting out which way round the throttle went, after warming up, the engine settled at 2500/2800 on low throttle. All that's left to do is set the throws and rates, then wait for the wind to be straight up or down the runway. Can't risk a crosswind take-off with all the top hamper and a very narrow undercart.
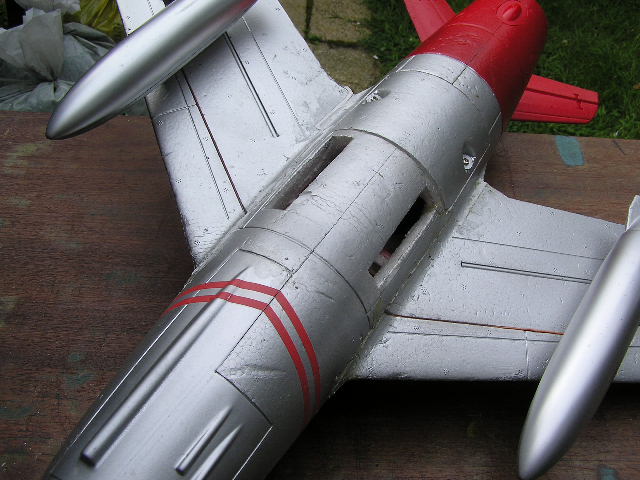
The next model to get "the treatment" is my Freewing Mig-15. A couple of years ago it made one short flight which ended with the model having a very short nose. I flew it last Tuesday, it was slightly modified from the time of its first flight, originally I'd cut two "cheater" slots in the underside of the fuselage. This time I'd closed off those slots and opened up two more in the top of the fuselage. The improvement in thrust allowed the model to lift off the grass after I stalled it on launching ,didn't think that would be possible, but it did, and there was hardly any wind either.
The next model to get "the treatment" is my Freewing Mig-15. A couple of years ago it made one short flight which ended with the model having a very short nose. I flew it last Tuesday, it was slightly modified from the time of its first flight, originally I'd cut two "cheater" slots in the underside of the fuselage. This time I'd closed off those slots and opened up two more in the top of the fuselage. The improvement in thrust allowed the model to lift off the grass after I stalled it on launching ,didn't think that would be possible, but it did, and there was hardly any wind either.
Please Log in or Create an account to join the conversation.
- Brian
-
Topic Author
- New Member
-
Less
More
- Thank you received: 0
25 Jul 2021 16:46 #24944
by Brian
Replied by Brian on topic Back to Basics
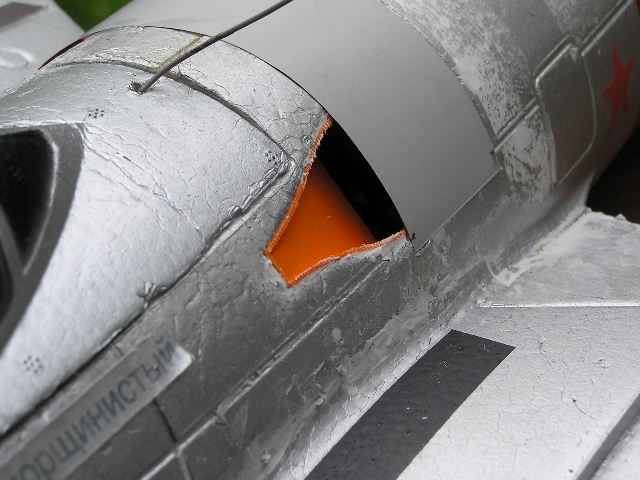
The Freewing MIG-15 wouldn't "get up and go" from a hand launch in its "as supplied" state. I watched a video by the Petrincic brothers, they'd cut a couple of cheater slots in the underside of their MIG-15, and it made quite a difference to the performance. I cut slots in my MIG, never got to know whether they worked properly, I crunched the model on its first flight with cheater slots. Last week I flew the MIG for the second time, I'd repaired most of the damage, couldn't do much with the distorted nose section, apart from glue it back together. I ran the EDF and found that instead of allowing air in, the underside cheater slots were definitely leaking air outwards, this occurred at the end of the slot close to the fan. I expect that somewhere, several pages of obscure calculations will explain the best size and position of cheater slots. Beyond me, I can't even count the number of cells in a flight battery correctly. The MIG's fuselage has a tray with the battery, ESC, lots of wires and a servo, this little lot is all on the topside of the tray and effectively obstructs the airflow. In order to get more air to the fan, I realised that a couple of cheater slots in the top of the fuselage would probably bring a better balanced airflow, than having slots in the lower fuselage which was already providing the bulk of the air. I blocked off the lower slots and opened up two new ones in the top of the fuselage. Bit limited with regard to their position as the canopy hatch gets in the way. The new slots seemed to work alright and the MIG flew quite nicely, even managed to get off the grass after I stalled it on launch. Today I have been treating the newly cut but rather crude slots to some cosmetic treatment. I have used a mix of 3D printed NACA Ducts and a piece of preformed litho plate. The fuselage was cut to accept the ducts, and as much foam as possible was removed between the ducts and the fan. In order to maximise the aperture, I used a piece of litho plate to wrap round the fuselage and form the outer skin of the duct. The litho plate was curved by drawing it under the handle of a balsa knife. This was then cut to length, leaving the ends slightly long to allow a 1/8" tab to be bent up at each end. Slots for the tabs were cut in the fuselage. A trial fit using stiff paper showed that the litho plate strip would fit. Using my favourite R/C glue along the edges of the strip and in the slots, the litho plate was eased into position. While all this was drying, I made a start on the second bit of cosmetic work by knifing on some lightweight filler into the assorted joints and dents, messy but effective. The next step is to find a way of getting the MIG to take off without using a dolly, perhaps some sort of wire skids?
Please Log in or Create an account to join the conversation.
- Brian
-
Topic Author
- New Member
-
Less
More
- Thank you received: 0
25 Jul 2021 16:59 #24945
by Brian
Replied by Brian on topic Back to Basics
The middle picture of the MIG shows the end of a label which is beginning to peel off. The message on the label says (in phonetic Russian) "Starryy Morschinistyy" It means "Old Wrinkly". Neatly describing the model..and me.
Please Log in or Create an account to join the conversation.
- kevinross
-

- Offline
- Platinum Member
-

Less
More
- Posts: 1023
- Thank you received: 583
25 Jul 2021 19:56 #24946
by kevinross
Replied by kevinross on topic Back to Basics
Just wondered if you've seen Mike Seals new bungee launch system for the Impressivio. Its so effective i'm currently making my own in preference to the Hobbyking launch ramp ive used for several years.
Ive also fitted an bungee UCK to my F86 as this has also proved difficult to hand launch
Ive also fitted an bungee UCK to my F86 as this has also proved difficult to hand launch
Please Log in or Create an account to join the conversation.
Moderators: DaveBright
Time to create page: 0.397 seconds
Latest Posts
-
-
- Valkyrie Slope Soarer
- In Activities / Glider & Slope
- by Phil Ford
- 22 Feb 2026 13:03
-
©
2009 - 2026
WMAC PCF Design