
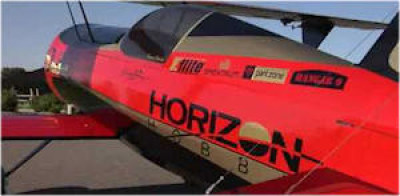
The Eflite Beast 60E has been around for a little while now and I thought it was time for my quick review of this model from a UK user and flyer, the first one for me from the Eflite stable, although I am a previous multiple buyer of Hangar 9 models from Horizon Hobby. It is designed for 3D areobatics and the hi-voltage servos and avonics powered directly from a 7.4volt LiPo.
It comes in rather a large box and extremely well packed and secured. The box has custom compartments to hold the fuselage, four wings, stabiliser, fin, cabane struts, mid upper wing and wheel spats. Hardware and landing gear is bagged. Two carbon tubes are used to support the wings. There is also sheeted, precut self-adhesive decals to finish the scale looks of this super biplane.
As a first time purchaser of EFlite models I scrupiously checked all the parts for damage and the covering. First impressions were of quality build and covering.The model is designed to be powered by an Eflite Power 60 with an upgraded KV, 470kv to be precise. That's 70Kv up from the standard Power 60 400Kv. Power from a 6 cell Lipo and a 100amp ESC complete the motive power. All up weight should be around 8.9 to 9.5lbs.
For a biplane initially I get the feeling that it would be quite a quick assemble for flight up at the field. In the hardware bags are the fibreglass horns and fibreglass servo arm extenders. Coupling is done by ball links on all controls. Each wing has it's own servo and the hatches are a perfect fit. Checking over the hardware, unlike some model makers the hardware looks quality and so nothing should need to be junked in favour of your own preferred bits.
The model was designed for 3D aerobatics and to have all high voltage, high torque metal geared servos and an ASX receiver. Not being a 3D fan, more a scale-man myself, I will build this for my comfort and to reduce expense will not use HV servos but standard voltage MG servos of near the same torque. Elevator / rudder I plumped for HS5065MGs (Programmable. Torque = 7.9Kgs) and Ailerons got HS225MGs. I will also not use the servo arm extenders supplied, albiet they can be retro fitted if need be.
The Fuselage


The fuselage is light weight and mainly skeletal, except the top side, but at the front end it is sheeted and has numerous bulkheads and braces. Access to the battery compartment is large and is accessed by sliding the top cowl forward away from the magnets and lift. On the top side is the canopy area which on assembly is needed to get fingers inside the fuselage to fit some parts. On the underside at the rear is an opening to allow cooling air flow and also to access the servo lead plug ends. Inside the fuselage are slots in the sides of the bulkheads to pass through the servo extension leads. At mid-fuselage is a hatch secured by a spring loaded pin. This allows access again to the main compartment in the front and also to access the bottom wing securing screws.
The front nose has two large cutouts for airflow. A transfer that you can stick on will give the impression of the big radial engine! Up front after removing the cowl top there is a massive compartment for the battery pack, receiver and anything else you want to throw in. Multiple bulkheads ensure strength. The firewall is predrilled and thrust angle is preset, quite a lot of thrust angle in fact. The predrilled holes are a perfect match for the X plate motor mount supplied with the Eflite Power 60 470Kv. Blind nuts are supplied to fit this mount. On the starboard side is the location for the ESC, directly in the airflow. Opposite on the Port side is a deflector to force air through the fuselage and over the battery pack.
The cabane struts fitted near perfect except I had to open two pre-drilled holes a little to allow the socket head machine screws to fit. Fitting these screws was a little exasperating for big hands like mine. When the struts are loosely nipped up I found that the centre wing blind nuts aligned up nicely with the struts. I was impressed because any mis-alignment here could be a bad sign.
The carbon rods were a little too tight to slide neatly through the centre wing and required some light sanding down and some baby talcum powder. The bottom the tube slid nicely through the fuselage. Later, I was to find also that the wing tubes were too tight a fit on the carbon tubes!
The stabiliser is slid into the fuselage after a removing a small fillet to support the rear end of the fuselage. It is also marked approxmediately to remove some covering for the adhesive. The elevators are joined by a preformed wire. After checking that the elevators align up with each other when connected to the joiner wire the elevators are removed and the wire is passed through the rear of the fuselage along with the stabiliser and moved into position. I used the carbon wing tubes as guides to aligning the stabiliser before glueing the stabiliser with CA thin. The elevator is hinged by CA fibre hinges, the precut slots I found were near perfect, surprisingly!
Before fitting the the elevators the fibreglass horns are fixed using epoxy and slip into precut slots in the surfaces.The rudder is hinged by CA hinges and is the usual standard fit after checking the rear steering wheel rod. Again, the pull- pull horns are fibreglass and slide into a precut slot, the glue ends sliding one above the other in the rudder. I had to make a little adjustment here to ensure they fitted correctly before final glueing with epoxy.
The Wings
First job was to check the wing tubes and as I mentioned earlier the tubes were rather a tight fit in three out of the four wings. This may be okay for once in lifetime fit but this large model needs to be easily disassembled to get up to the field. I used a solid aluminium tube that was just the right size which had sharp edges at the end. I continuously slid this in and out to remove any internal roughness in the wing tube guides. It took a while and with a little more polishing of the carbon tubes with wet-n-dry paper I was satisfied that the tubes were a sliding fit without the need of undue force.The wing hatches I was surprised were an amazingly good fit. Two were found taped to the wing and the other two were in the hardware bag.
The large ailerons are attached using CA fibre hinges, four for each wing. Precut slots were generally perfect in alignment but a little adjustment was needed on two of the wings to ensure correct alignment with wing tips. Nothing unusual here!
The wings are very skeletal, ie; virtually no balsa sheeting, just well tensioned preprinted Oracover film (Profilm to Europeans)
Servos are secured by hardwood blocks glued to the servo hatches, standard format for Horizon stuff. The manual shows exactly where to position the servos but you do need to allow some leeway if using different brand of servos from those recommended. I used standard sized HiTec metal gear digitals, normal voltage with no issues.
The wings slide onto their respective carbon tubes and at the root is a locking tab and anti-rotation pin. With wings attached and fully engaged in to fuselage, small 3mm socket head screws secure the wings from inside the fuselage via the bottom hatch for the lower wings and the top wings from the underside of the centre wing panel. I would suggest a model cradle is needed without doubt to suppor tthe model whilst wings are being attached.


Aileron servo connections is done by long Y-leads from the receiver, left and right. Eflite recommend a ASX receiver but I used a AR7000 as I had one with no home. The JRDSX9 radio I used was set for Flaperon which allowed me to plug in the right ailerons to Aileron Channel and the left ailerons into Flap channel (Aux1). This gives me common trim and the availability of aileron differential if I need it. There is also the possibility of using the ailerons as crow brakes. (butterfly) Maybe in the future but for now I'll stick with normal set-up!
The canopy found in it's own bag is preformed clear plastic with prepainted edges that line up with the fuselage's livery. Near perfect fit in my case. More brownie points for EFlite!
The canopy is designed to be glued on permanently. I opted to line the canopy area in the fuselage sides with ply so I can secure the canopy with screws and later fit a pilot. The pilot featured, large with helmet, is on backorder/unavailable virtually everywhere. This is not unusual for Horizon so come on Horizon, ensure adequate supplies of accessories and spares for your products!
In fact I may look for a blond, green eyed, slim dolly, near scale for the model to cut down to fit! i have to ensure she has a ponytail so her hair doesn't fall into her eyes during aerobatics.
Electronics & Power
The recommended reciever is the AR635, 6 channel which has an integrated Gyro. There has been a lot of debating over this receiver some good points and some bad. Using this receiver, EFlite require you to purchase also a Matchbox for the ailerons. This is more expense to add to the build of this model. As I said earlier I am using the AR7000.
I opted for a 100Amp Hobbywing Platinum ESC which can handle another 40% in burst mode. Instead of relying on the ESC for receiver and servo power I opted to use a DualSky 10amp regulator set for 5 volts and powered by a GensAce 1800maH 2 cell (7.4v) Lipo. This ensures steady voltage supplies and in the case of the ESC failing for whatever reason I will still have power for the control surfaces. The regulator is switched on by a "failsafe" switch.
The receiver battery was located on the opposite side to the ESC and mounted on a ply panel that I cut out and glued to the outer bulkheads. The regulator sits behind the main pack and the main receiver behind that. The satellite receiver is located on the port fuselage side under the centre wing and orientated vertically.


For main motive power I opted for Turnigy 4000maH,6 cell, 40C for main power. Just like the full size I wanted a three blade prop for looks at least. I delved into my prop drawer and selected a EMP three blade 15X8. I painted the tips for visiblity and balancing. Not the easiest job to do but got it near enough! Not the best of props but it will do for now. To finish off I used a 3 inch polished aluminum three blade spinner. I may later spray this in a golden colour as per the full size Beast. That completes the assembly.
EFlite Power 60 470Kv Specifications
Recommended Prop Range: 15 x 8 - 17 x 7 electric propeller
Voltage: 22.2V (6S LiPo, 4400-5000mAh)
RPM/Volt (Kv): 470Kv
Resistance (Ri): 0.02 ohm
Idle Current (Io): 2.1A @ 20V
Continuous Current: 65A
Maximum Burst Current: 80A for 15 seconds
Speed Control: 80A brushless
My Results - Power Input
Test 1
- 4000maH Lipo 6cell, 1 pack (charged at 78%) @23.3 volts
- EMP three blade prop 15x8
- WOT = 79amps equates to 1800 watts (2.36 HP)
- Actual Thrust = Unchecked
Test 2
- 4000maH Lipo 6cell, 1 pack (charged at 75%) @23.1 volts
- Two blade 17x8E APC prop (No 17x7 prop available)
- 85% throttle = 88 amps
- WOT = Not Tested - Would exceed motor Specs shown above.
- Actual Thrust = Unchecked
On both tests there was serious amount of air being moved that's for sure. But for now I will stick with the three blade set-up as it is within reasonable boundaries. Test flights will prove whether the model is happy and me with this arrangement. Bearing in mind that the flying weight of this aircraft is approx 9lbs we are looking at 200 watts per lbs of input power to weight ratio. Overall, I am impressed with this model and it's build and hardware quality. Although I love the Hangar 9 100cc version which is some hefty step up and serious money invested, Eflite have given us lesser mortals something more manageable.
The weather turned perfect on May 3rd and Club member Jon Tappin, our resident test pilot took the Beast for a spin. Flew beautifully, but he did reduce the rates and exponential. However we found that the 4000maH Lipo pack won't give you a decent flight time.
![]() Evaluation
Evaluation
Update:
03/08/2014 Main power packs are now Turnigy 5000maH 30C 6 cells.
08/04/2015: The Hobbywing ESC is now side mounted on the starboard side directly behind the airflow director not as seen in photo where it was placed between battery and receiver.
01/02/2016 Dualsky regulator removed. Receiver pack now 6.6 volt LiFe. Heavy duty illuminated switch for RX power
You can check out more EFlite models here Eflite - Advancing Electric Flight

