- Thank you received: 0

Back to Basics
- Brian
-
 Topic Author
- New Member
-

Less
More
10 Jul 2021 21:58 #24891
by Brian
Replied by Brian on topic Back to Basics
The Multiplex Easy Glider is now completely stripped, not a trace of paint anywhere, well perhaps an odd spot here and there. Unfortunately the surface of the foam isn't as smooth as it was when the model was moulded. All the surfaces are smooth after being sanded with 240 grit paper, but smooth and fluffy. I think that a "fluffy" model wouldn't fly as well as a smooth one. In the days when all my models were either free flight or control line, I remembered using thinned clear dope with talcum powder mixed in as a primer/filler undercoat. Hoping to get the same result using different ingredients, I thinned one part of PVA with four parts of water, added 50% by volume of talcum powder, stirred it up and slopped on a coat to the "fuzzy" foam fuselage. I was surprised at just how long the coat of home made primer/surfacer took to dry. It looks promising, the first light sanding had everything looking smooth and no sign of "fluffy" at all. Perhaps the second coat will be all that's needed to restore the glider to its original state. No photos, can't really show what "fluffy" moulded polyolefin looks like.
Please Log in or Create an account to join the conversation.
- Phil Ford
-

- Offline
- Moderator
-

Less
More
- Posts: 3156
- Thank you received: 903
11 Jul 2021 11:05 #24892
by Phil Ford
Replied by Phil Ford on topic Back to Basics
I don't know why you worry about holes or cracks in the fuselage Brian. Key Lime Air managed to safely fly and land and only lost a couple of suitcases. The Guy holding the phone is telling his boss, " Hi Guv, you having a nice day, how and I?, Just fine. We had a little problem this morning. Yes Yes a minor one. We got a hole in the fuselage. No sweat though. I know a Guy in the UK, Bournemouth in fact, Yeh, that's the place, beaches and ice cream, lots of old people live there. Yeh! Well this Brian can fix it no problem. PVA and Cusson's. :lol:

The following user(s) said Thank You: Brian
Please Log in or Create an account to join the conversation.
- Brian
-
Topic Author
- New Member
-
Less
More
- Thank you received: 0
15 Jul 2021 17:49 #24901
by Brian
Replied by Brian on topic Back to Basics
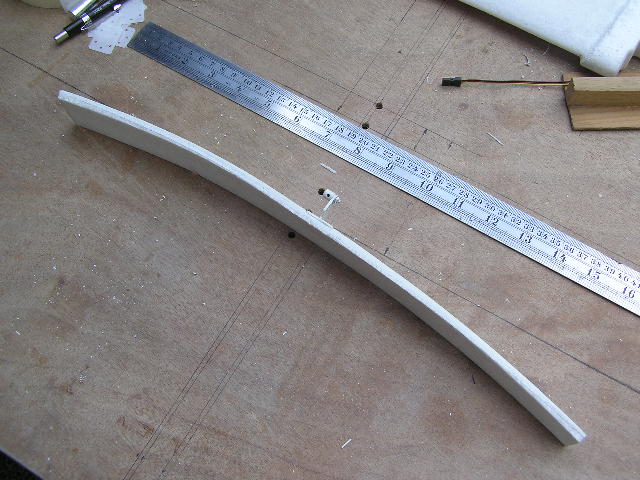
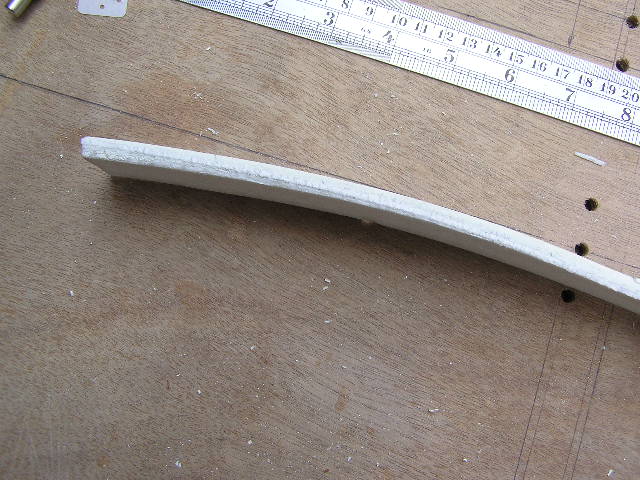
A second coat of home made primer/sealer was brushed on the fuselage. It didn't soak in as the first coat did, so it dried much quicker. The second sanding produced a very smooth surface, I think it'll be good enough to accept the final finishing coat of water based acrylic varnish. Meantime, the rest of the model has been undergoing the same treatment. Unfortunately I had to re-hinge the ailerons. They had been locked solid by the original paint, and weren't in a usable condition after the paint stripper had softened everything. The hinge line looks a bit odd, in the middle, its close to the upper surface of the wing, but at the ends, the hinge line is closer to the bottom surface. This gives a pronounced curve to the line. I cut away the ragged remains of the hinge from both the wing and the aileron. The aileron was then taped to the wing and marked out for four mylar hinges. Using the faint line of the original moulded hinge, I cut matching slots in the wing and aileron using a balsa knife. With the hinges in place and the aileron fitted, I glued the hinges with aliphatic glue. Now there's just one more coat of primer/sealer and a final sanding all over before adding some coloured trim here and there.
Please Log in or Create an account to join the conversation.
- Brian
-
Topic Author
- New Member
-
Less
More
- Thank you received: 0
18 Jul 2021 19:19 #24904
by Brian
Replied by Brian on topic Back to Basics
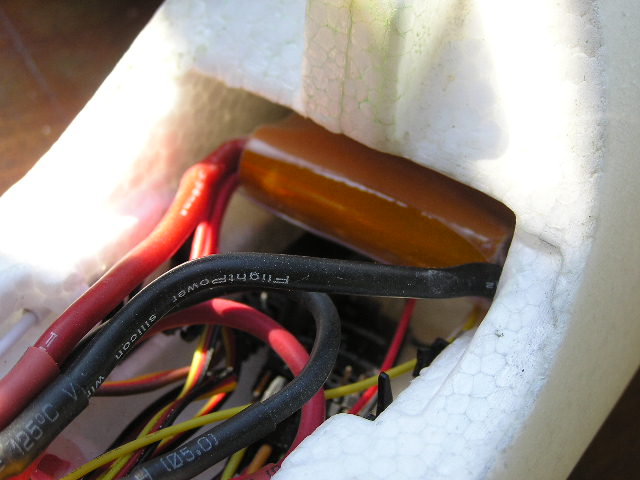
Today the tail plane/elevator, fin/rudder were finally fitted and glued with 60min epoxy. Bit fiddly as the moulded locations were slightly out, and I hadn't tried a dry assembly. As moulded the tail plane was a full 15mm out of alignment, shaving off a small slice from the locator did the biz, and a quick wipe with acetone on a paper towel cleaned the balsa knife. This afternoon I checked the alignments and was happy that nothing had moved. Getting the rudder and elevator pushrods moving was fun, I should have removed them and plugged the guide tubes before slopping stripper all over the place. They finally yielded to firm pressure, and moved freely after the rod ends were scraped clean. All the controls were coupled up, a Lemon Rx six channel lightweight receiver and satellite was fitted. Sliding the battery into its compartment took ages, and when it was finally in place, the canopy wouldn't close properly. Assembling the wing to the fuselage is another fiddly job, can't thread the servo wires with the battery in place. I'm going to modify the aileron connectors using the Easy Glider 4 system, where the connectors are exposed when the wing is assembled, no threading wires through small gaps. Finally with everything plugged in and switched on, the control surfaces were set, and cycled, the motor was run and the fail safe tested. Just the canopy and aileron connections to sort out. I was going to use an old FlightPower battery, but I think it would be better to use a Zippy Compact 2S 1500mAh. Its half the size of the FlightPower with little reduction in capacity. The original Multiplex battery was a 1400mAh NiMh, so the Zippy should be able to cope. I was pleased that the motor ran, although being a brushed and geared unit, it is noisy, and produces a draught rather than the eager thrust of a brushless set-up. I expect the model will climb, but it won't be an exciting event.

Please Log in or Create an account to join the conversation.
- Brian
-
Topic Author
- New Member
-
Less
More
- Thank you received: 0
19 Jul 2021 19:43 #24914
by Brian
Replied by Brian on topic Back to Basics
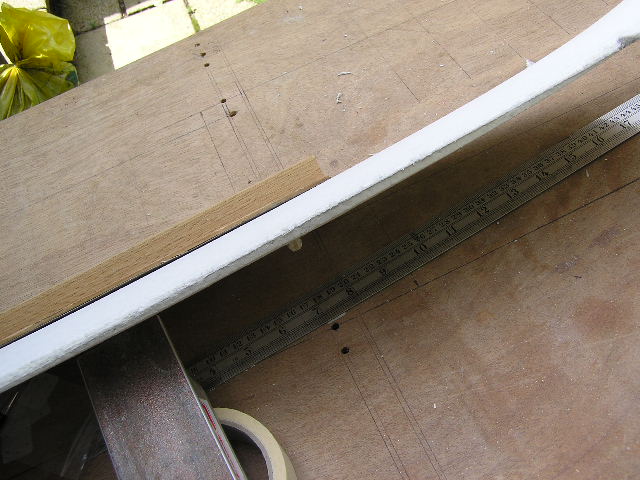
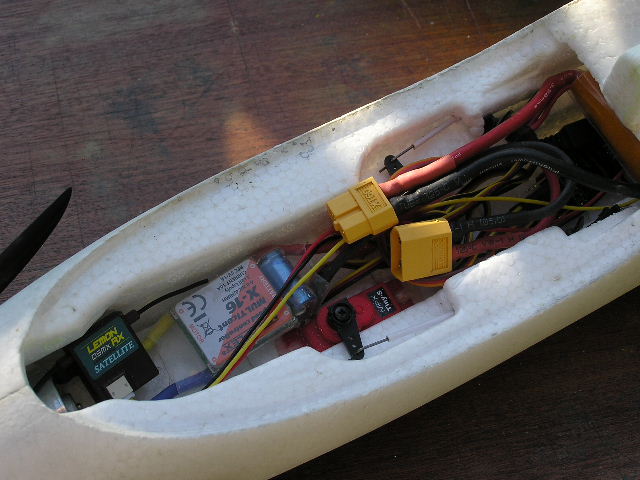
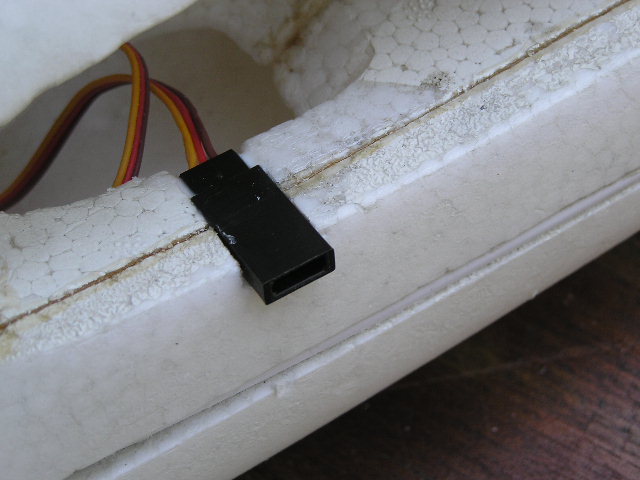
There isn't much space for anything in the front bay of the Easy Glider. I wondered about using the generously moulded "canopy" to house the receiver and satellite. After cutting away a bit of foam, things got easier. The receiver fitted without fouling anything and the satellite fitted but has a bit of one aerial stuck out of the canopy. With the electrics looking tidier, I sat a while and watched a video of the Easy Glider 4. That model is a lot different! I replayed the video a couple of times to make sure of the way the aileron servo leads are connected. The Mk 1 needs a wire hook and some nimble fingers to get the connectors through to the receiver. Not much fun on a cold day. Suitably enthused, I cut slots in the lower wing seating and fitted a pair of sockets, ran the leads through the newly cut access slot and connected them to the receiver. Then the real fun started, I re-routed the servo leads so that they exited the wing in a spot clear of the fuselage, closed the slots with the scrap foam generated during the process. I cut the leads a trifle long "just in case". Using a new plug and terminals, I tried to fit the female pins. After something like twelve failures and no amount of adjusting the crimp tool made things any better. Now one set of leads were becoming clos to being too short. I had a final "go" using a length of wire from an old JR extension lead. Apparently I hadn't lost the knack! The failures were due to the Multiplex leads being smaller in diameter, this lead to the crimp tool crushing the terminals. As a last resort, I soldered on the original connectors, ugly but effective.

Please Log in or Create an account to join the conversation.
- Brian
-
Topic Author
- New Member
-
Less
More
- Thank you received: 0
21 Jul 2021 14:54 #24925
by Brian
Replied by Brian on topic Back to Basics
The Easy Glider flies, but only just. Lack of power from the Multiplex geared motor led to some interesting moments during the first flight. The control surfaces seem to be quite powerful, and set -up with generous throws, it was all too easy to overcontrol and induce a stall. Landing was surprising, power off and gliding in, the model got to a couple of feet and wanted to stay there. The first landing attempt had the model so far down the field I had to go round again. Today I removed the motor, lubed the gearbox and put a couple of drops of contact cleaner on the motor's commutator. With the motor back in the model, a test run showed a distinct improvement in performance.
Please Log in or Create an account to join the conversation.
- Brian
-
Topic Author
- New Member
-
Less
More
- Thank you received: 0
22 Jul 2021 13:05 #24933
by Brian
Replied by Brian on topic Back to Basics
The next part of the tale of the Easy Glider should be in "Tales of Stupidity". When I pulled the original NiMh battery out of the model, I assumed it was a six cell 7.2V. I must admit I didn't really look at it. Today the awful truth came to light, the battery is in fact an eight cell 9.6V item. No wonder there was a lack of power from the 7.4V LiPo that I'd fitted to replace it. I spent an hour or so vandalising the battery stowage to enable a 3S 2200mAh LiPo to be fitted.
On test, the motor is very lively indeed on 11.1V. I ran it for about fifteen seconds. There was a distinct smell of something hot and electric. The brushed motor was quite hot, and I assumed that the coating that had formed on it during years in storage had something to do with the smell. Anyway, I'm sure the cool clear upper air of Cashmoor will provide adequate cooling. Looks as though the flight pattern will be powering to height on modest throttle, then gliding as long as practical before powering up again. I don't think going brushless will be an option due to the slim nose section of the fuselage not providing enough support for a motor mount. Perhaps a 40mm EDF in a pod on top of the fuselage would be an option? Either that or a heat sink for the motor.
On test, the motor is very lively indeed on 11.1V. I ran it for about fifteen seconds. There was a distinct smell of something hot and electric. The brushed motor was quite hot, and I assumed that the coating that had formed on it during years in storage had something to do with the smell. Anyway, I'm sure the cool clear upper air of Cashmoor will provide adequate cooling. Looks as though the flight pattern will be powering to height on modest throttle, then gliding as long as practical before powering up again. I don't think going brushless will be an option due to the slim nose section of the fuselage not providing enough support for a motor mount. Perhaps a 40mm EDF in a pod on top of the fuselage would be an option? Either that or a heat sink for the motor.
Please Log in or Create an account to join the conversation.
- Brian
-
Topic Author
- New Member
-
Less
More
- Thank you received: 0
23 Jul 2021 16:08 #24937
by Brian
Replied by Brian on topic Back to Basics
Dusted off the Se 5A yesterday, finished covering the wing tip of the upper wing and completed the covering on the lower wing. Today I thought would be a good day to install and set up the receiver. Unfortunately it didn't turn out like that. The original receiver was fitted into a recess built into the lower wing centre section, bit fiddly if the wing needs to come off. I fitted a receiver tray into the fuselage so that the receiver could stick up into the existing recess. That worked out, and I carried on setting up the servos. They were rather old Fleet types, they are a bit awkward sometimes due to the square output shafts, rather limiting on adjusting the servo arm position. Throttle and elevator were OK as were the two aileron servos. The rudder proved to be a problem. The servo wouldn't centre. I'd noticed that when I first picked up the model, the rudder was jammed hard over. I spent a while removing three Fleet servos and replacing them with JR NES 591s. Elevator was good, as was the throttle. Unfortunately the rudder servo was the same as before, it wouldn't centre and there's more travel one way than the other. Now I've spent half a day and ended up exactly where I started. Looks as though the problem might be the transmitter, don't suppose I can do much about that, apart from check it out on other models. I'll try that after I've had a chocolate digestive and a cup of tea.
Please Log in or Create an account to join the conversation.
- Phil Ford
-
- Offline
- Moderator
-
Less
More
- Posts: 3156
- Thank you received: 903
24 Jul 2021 11:29 #24939
by Phil Ford
Replied by Phil Ford on topic Back to Basics
I am not sure about NES servos but generally most servos consider centre as a signal of 1500ua although I believe Futaba consider centre as 1520ua. 20ua would not make much difference in your case. Swap servo or check TX again, sub trims?
The following user(s) said Thank You: Brian
Please Log in or Create an account to join the conversation.
- Brian
-
Topic Author
- New Member
-
Less
More
- Thank you received: 0
24 Jul 2021 19:02 #24940
by Brian
Replied by Brian on topic Back to Basics
Thanks Phil, I finally got the servo to centre reliably using the sub-trim function. I'm not really happy with that as something has caused the transmitter to alter. Perhaps the Radio Workshop at Southampton can advise.
Please Log in or Create an account to join the conversation.
Moderators: DaveBright
Time to create page: 0.402 seconds
©
2009 - 2026
WMAC PCF Design