Back to Basics

  • Brian
  • Topic Author
  • Offline
  • Platinum Member
  • Platinum Member
More
2 years 10 months ago #24783 by Brian
Replied by Brian on topic Back to Basics
Thanks for the comment Kevin, fortunately the previous owner had fitted a servo for each pair of ailerons. Much better than the old system which had to be built accurately to avoid sloppy movement. Another bonus of having two servos is that they can be set up with adjustable differential movement. Flair had this from a single servo by positioning the operating rod take off points on a servo mounted disc. Cheap and effective if built right.

Please Log in or Create an account to join the conversation.

  • 4Pedalsfly
  • Away
  • Platinum Member
  • Platinum Member
More
2 years 10 months ago #24786 by 4Pedalsfly
Replied by 4Pedalsfly on topic Back to Basics
Many of the R.T.F. Trainer types
are fitted with separate aileron servos but they come fitted with
a "Y" lead.
I've suggested to a number of trainees they delete the "Y" lead
for better control adjustment.
Colin
The following user(s) said Thank You: Brian

Please Log in or Create an account to join the conversation.

  • Brian
  • Topic Author
  • Offline
  • Platinum Member
  • Platinum Member
More
2 years 10 months ago #24787 by Brian
Replied by Brian on topic Back to Basics
Thanks Colin, I use "AIL" and "AUX 1" on my Spektrum Rxs for the aileron servos. Makes setting up differential aileron throw a lot easier. Having a "Y" lead is really convenient , especially when you get old and lazy, like me.
The following user(s) said Thank You: 4Pedalsfly

Please Log in or Create an account to join the conversation.

  • Brian
  • Topic Author
  • Offline
  • Platinum Member
  • Platinum Member
More
2 years 10 months ago #24788 by Brian
Replied by Brian on topic Back to Basics
Today I spent a short time trying to rescue the SE5As liteply wing tips. One was broken and had a piece missing, the other looked good enough to be used again. It wasn't, it had been broken and re-glued and fell apart when removing it. I used the busted bits as a template, made a sandwich of four pieces of liteply, threw caution to the winds and sawed all four pieces to the wing tip profile. I made the new tips oversize on length to enable them to be fitted to the existing wing structure. As it was designed many years ago, I assumed that the tip structure would be a simple replacement, however, with a tip profile in place, I eyeballed the end view of the wing tip and found that the tip profile has a distinct amount of extra incidence, not helpful in avoiding a stall, especially as there are four of them. A simple mod to the leading edge of the wing and the new tip section is now parallel to the centre line of the wing rib. Photos to follow, forgot to take the camera. Must try harder!
The following user(s) said Thank You: 4Pedalsfly, Phil Ford

Please Log in or Create an account to join the conversation.

  • Brian
  • Topic Author
  • Offline
  • Platinum Member
  • Platinum Member
More
2 years 10 months ago #24797 by Brian
Replied by Brian on topic Back to Basics
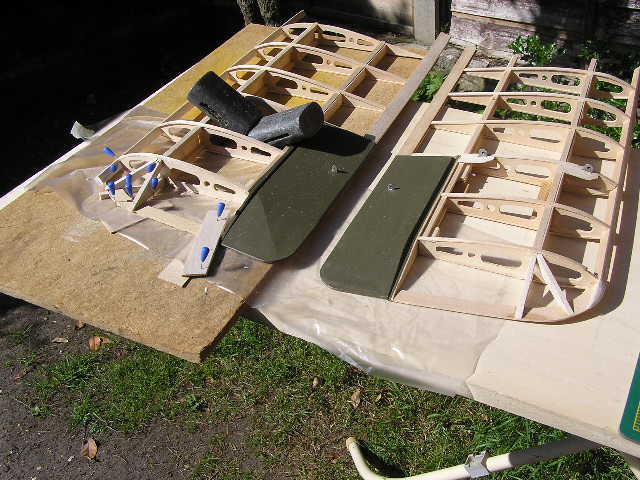
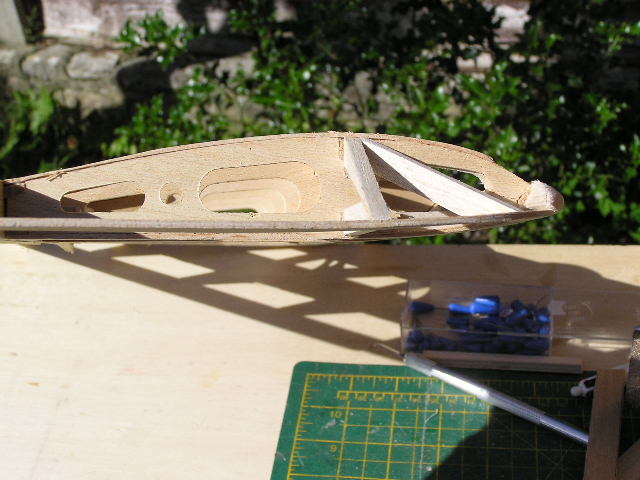
The Se5A's wingtips turned out to be easier to build than I had anticipated. The last job to do before assembling the wings to the centre section will be to replace the broken cap strips. The robust (Forth Bridge) wingtip structure will only be used on the lower wings, these are a bit vulnerable due to the narrow undercart allowing the model to tilt onto a wingtip very easily. There was a surprising amount of damage to the tips of the lower wings, complete replacement was the only way to fix them, one wing had a rib broken at the leading edge. I patched it using a balsa nose rib to hold the remaining liteply parts together. While waiting for the glue to dry, I gave the Multiplex Easy Glider (given to me by Simon) a look over. Unfortunately is has been painted with what looks like B&Q radiator paint, this doesn't look very nice, and even worse, the paint has got into the all foam control surface hinges, and virtually seized them solid. Adding to the complications, the factory fitted NiMh battery was firmly stuck in place. No point in doing anything to the model if the battery couldn't be removed. Luckily, after sawing a couple of chunks out of the top of the battery "bay", the battery gave in to the prodding from a large chisel. I'll replace the five AA cell monster with a 2S LiPo. Fortunately the battery sits right on the CofG, so no trim changes. I might be wasting my time in trying to get the paint off. The model is made of Elapor foam, I'll have to do some tests to see if its solvent resistant.
Attachments:

Please Log in or Create an account to join the conversation.

  • 4Pedalsfly
  • Away
  • Platinum Member
  • Platinum Member
More
2 years 10 months ago #24798 by 4Pedalsfly
Replied by 4Pedalsfly on topic Back to Basics
Hi Brian - Easy Glider - I take it that it's fitted with a canned motor, will you go brushless ?
Good work on the S.E.5 , look forward to seeing her finished.

Colin

Please Log in or Create an account to join the conversation.

Moderators: DaveBright
Time to create page: 0.302 seconds