Scratch Built Hannibal

  • Brian
  • Topic Author
  • Offline
  • Platinum Member
  • Platinum Member
More
6 years 11 months ago #12861 by Brian
Scratch Built Hannibal was created by Brian
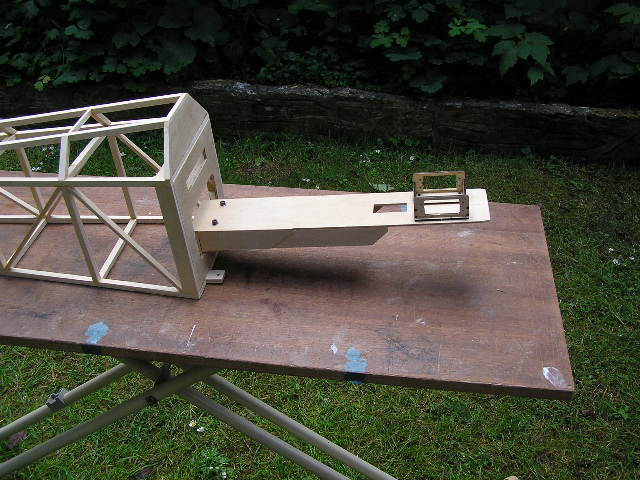
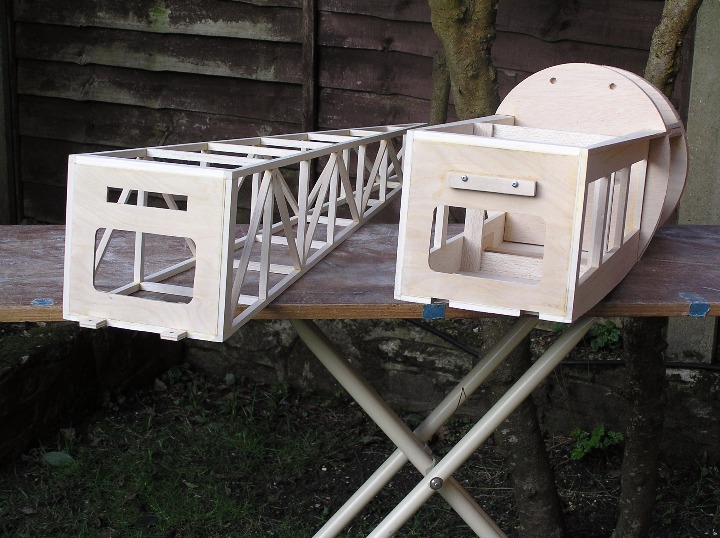
A while ago, I bought a kit for a Flair Magnattila. I had the plan copied, copied all the parts onto balsa and ply stock, built the model. Apart from standard hardware parts, my only purchases were the alloy cowl and the "vintage" wheels. When I finished the build, I sold the kit on eBay for rather more than I paid for it in a Club auction. While building the model, I found that the other two Flair Scouts in the series could be scaled from the Magnattila plan. The Attila was 3/4 the size of the Magnattila, and the mighty Hannibal was 1 1/2 times the size of the Magnattila. I'd had a Hannibal for a short time, bought it on the BMFA site, collected it from Norfolk (Hunstanton......long way to go). It was difficult to get the aeroplane into my old Vauxhall Meriva, strictly illegal too, I could hardly see past the cowl when looking left. Unfortunately, the first flight was the last. After four minutes or so of struggle, I brought the model in to land as the trim was outside the transmitter's adjustment range. I managed to put the model into a tree. I hadn't allowed for the size, so it was too far away from me. The work required to repair everything was about equal to a complete re-build. So that's what I did. In matters of scaling, I saw an article in RCM+E about cutting a Puppeteer in half, allowing the fully rigged front half to fit into a small hatchback. The Hannibal fus. is built in two sections, so all it needed was an extra bulkhead in each section. The photos are taken at an early stage in the build.
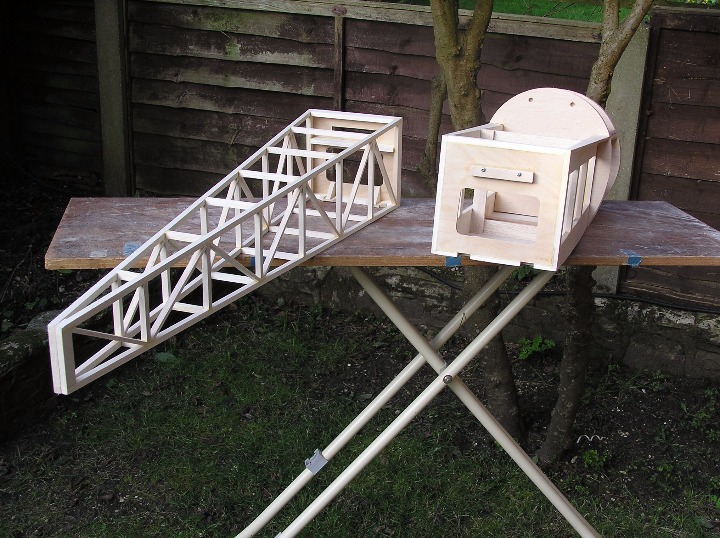
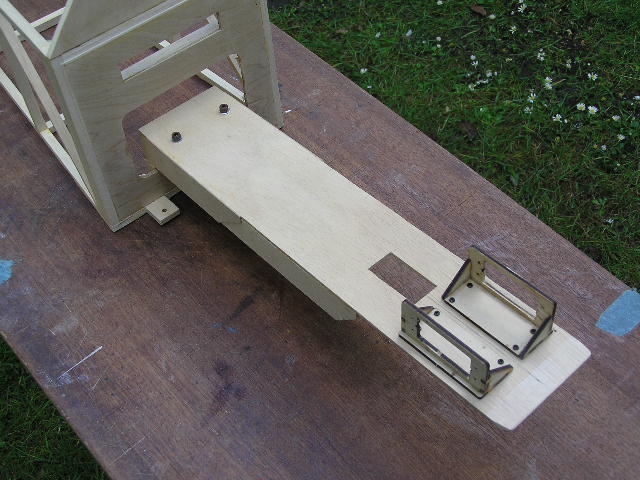
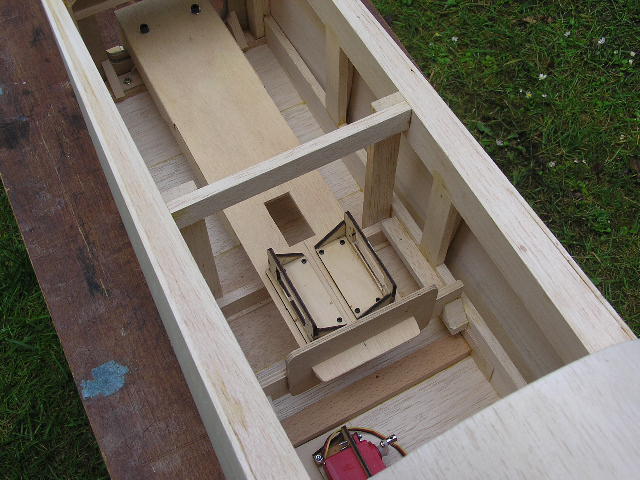
There is a "locking bar" on the front bulkhead, this locates in a slot in the rear bulkhead, pushing the rear fuselage upward locks it in position, two tabs on the underside of the rear bulkhead locate into two recesses under the front bulkhead. Two 4mm screws through the tabs into threaded inserts hold everything securely and in alignment. The servos for rudder and elevator are carried on a ply extension fitted to the rear bulkhead, no photos of that bit, but will take some if there's any interest in the project.
Attachments:

Please Log in or Create an account to join the conversation.

More
6 years 11 months ago #12874 by 4Pedalsfly
Replied by 4Pedalsfly on topic Scratch Built Hannibal
Brian - Thanks for posting pics, interesting solution to fitting a large model into a smaller car.
Look forward to more pics as the project progresses.
Colin.A

Please Log in or Create an account to join the conversation.

More
6 years 11 months ago #12899 by AlanF
Replied by AlanF on topic Scratch Built Hannibal
Looks like a practical solution to the transport problem. How do you arrange for control surface connections? Keep the pics coming :)

Please Log in or Create an account to join the conversation.

More
6 years 11 months ago #12900 by kevinross
Replied by kevinross on topic Scratch Built Hannibal
Hi Brain
I dont know what solution you have arrived at for the rudder / elevator controls but the logical way would be to place the servos in the removable tail section and just connect the plug during assembly.

Please Log in or Create an account to join the conversation.

  • Brian
  • Topic Author
  • Offline
  • Platinum Member
  • Platinum Member
More
6 years 11 months ago #12901 by Brian
Replied by Brian on topic Scratch Built Hannibal
Hi Kevin, the controls are attached to the rear part of the fuselage. The servos are right where the original design put them, but, there will be two elevator servos instead of the single servo on the original plan. I'll put up some more photos soon.

Please Log in or Create an account to join the conversation.

  • Brian
  • Topic Author
  • Offline
  • Platinum Member
  • Platinum Member
More
6 years 11 months ago #12906 by Brian
Replied by Brian on topic Scratch Built Hannibal
. Servo mount and forward location.

The mounting tongue for the elevator servos and rudder servo is attached to the bulkhead in the rear fuselage, and the front end locates in a slotted ply plate fitted to a cross brace in the front fuselage. It might need some sort of support when being transported, it seems a bit fragile just hanging on the bulkhead. After I fitted the servo brackets, I realised that one elevator servo will have to be reversed to keep the elevator wire runs identical. Rudder and elevators will be "pull/pull" operated. This build has taken a long time. Due to the size of the model, it was built on the "ironing board bench" in the garden outside my shed. There was room for the Hannibal in there, but no room for me at the same time. On colder days, the glue was a bit of a problem, drying quite slowly. I kidded myself that it was a good thing as it probably soaked in a bit better.
Attachments:

Please Log in or Create an account to join the conversation.

Moderators: DaveBright
Time to create page: 0.339 seconds