- Posts: 1048
- Thank you received: 415
Back to Basics
- Brian
-
 Topic Author
- Offline
- Platinum Member
-

Less
More
2 years 1 day ago #25804
by Brian
Replied by Brian on topic Back to Basics
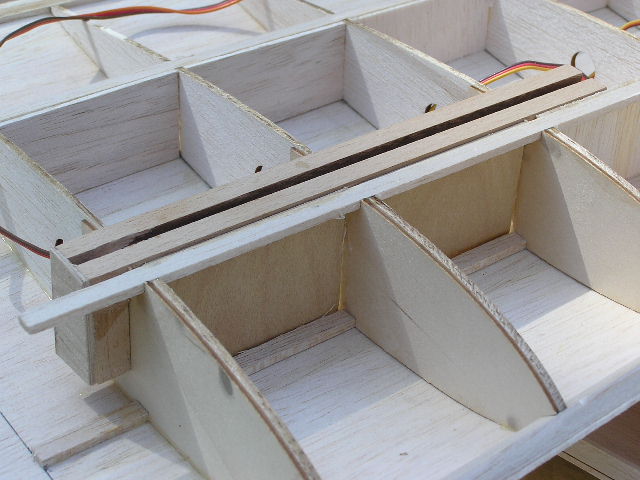
The weekend fairly flew by as I measured, re-measured and then cut the parts for the servo mounts and servo cover plates. I'd left the wings glued, pinned and weighted overnight, this morning the pins etc were removed and I was relieved to find no warps. Today I fixed the first servo onto its mount and attached the mount to its bearers with tiny screws only 8mm long. I cut and fitted some scrap balsa to use as a support frame for the servo cover, made the servo cover from 2mm liteply and cut a slot in it for the aileron pushrod and clevis. With everything glued up, I took a break for lunch, and then wasted an hour watching David Attenborough's programme on the last day of the dinosaurs. Not wasted really! Sewed up the mystery of where all the dinosaurs went overnight.
Returning to the building board I did a final check on the alignment of the servo arm and elevator horn. Something wasn't right, almost 1/4" out. It took a while to sort out what had happened, I'd fitted the servo the wrong way round, fortunately it was only a case of taking out the screws and re-positioning the servo mount in the right place.
Repeating the procedure for the other wing (correctly this time) was a lot quicker.
No pix today, forgot to change camera the batteries again.
The following user(s) said Thank You: 4Pedalsfly, kevinross
Please Log in or Create an account to join the conversation.
- Phil Ford
-

- Offline
- Administrator
-

Less
More
- Posts: 3169
- Thank you received: 944
2 years 1 day ago - 2 years 6 hours ago #25805
by Phil Ford
:oops:
Had you worried for a bit though didn't it?
Replied by Phil Ford on topic Back to Basics
. Something wasn't right, almost 1/4" out. It took a while to sort out what had happened, I'd fitted the servo the wrong way round.
:oops:
Had you worried for a bit though didn't it?
Last edit: 2 years 6 hours ago by Phil Ford.
Please Log in or Create an account to join the conversation.
- Brian
-
 Topic Author
- Offline
- Platinum Member
-

Less
More
- Posts: 1048
- Thank you received: 415
1 year 11 months ago #25823
by Brian
Replied by Brian on topic Back to Basics
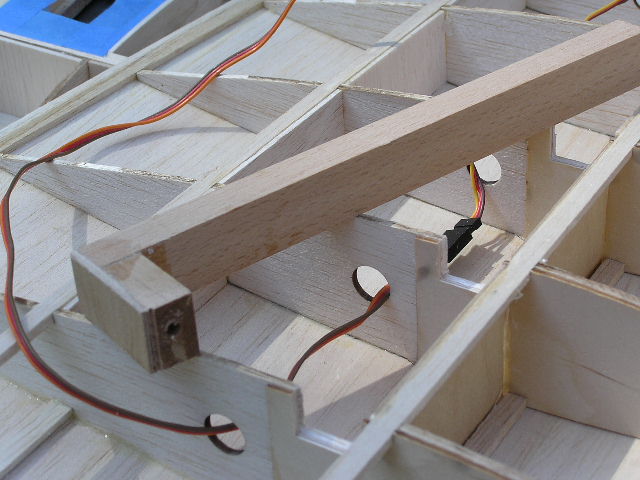
Four days late with the reply, but... yes Phil I was a bit rattled at the time, at least it didn't take a lot of effort to get things straightened out. Since the last posting I've done very little, apart from making a few more mistakes. The plan calls for a 1/2" square hardwood undercart mounting, I had 3/4" X 1/2". No problem, I cut the ribs and ply doublers to accept the wider mounting. Then I decided to add a block to the end of the mounting, drilled for the U/C wire, and (hopefully) take the load imposed when landing and not get " floppy" due to lack of bearing area. I had some plain 3/4" X 1/2" beech, sawed off a couple of 1" lengths and epoxied them to the ends of the U/C mounting. With the epoxy nicely cured, I epoxied the U/C mounts into the wing. Should have had a better look at the plan. There's about an inch and a half of mounting block extending beyond the outer rib. I should have cut the mounting and used the offcut instead of gluing on a piece of 3/4" X 1/2" and drilling it. So much for trying to keep the structure light, now I've introduced a load of hardwood that's doing nothing at all. Perhaps I'll be able to use a cutting disc in the Dremel and saw it off.
Please Log in or Create an account to join the conversation.
- Brian
-
 Topic Author
- Offline
- Platinum Member
-

Less
More
- Posts: 1048
- Thank you received: 415
1 year 11 months ago #25824
by Brian
Replied by Brian on topic Back to Basics
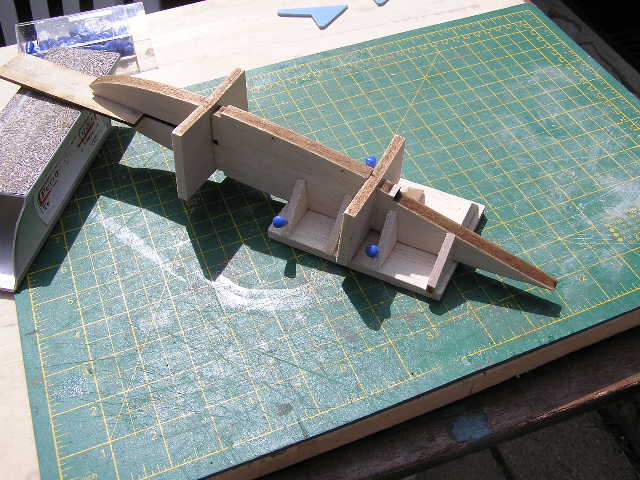
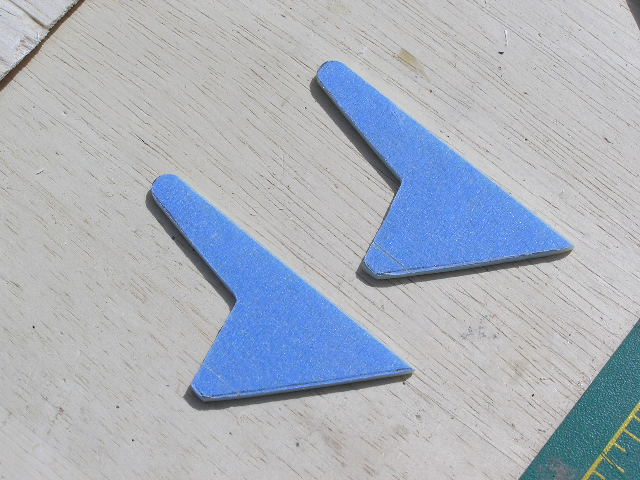
The centre rib in the wing is about 3/8" thick. It has to be cut into three parts to accommodate the two dihedral braces. To help get a fairly accurate assembly of the three ribs parts and the two dihedral braces, I knocked up a jig from scrap balsa. While the glued up jig dried, I made a pair of aileron horns from 2mm epoxy glass sheet. These were sawn out using a metal cutting blade in a 1930s Hobbies fretsaw frame. This saw cost me the princely sum of 2/6 or 2s6d or "Half a Crown" (12 1/2p) way back in 1957. The chap who sold it to me really didn't want to sell it at all, only because the frame had slight traces of rust on it. I think perhaps he was persuaded to sell it as I was doing my National Service and was in uniform at the time, woefully short of cash, and it must have had some bearing on the deal.
The following user(s) said Thank You: 4Pedalsfly
Please Log in or Create an account to join the conversation.
- Brian
-
 Topic Author
- Offline
- Platinum Member
-

Less
More
- Posts: 1048
- Thank you received: 415
1 year 11 months ago #25852
by Brian
Replied by Brian on topic Back to Basics
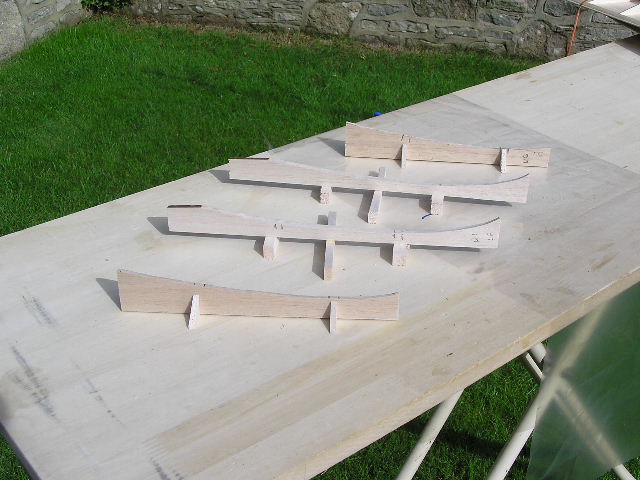
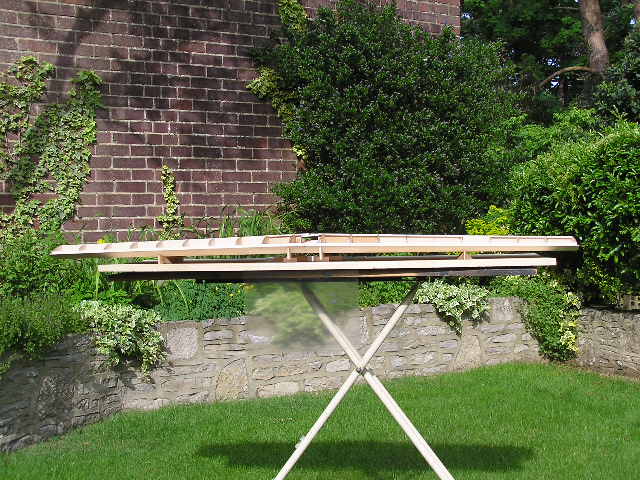
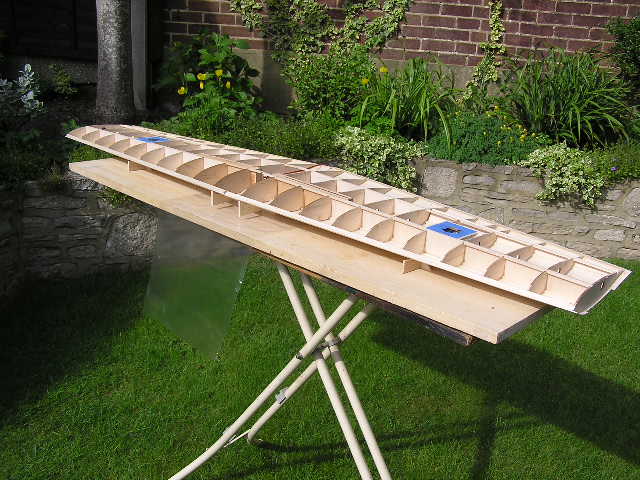
Warm sunshine and the lack of wind today persuaded me to get on with the Moonglow's wing. I haven't made things easy for myself by sheeting the top of the wing first. Now I'll have to join the two halves with everything upside down. I made up two sets of cradles to hold the wings at the correct dihedral angle. These were made from scrap bits, and when the wing halves were supported on them and a straight edge applied to one main spar, the distance from the straight edge to the opposite spar was a tad over 1 7/8". The plan calls for 2" dihedral under one wing tip, I don't think the designer would quibble over 1/8". When I fit the sheeting to the underside of the wing, I'm going to try a method I saw on YouTube. In the video, the sheet was taped to the trailing edge of the wing. Lots of PVA glue was applied to the ribs and structure, the sheet was flipped over and was made to contact all the glued areas, then the sheet was flipped back and all the glued areas showing on the sheet were re-glued, as were the ribs and structure. When the glue had dried, the sheet was flipped over again, and using a steam iron and a piece of cloth (tea towel?), the sheet was ironed on. I think this must be a better way than trying to "pin-and-glue-as-you-go".
The following user(s) said Thank You: 4Pedalsfly, kevinross
Please Log in or Create an account to join the conversation.
- Brian
-
 Topic Author
- Offline
- Platinum Member
-

Less
More
- Posts: 1048
- Thank you received: 415
1 year 10 months ago #25894
by Brian
Replied by Brian on topic Back to Basics
I don't know whether the following notes should be in "Tales of Stupidity" or something similar. Recently I've had a very ordinary common cold, first one for over four years. Apart from a runny nose, the only remaining symptom is a distinct loss of balance now and then. I should have known better, but yesterday I decided to transfer Moonglow's fuselage from the Winter workshop in the spare bedroom to the proper workshop (shed). I picked up the fuselage, turned towards the doorway and stepped into what seemed like a hole in the floor. Most odd! Even odder was the sight of the shattered fuselage after I'd picked myself up. Fortunately the top decking was only tack glued and ended up with only minor damage. First job will be to recover the ply formers and the engine bearers, I thought about contacting Belair to see if I could get a set of laser cut parts just for the fuselage, but I'll do that only if I can't make a decent job of rescuing the ply parts. If I have to rebuild the fuselage from scratch, there'll be one good thing, there won't be a brown edged dovetail joint right in the middle of the fuselage sides. No pictures, no point.
Please Log in or Create an account to join the conversation.
Moderators: DaveBright
Time to create page: 0.436 seconds
Latest Posts
-
-

- Models for sale
- In WimborneMac Members / For Sale - Exchange - Wanted
- by John Bannister
- 1 day 23 hours ago
-
-
-

- Fixed wing FPV pilots?
- In Activities / Jet Flight and EDF
- by kevinross
- 1 week 2 days ago
-
-
-

- How old are your Fuel Lines?
- In Activities / Gas-n-Glow
- by Phil Ford
- 1 week 3 days ago
-
-
-

- F4 Scale World championships 2024
- In Main Forum / Announcements
- by DavidTappin
- 1 week 5 days ago
-
-
-

- Back to Basics
- In Activities / Kits n Scratch Build
- by kevinross
- 2 weeks 2 days ago
-
-
-

- Valkyrie Slope Soarer
- In Activities / Glider & Slope
- by Phil Ford
- 2 weeks 5 days ago
-
©
2009 - 2024
WMAC PCF Design

