- Posts: 1023
- Thank you received: 583

Back to Basics
- kevinross
-

- Offline
- Platinum Member
-

Less
More
10 Jun 2022 19:31 #25928
by kevinross
Replied by kevinross on topic Back to Basics
pleased to hear your gyro has stopped toppling
The following user(s) said Thank You: Brian
Please Log in or Create an account to join the conversation.
- Brian
-
 Topic Author
- New Member
-

Less
More
- Thank you received: 0
15 Aug 2022 19:57 #26085
by Brian
Replied by Brian on topic Back to Basics
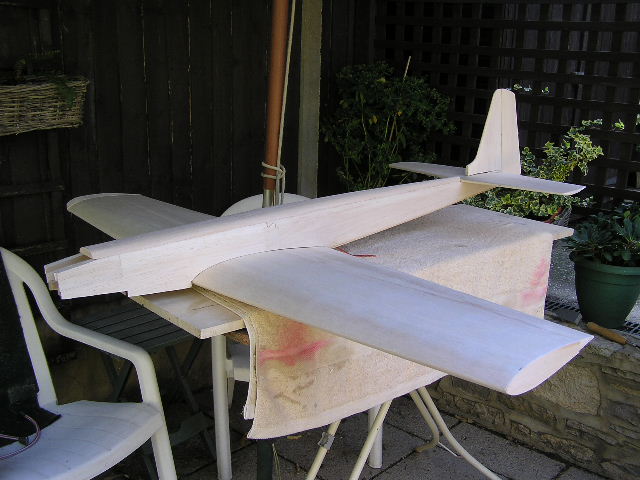
The past few weeks have been a bit of challenge one way or another, in the background I've been getting Moonglow's fuselage ready to re-build, a lot of tiny bits became several larger bits. Today all the fiddling proved to be worth the effort. I made an early start as the day was windless and slightly overcast, that made working on the model in the garden a lot easier. Things went pretty well, the glued up fuselage parts were held in a good old fashioned building jig, and by lunchtime, I was ready to fit the refurbished turtle deck. This was duly glued on after lunch, and by tea time I was able to take the fuselage out of the jig and do a trial fit of the fin and rudder as well as the tail plane and elevator. Checking the tail plane seating alignment with the wing seating showed a slight error. I slid a small piece of paper under one side of the tail plane seating, that brought both wing and tail plane into alignment. Tomorrow I'll shave a little away from the high side of the seating, I don't want a paper interface between fuselage and tail plane. Looking back, this is the first time I've had to rebuild a model before it has flown, at least there were no oily bits to make things even more difficult.
Please Log in or Create an account to join the conversation.
- Brian
-
Topic Author
- New Member
-
Less
More
- Thank you received: 0
20 Aug 2022 18:40 #26100
by Brian
Replied by Brian on topic Back to Basics
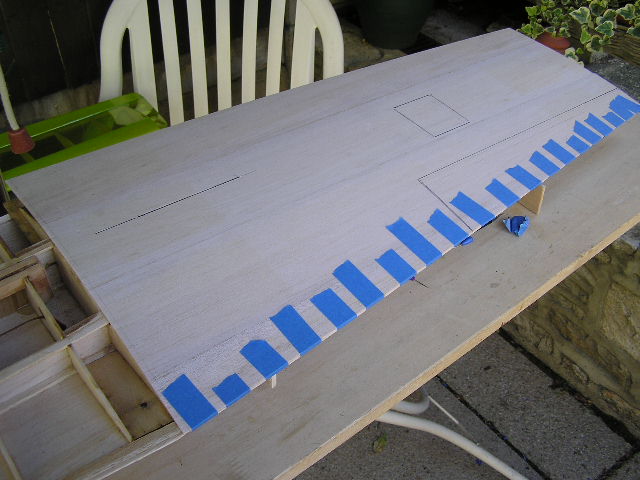
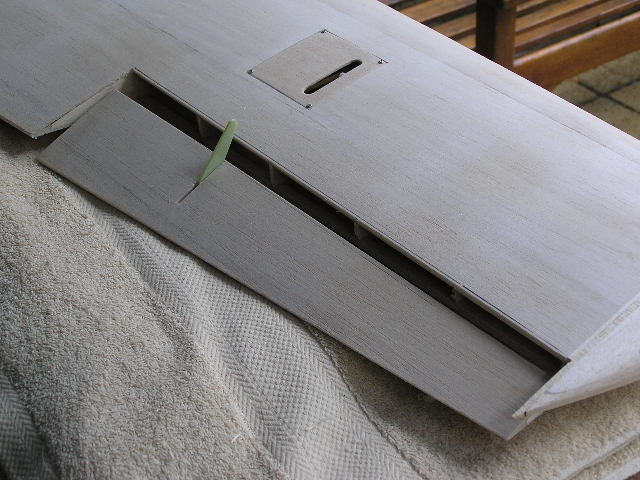
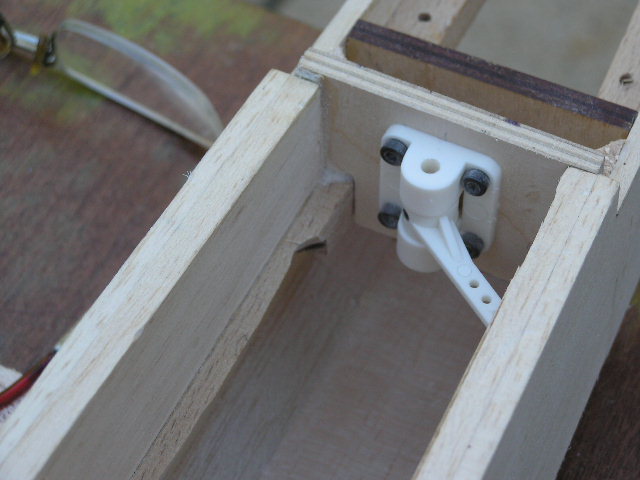
The wing was finally made into a one piece item a week or so ago, no drama at all. It has been sitting in its cradles showing no signs of warping, and today being suitably enthused after a couple of recent visits to the field, I started the task of sheeting the undersides of the wing. Fixing the sheet was no problem, I'd pre-cut each sheet ready to fix, all I had to do was line up the centre line mark, align the rear edge of the sheet with the trailing edge, And fit a tape "hinge" to maintain the alignment of the sheet during marking out and gluing up. The sheet has to be cut in various places, and I had fun with a sheet of lining paper trying to transfer the positions of the cuts for the ailerons, the servo hatch and the slot for the U/C wire. I had a couple of "goes" with varying results, caused I think by slight movements mainly caused by strongly gusting wind. Finally I hit on the idea of locating the areas to be cut with drawing pins taped on at the corners of the servo cover, each end of the U/C wire slot, and the two cuts needed to release the aileron from the main structure. I used standard 3M masking tape marked with a cross using a black ballpoint pen. The drawing pin was placed point up from the sticky side, the markings on the tape were lined up and the thing was pushed down firmly onto the structure. The pins were positioned, the sheet was swung down on the tape hinge, and all the pin points appeared above the sheet surface. I marked out the various cut outs and cuts using a straight edge against the pins. With that job out of the way, a final sanding of the wing structure and a good dusting off was followed by the application of a bead of Aliphatic PVA glue to all the contacting areas. The sheet was duly swung over and smoothed into position. An assortment of pins and tape were used to hold the leading edge tightly. Hope I can remember to cut on the "safe" side of the marked out cuts. I had intended to attach the wing skin by gluing it up, and swinging back the sheet on its hinge and leaving the glue to dry, Then using a domestic iron, replace the sheet and iron it down. Instead I have used generous amounts of glue, and when its all dried, I'll use the iron to ensure that the sheet is well and truly stuck down.

Please Log in or Create an account to join the conversation.
- Brian
-
Topic Author
- New Member
-
Less
More
- Thank you received: 0
21 Aug 2022 19:51 #26103
by Brian
Replied by Brian on topic Back to Basics
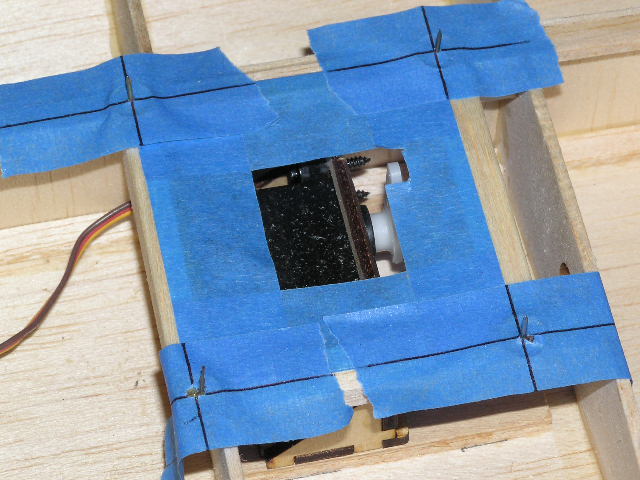
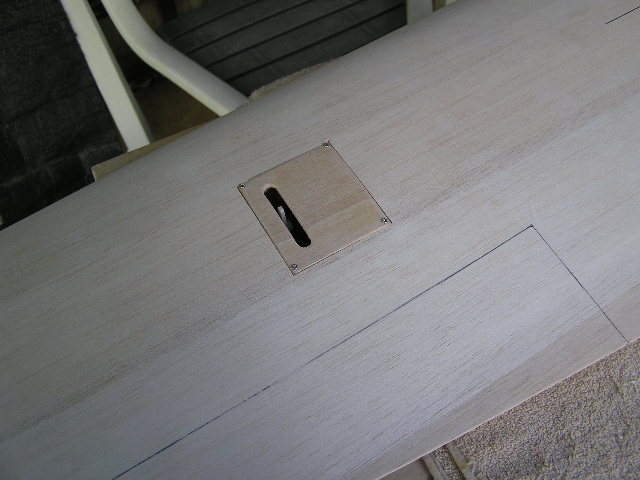
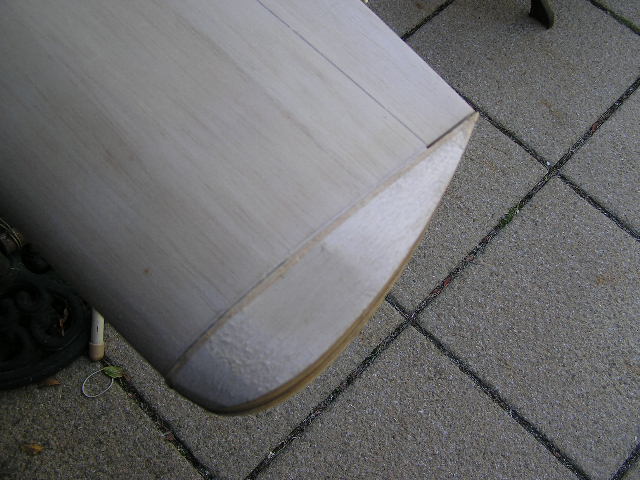
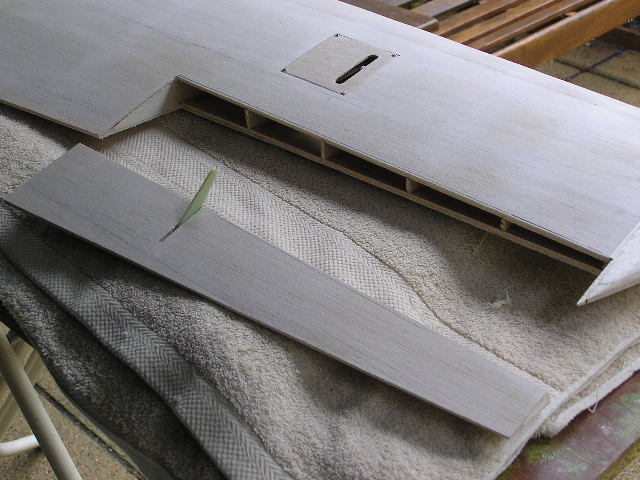
Today was fairly calm, and after a leisurely start, the top sheeting for the wing was completed well before lunchtime. I let the glue dry for three hours or thereabouts, then tried the steam iron and tea towel biz. It takes ten to fifteen minutes to "iron" each wing panel, I was pleased to find that it really does work. The bottom sheet on the right wing had lifted from the ribs in a couple of places, one really showed as it was the tip rib. Ironing re-fixed the sheet to the rib and it was still fixed this evening. It was gratifying to find that ironing works on glue that has been dry for a couple of days. I'd glued up the laser cut wing tip blocks, today I found they were a bit on the short side, I corrected this by adding a layer of 3/32" sheet to the inboard face. I fitted a 1/16" end rib to each wing tip, this is intended to give a 1/16" gap between the tip and the end of the aileron. I glued the tip blocks in place, and while the glue was drying, I cut out the access hole for the servo cover. The hole was cut slightly inside the marked outline, I checked the marked lines with the servo cover, to my surprise, everything lined up. Finished the day by temporarily fitting the servo cover. Not feeling smug yet, not until the second servo cover is done. Before putting it all away, I just had to dry fit all Moonglow's bits together, well you have to, helps keep the enthusiasm going.
Please Log in or Create an account to join the conversation.
- kevinross
-
- Offline
- Platinum Member
-
Less
More
- Posts: 1023
- Thank you received: 583
21 Aug 2022 22:32 #26108
by kevinross
Replied by kevinross on topic Back to Basics
I guess your recent episode has taken its toll but pleased to see glad to see your back to balsa bashing. Keep it up !
The following user(s) said Thank You: Brian
Please Log in or Create an account to join the conversation.
- Brian
-
Topic Author
- New Member
-
Less
More
- Thank you received: 0
22 Aug 2022 12:49 #26114
by Brian
Replied by Brian on topic Back to Basics
The second servo cover was duly fitted this morning, quite relieved to find that there was no problem with the position and fit.
After a mug of strong coffee, I tentatively cut through the lines marking out the position of the aileron. The cuts were made with a deep bladed razor saw, and left a bit of cleaning up to do on the aileron upper leading edge. My marking out for the position of the aileron horn was accurate and the horn fitted quite nicely. Must remember to drill some holes to allow the epoxy to flow around it. The open area of the wing will be filled with a hard balsa spar after cutting back the ribs to make room for it.
After a mug of strong coffee, I tentatively cut through the lines marking out the position of the aileron. The cuts were made with a deep bladed razor saw, and left a bit of cleaning up to do on the aileron upper leading edge. My marking out for the position of the aileron horn was accurate and the horn fitted quite nicely. Must remember to drill some holes to allow the epoxy to flow around it. The open area of the wing will be filled with a hard balsa spar after cutting back the ribs to make room for it.
Please Log in or Create an account to join the conversation.
- Brian
-
Topic Author
- New Member
-
Less
More
- Thank you received: 0
22 Aug 2022 16:53 #26116
by Brian
Replied by Brian on topic Back to Basics
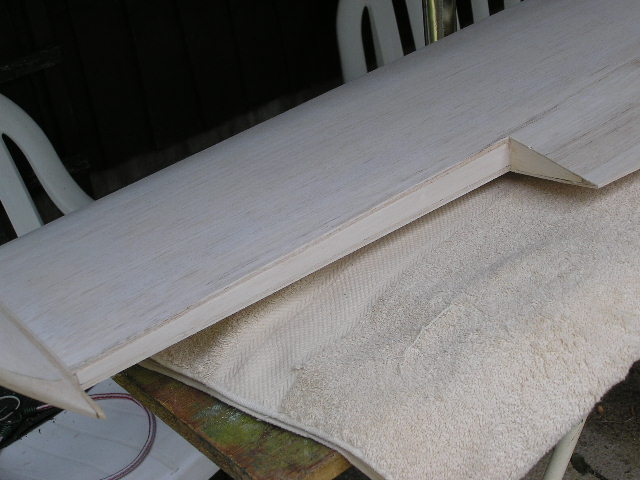
The second aileron cut away from the wing rather more cleanly than the first one. I used a slightly different method, holding the saw against the angled face of the aileron, rather that square with the rear spar. Unfortunately I made up for the better finish by missing the cut marks for the aileron horn by 2mm, a small patch of 1/16" sheet put things to rights. Finished the day by fitting hard balsa spars into the wing to give mounting areas for the sewn aileron hinges. Now its drizzling again and the wind has picked up a bit, no chance of further building today.
Please Log in or Create an account to join the conversation.
- Phil Ford
-

- Offline
- Moderator
-

Less
More
- Posts: 3156
- Thank you received: 903
23 Aug 2022 09:40 #26119
by Phil Ford
Replied by Phil Ford on topic Back to Basics
It is handy working with balsa when a slight cock-up happens, sticking in a bit of scrap balsa in to cover it up. ")
Please Log in or Create an account to join the conversation.
- Brian
-
Topic Author
- New Member
-
Less
More
- Thank you received: 0
23 Aug 2022 19:12 - 23 Aug 2022 19:15 #26122
by Brian
Replied by Brian on topic Back to Basics
Its really no drama at all to patch a model before the covering's on. During the wing skinning I went indoors to get some more coffee, I needed to stay awake for the whole afternoon. During my brief visit to the kitchen, a freak gust blew all the loose balsa around the garden, and the wing into the Pyracantha bush, commonly called Firethorn. A bad tempered plant with branches covered in short twigs which are in turn covered in very sharp spikes. One wing was peppered by the thorns, and one enterprising twig had found a weak spot between two ribs and poked a neat hole. Now filled by a small rectangular patch. The rest of the damage will be made good with lightweight Polyfilla tinted with instant coffee granules. Looks good, smells good too.
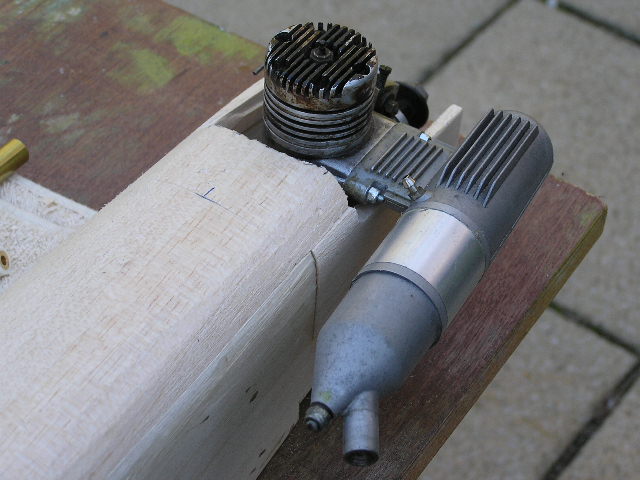
Today I have been dithering about how to fit a silencer/muffler to the Merco .61. In its heyday, the Merco sported a big black dustbin silencer, rather rare now. Rummaging through my engine bits I came across a silencer that looked like an OS but had no markings at all. The hole pitch in the silencer was within 0.1mm of the mounting hole pitch in the Merco, hooray! Unfortunately the holes in both items are tapped holes, boo! After a bit of Internet searching, I came across a Merco .61 at SMC (less silencer), and an outfit called "mecoa.com", an American based company that do some Merco spares, unfortunately a silencer wasn't one of them. Now comes the decision, it might be possible to get some studding to fit the Merco, but I doubt it since most of the suppliers are almost entirely Metric in the smaller sizes. The Merco casting seems to be quite robust, and would probably survive having the holes re-tapped slightly oversize (M3.5 X .6), as long as its done gently. The new studs would be fitted with Loctite. The silencer holes could be drilled out to 3.6 mm. Dia, and cutting a couple of slots where the section of the casting changes, would enable the silencer to be fitted to the new studs with nuts and washers. Fiddly but possible. I'll probably be awake half the night worrying about it.
Today I have been dithering about how to fit a silencer/muffler to the Merco .61. In its heyday, the Merco sported a big black dustbin silencer, rather rare now. Rummaging through my engine bits I came across a silencer that looked like an OS but had no markings at all. The hole pitch in the silencer was within 0.1mm of the mounting hole pitch in the Merco, hooray! Unfortunately the holes in both items are tapped holes, boo! After a bit of Internet searching, I came across a Merco .61 at SMC (less silencer), and an outfit called "mecoa.com", an American based company that do some Merco spares, unfortunately a silencer wasn't one of them. Now comes the decision, it might be possible to get some studding to fit the Merco, but I doubt it since most of the suppliers are almost entirely Metric in the smaller sizes. The Merco casting seems to be quite robust, and would probably survive having the holes re-tapped slightly oversize (M3.5 X .6), as long as its done gently. The new studs would be fitted with Loctite. The silencer holes could be drilled out to 3.6 mm. Dia, and cutting a couple of slots where the section of the casting changes, would enable the silencer to be fitted to the new studs with nuts and washers. Fiddly but possible. I'll probably be awake half the night worrying about it.
Last edit: 23 Aug 2022 19:15 by Brian. Reason: Clarified drilled hole size.
Please Log in or Create an account to join the conversation.
- Brian
-
Topic Author
- New Member
-
Less
More
- Thank you received: 0
24 Aug 2022 18:52 #26131
by Brian
Replied by Brian on topic Back to Basics
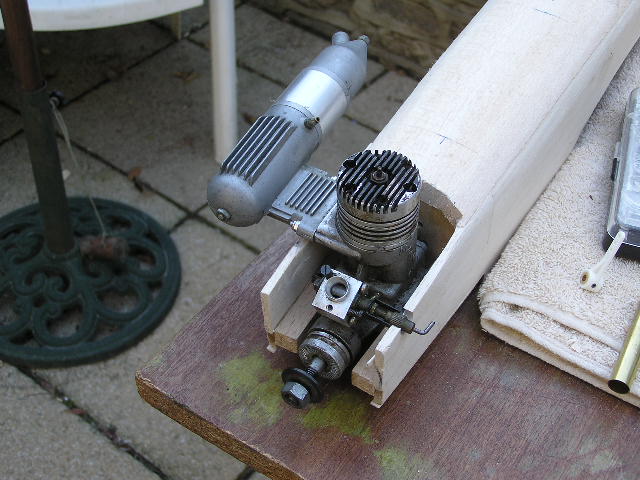
Oily hands day today, modified the "lookalike" OS silencer by drilling out the M3 tapped holes to 3.1mm Dia., filed clearance slots for the 3mm nyloc nuts. Increased the depth of the holes in the engine exhaust stub 2.2mm Dia X an extra 7mm deep. Re-tapped the holes in the exhaust stack 3.0mm X 0.5. Cut and dry fitted two lengths of M3 studding. Slid the silencer over the studs and fiddled the nuts on to the stud ends. Took it all apart, cleaned up the Merco and the studs, refitted them with Loctite. Reassembled the silencer fitted the nyloc nuts, bit short of room, but they tightened one flat at a time. It'll all have to come apart again as I completely forgot that the mating faces of the silencer and the engine's exhaust stack must be flat and probably will need a gasket. Little bit of woodwork to clear the needle valve and silencer.Fitted an extra former to take the nosewheel mounting. Last minute decision to make it a steering nosewheel.
Please Log in or Create an account to join the conversation.
Moderators: DaveBright
Time to create page: 0.396 seconds
Latest Posts
- No posts to display.
©
2009 - 2026
WMAC PCF Design