- Thank you received: 0

Back to Basics
-

- New Member
-

Less
More
4 years 4 months ago #24742
by
Replied by on topic Back to Basics
I’m so looking forward to see the SE5 flying, I can’t tell you how much! More power to your elbow (and your trusty 5/16 ferret) Brian!
Please Log in or Create an account to join the conversation.
- Brian
-
 Topic Author
- Offline
- Platinum Member
-

Less
More
- Posts: 1044
- Thank you received: 414
4 years 4 months ago #24744
by Brian
Replied by Brian on topic Back to Basics
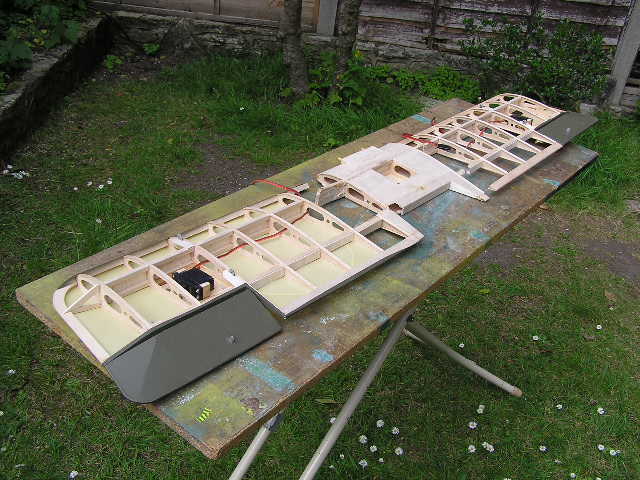
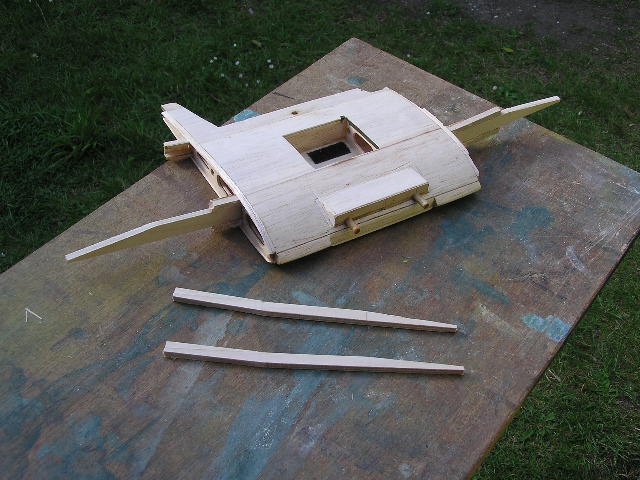
With the covering removed, the wing fell neatly into three sections. The previous owner's repair had attempted to do the job with the covering in place, a shame because the epoxy used made it difficult to get the wing back to its original just plain busted state. Once again the thin diamond disc in the Dremel got most of the bits either cleaned up or cut away completely. I plan to reinforce the spars in the wings and centre section by fitting long ply webs between the main spars. The next job will be to remove the sheeting from the centre section to enable access for fitting/gluing the new spar inserts.
The following user(s) said Thank You: Phil Ford
Please Log in or Create an account to join the conversation.
- Brian
-
Topic Author
- Offline
- Platinum Member
-
Less
More
- Posts: 1044
- Thank you received: 414
4 years 4 months ago #24751
by Brian
Replied by Brian on topic Back to Basics
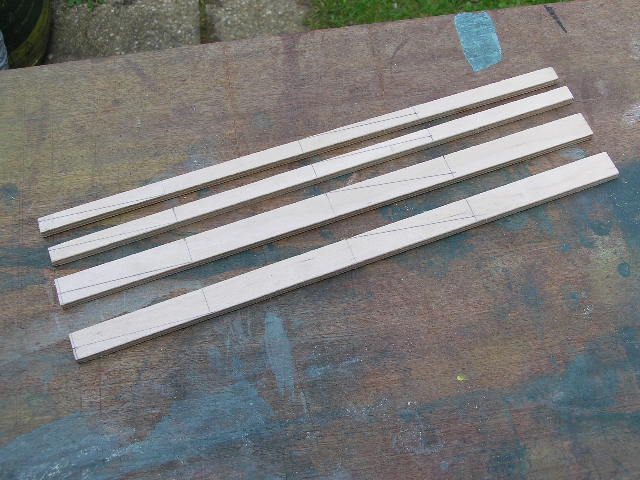
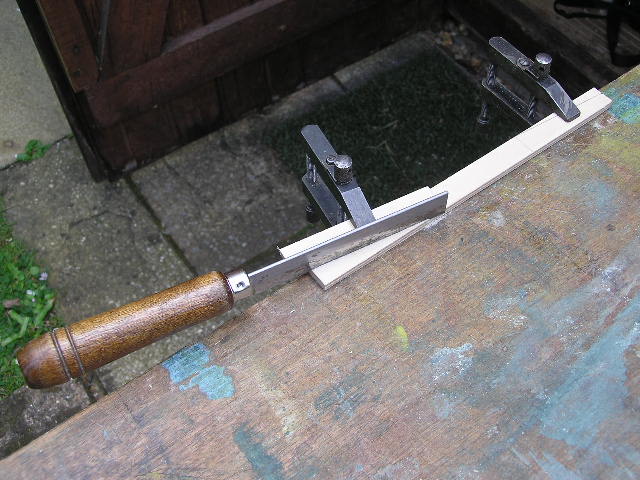
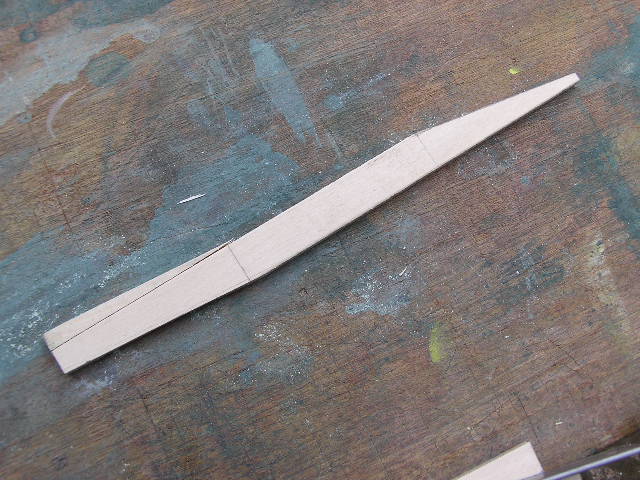
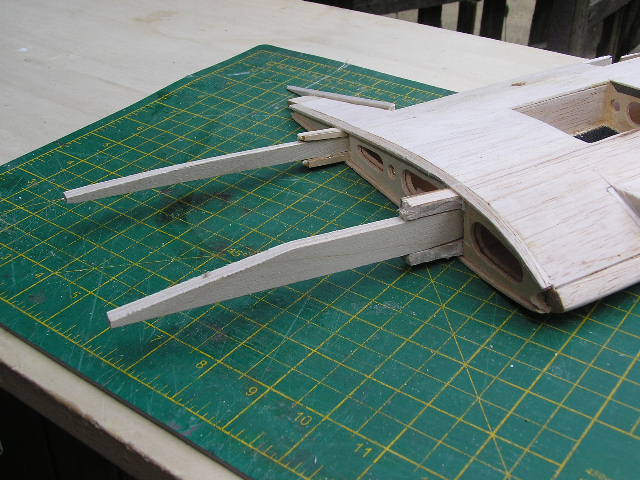
The Flair method of joining the wings to the centre section uses thin ply dihedral braces, these are quite short, and although might be adequate for normal day to day flying, they were lacking when it came to taking a serious tumble, as I'm sure the SE5A did just that. I've made up some new spar inserts from 1/4" ply. These will fit between the existing 1/4" square spars. Just in case I've prepared enough to be able to rebuild the upper wing assembly as well.
The SE5A plan shows the root ribs on the wings being set by using an angle template. I measured the angle as 6 degrees, using the angle I made up a packing block to fit under the last rib, rather than rely on the accuracy of the dihedral braces to get both wings to the correct dihedral. Might be a long winded way of going about it, but once the fiddly bits are sorted, it should prove to be a straightforward as well as accurate rebuild. The photos show the spar inserts in various stages, the saw is a "Zona", I've used it for at least twenty years, it enables very accurate cutting with a nice thin kerf that hardly notices when you cut bits apart and glue them back together. This is the way I made the LE and TE spars for a Copland 1937 Wakefield, so the idea isn't mine. Piece of scrap and a couple of clamps make cutting an accurate line easy.
The SE5A plan shows the root ribs on the wings being set by using an angle template. I measured the angle as 6 degrees, using the angle I made up a packing block to fit under the last rib, rather than rely on the accuracy of the dihedral braces to get both wings to the correct dihedral. Might be a long winded way of going about it, but once the fiddly bits are sorted, it should prove to be a straightforward as well as accurate rebuild. The photos show the spar inserts in various stages, the saw is a "Zona", I've used it for at least twenty years, it enables very accurate cutting with a nice thin kerf that hardly notices when you cut bits apart and glue them back together. This is the way I made the LE and TE spars for a Copland 1937 Wakefield, so the idea isn't mine. Piece of scrap and a couple of clamps make cutting an accurate line easy.
The following user(s) said Thank You: 4Pedalsfly,
Please Log in or Create an account to join the conversation.
- Brian
-
Topic Author
- Offline
- Platinum Member
-
Less
More
- Posts: 1044
- Thank you received: 414
4 years 4 months ago #24760
by Brian
Replied by Brian on topic Back to Basics
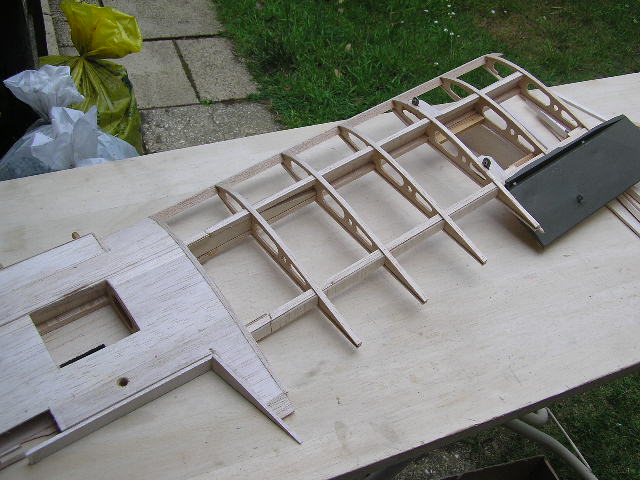
The spar reinforcements were glued up this morning. As they were "drying", "setting", "curing", I attacked the lower centre section. The object was to remove all the previous attempts to repair the damaged wings. Unfortunately large quantities of epoxy had been used. Fortunately I have a way of dealing with it. Softening the epoxy with a heat gun, I managed to get most of it out of the way with the tool that is normally used to "pick out" the balsa after using a hinge slotting tool. Final establishing an area to accept the new spar reinforcements was carried out using a small diamond disc in a Dremel flexible drive and a small X-Acto saw blade. This evening I offered up the spar bits, they slotted into place as though they had been made to do just that. The photo says the rest
The following user(s) said Thank You: Phil Ford
Please Log in or Create an account to join the conversation.
- Brian
-
Topic Author
- Offline
- Platinum Member
-
Less
More
- Posts: 1044
- Thank you received: 414
4 years 4 months ago #24776
by Brian
Replied by Brian on topic Back to Basics
Mistakenly, I felt just a bit smug after the two main spar reinforcements were dry fitted. The reinforcement for the rear spar was a bit more complicated as the top of the spar follows the upper contour of the wing rib. I had to reduce the depth of the spar from 3/8" to 5/16" at the rear face. The really fiddly bit was cutting away the ribs between the spars to allow the ply reinforcements to be slid into place. This morning I found that my "inexhaustible supply" of assorted balsa strip did not have a single piece of either 1/4" square or 1/4" X 1/8" hard balsa. I had just one piece of 5/16" square left over from the Hannibal build of years ago. I band sawed it to the size required, and now I wouldn't be surprised if I'll need some of the original section for another project. Slotting the wing rib to take the spars was a little awkward due to the broken spars getting in the way. I used the Dremel flexi extension and a very small burr. Drilling lots of tiny holes enabled the slot to be cut fairly quickly. The right wing was dry fitted to the centre section, the outer rib sits on the packing block. I'll splice in some new balsa in the area of the original break, and that should leave the lower right wing ready to be glued up. The left wing will be a little more complicated as the rear part of the centre section broke away still attached to the wing.

Please Log in or Create an account to join the conversation.
- kevinross
-

- Offline
- Platinum Member
-
Less
More
- Posts: 1028
- Thank you received: 583
4 years 4 months ago #24781
by kevinross
Replied by kevinross on topic Back to Basics
Hi Brian
Because your model is traditional of the era when we didn't have computer radios the design appears to use a single aileron servo with linkages .It would be a great opportunity to fit individual mini servos to control the ailerons directly
Because your model is traditional of the era when we didn't have computer radios the design appears to use a single aileron servo with linkages .It would be a great opportunity to fit individual mini servos to control the ailerons directly
Please Log in or Create an account to join the conversation.
Moderators: DaveBright
Time to create page: 0.285 seconds
Latest Posts
-
-

- Various Gliders from Dave Ambrose ex W.M.A.C Membe...
- In WimborneMac Members / For Sale - Exchange - Wanted
- by 4Pedalsfly
- 1 week 1 day ago
-
-
-

- Ray Ivey's Models
- In WimborneMac Members / For Sale - Exchange - Wanted
- by Phil Ford
- 2 weeks 7 hours ago
-
©
2009 - 2025
WMAC PCF Design