- Thank you received: 0

Back to Basics
- Brian
-
 Topic Author
- New Member
-

Less
More
15 Nov 2021 12:20 #25362
by Brian
Replied by Brian on topic Back to Basics
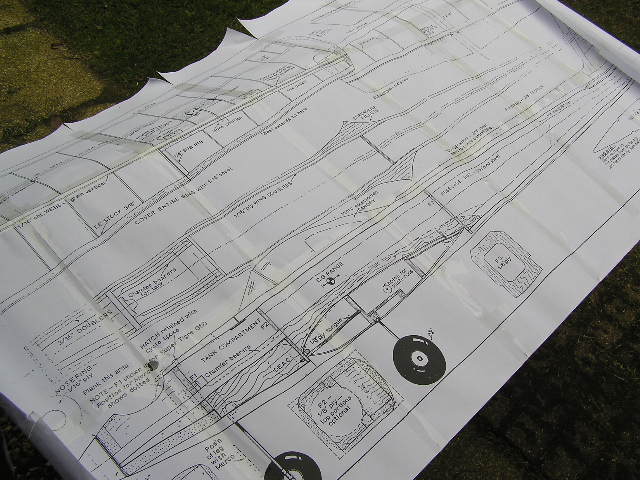
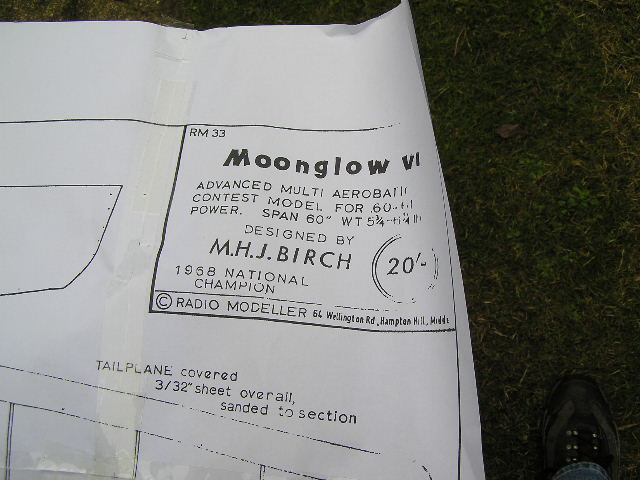
The fuselage sides, doublers, triangle section and engine bearers are all glued. Tail plane seating cut. Slight hiccup...I forgot to chamfer the top edges of the bearers where they pass through the tank bay. Could have been worse, very awkward if I'd glued in the formers. I've tried to find out as much as I can about Moonglow on the Internet. Some useful hints about dihedral and length of nose wheel leg, best position for C of G etc. Apart from that there isn't much at all, and even less about the later models (Capricorn and International) that were designed by Mike Birch. Both these models were kitted and were available from either RipMax or Mick Reeves. Sad that there's so little information available. Looking at the attached photos, isn't it amazing what you could get for a quid back in 1968?

Please Log in or Create an account to join the conversation.
- Phil Ford
-

- Offline
- Moderator
-

Less
More
- Posts: 3156
- Thank you received: 903
15 Nov 2021 12:38 - 15 Nov 2021 12:39 #25363
by Phil Ford
40 Mars Bars or 9 packs of fags or 6 pints of beer at least.:lol:
Replied by Phil Ford on topic Back to Basics
isn't it amazing what you could get for a quid back in 1968?
40 Mars Bars or 9 packs of fags or 6 pints of beer at least.:lol:
Last edit: 15 Nov 2021 12:39 by Phil Ford.
Please Log in or Create an account to join the conversation.
- Brian
-
Topic Author
- New Member
-
Less
More
- Thank you received: 0
21 Nov 2021 08:55 #25387
by Brian
Replied by Brian on topic Back to Basics
Building Moonglow's fuselage wasn't as easy as I thought. The formers aren't quite the same as the original of 1968, and having the luxury of laser cut ones, I didn't check them. The design has a slight taper to the fuselage in the area of the wing seating, this means that the formers are definitely not "square" to the fuselage sides. I ended up with a distinctly banana shaped fuselage that took several hours to dismantle by gently sawing at the glue joints until they gave way. With the errant former former rectified, I'll re-build the fuselage in a jig. If I hadn't been so lazy in not bothering to dig it out of the back of the shed, I'd have been a bit further advanced in the build .At least I managed to cut a chamfer on the engine bearers, and an 10 oz tank sits in quite nicely and leaves enough room for the throttle wire.
I don't know how thirsty a Merco .61 is, just hope that a tankful will be enough to fly a "Clubman" schedule.
I don't know how thirsty a Merco .61 is, just hope that a tankful will be enough to fly a "Clubman" schedule.
Please Log in or Create an account to join the conversation.
- kevinross
-
- Offline
- Platinum Member
-

Less
More
- Posts: 1023
- Thank you received: 583
21 Nov 2021 09:47 #25388
by kevinross
Replied by kevinross on topic Back to Basics
:lol: very inconsiderate of you not to photo your mistake and post in the appropriate section Brian :lol: :lol:
Please Log in or Create an account to join the conversation.
- Brian
-
Topic Author
- New Member
-
Less
More
- Thank you received: 0
21 Nov 2021 10:53 #25389
by Brian
Replied by Brian on topic Back to Basics
Too ashamed Kevin.
At least it made you laugh.
Quite a lot !
Nice to know that my efforts aren't wasted.
Anyway I don't suppose that'll be the only clanger I'll make.
I'll take a picture of the next one and I won't cheat with "soft focus".
At least it made you laugh.
Quite a lot !
Nice to know that my efforts aren't wasted.
Anyway I don't suppose that'll be the only clanger I'll make.
I'll take a picture of the next one and I won't cheat with "soft focus".
Please Log in or Create an account to join the conversation.
- Brian
-
Topic Author
- New Member
-
Less
More
- Thank you received: 0
02 Dec 2021 10:06 - 02 Dec 2021 10:07 #25420
by Brian
Replied by Brian on topic Back to Basics
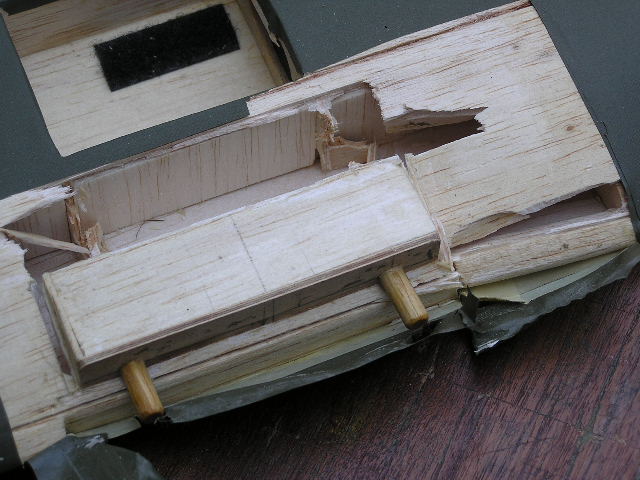
Building a banana shaped fuselage was only the first of two simple mistakes. Fortunately, between preparing to refit the formers, I had another look at the plan. Unfortunately its printed in a very pale grey and is difficult to read. Fortunately the OuterZone PDF A4 prints I had made were good and black, so although the plan dates back to the '60s, its easier to read the notes etc. That's when I found that the front bulkhead (firewall) is further forward when installing a Merco .61. The original design was for a Super Tigre, and is about an inch further back.
Unfortunately the kit cutters didn't allow for this, and the fuselage sides ended short I had to add a couple of pieces of 3/16" balsa to the sides to provide support for the re-positioned firewall.
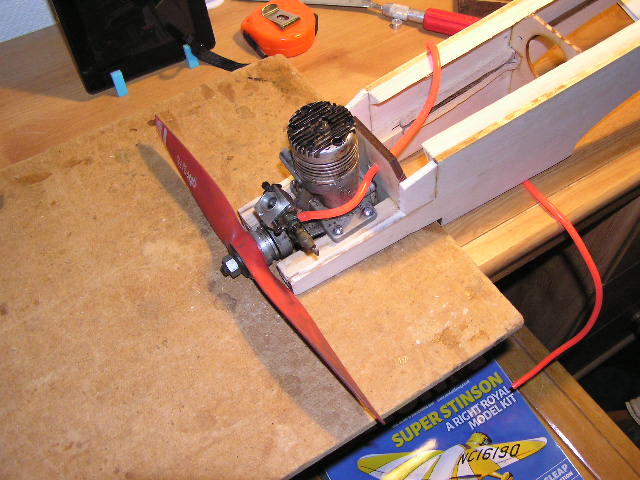
Naturally I couldn't wait to see if the engine fitted......of course it did! The fuel/ pressure tubes line up and so does the throttle wire.
Unfortunately the kit cutters didn't allow for this, and the fuselage sides ended short I had to add a couple of pieces of 3/16" balsa to the sides to provide support for the re-positioned firewall.
Naturally I couldn't wait to see if the engine fitted......of course it did! The fuel/ pressure tubes line up and so does the throttle wire.
Last edit: 02 Dec 2021 10:07 by Brian. Reason: Grammar
Please Log in or Create an account to join the conversation.
- Brian
-
Topic Author
- New Member
-
Less
More
- Thank you received: 0
02 Dec 2021 19:06 #25421
by Brian
Replied by Brian on topic Back to Basics
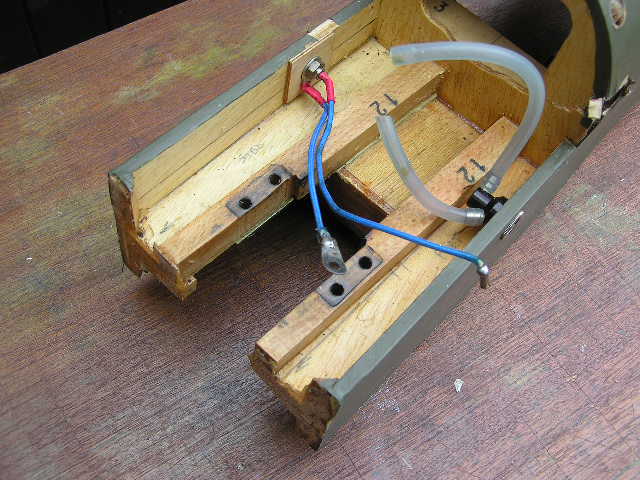
Until today, I didn't realise that fitting a Merco .61 to a fuselage could be such fun. The last Merco I had was in a model called "Uproar", a design by Chris Olsen, I think I sold the model to David Wedge a couple of years ago, now I wish I'd kept it! After marking and checking the mounting hole positions, I braved the chilly garden outside my shed, and drilled the required holes. Back indoors and thawed out, I popped the Merco between the bearers, and was suitably relieved when all four screws went in without any fuss. Then I decided to alter the position of the fuel intake nipple on the carburettor. "As supplied" it was tilted upwards, no doubt it would have worked alright, but I'm trying to get things as neat as possible. The Merco's carb is a well engineered item, it took a while to figure out which screws to loosen, and which nut released the intake nipple housing. Eventually the penny dropped and the necessary adjustments were made. Earlier today, I checked my stock of assorted strip and sheet balsa, unfortunately I don't have anywhere near enough of anything to be able to complete the Moonglow. I made a list of 1/16" and 3/32" sheet needed, good job I was sitting down as I hadn't realised how expensive balsa has become. I wondered if I could "Crowd Fund" the purchase, then I remembered that our kind and caring Government had given me a heating allowance that would cover the cost. Now it will be woolly hats, long underfugs and lots of jumpers as I turn down the heating and place an order with The Balsa Cabin. Cruel I know, but needs must.
Please Log in or Create an account to join the conversation.
- Brian
-
Topic Author
- New Member
-
Less
More
- Thank you received: 0
16 Feb 2022 15:14 #25576
by Brian
Replied by Brian on topic Back to Basics
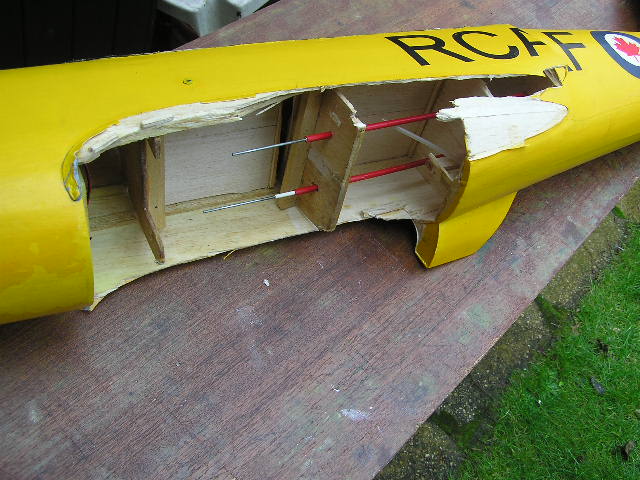
I had a look at the damaged lower wing of the SE5A this morning. It didn't look all that bad, just a slightly misaligned leading edge at the wing root. Opening up the area soon showed that the two ribs which made up the front part of the wing mounting had disintegrated during the "arrival". This was a bit of a setback I hadn't anticipated. There's a fair bit to do on the fuselage, new front former and dummy radiator to replace. Front engine cowling needs a complete rebuild. The upper fuselage in front of the cockpit needs a lot of work to repair the access holes made when removing the cabane struts, and there's some structural damage to repair around the wing seating and servo mountings. I'd spent a lot of time on repairing the model last year, and now I wonder if its worth spending any more. Seems a shame to abandon the project at this stage, but in the light of the number of hours spent repairing it and the only flight was a couple of minutes before losing signal and crashing, I think perhaps its time to put it all in a box and forget it.

Please Log in or Create an account to join the conversation.
- Brian
-
Topic Author
- New Member
-
Less
More
- Thank you received: 0
16 Feb 2022 15:32 #25577
by Brian
Replied by Brian on topic Back to Basics
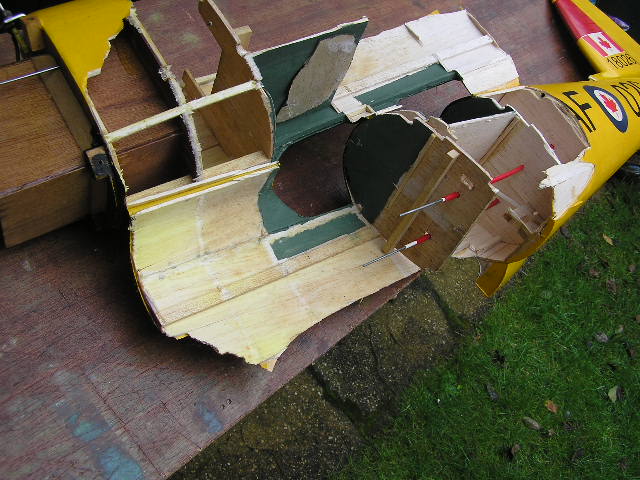
Feeling a bit fed up, I had a look at another repair job. This time it was a damaged Airsail Chipmunk I picked up at a clearance last Spring. The wings and tail unit were OK, but the fuselage had been damaged around the wing seating area. Unfortunately the fuselage seems to be a lightly built structure, most of the strength coming from the 1/16" balsa skinning. I assume that the fuselage was built in two halves, split along the centre line. If anyone knows how to repair this type of structure without actually completely rebuilding from scratch, I'd be grateful for any tips. I don't think I want to go the route of building a fuselage, especially as there aren't any instructions, and Airsail have long since gone out of business.
Please Log in or Create an account to join the conversation.
- Brian
-
Topic Author
- New Member
-
Less
More
- Thank you received: 0
20 Feb 2022 18:58 #25596
by Brian
Replied by Brian on topic Back to Basics
Some years ago, RCM+E had a "mass build" of the Chipmunk. It took me ages to recall who was the lead builder sending lots of photos and helpful hints. Finally the onboard filing system kicked in and I remembered it was Danny Fenton. I emailed him for advice on the Chipmunk. His opinion was to rebuild the fuselage as the original design. I had been considering getting a set of laser cut parts from Sarik. Their Chipmunk is the same span as the Airsail version, and I figured that it would be OK to graft the Airsail wing and tail on to the Sarik fuselage. I have the Airsail two sheet plan of the Chipmunk, but it only shows two fuselage sections, the firewall and the last former at the tail end. The lack of information on the intermediate formers was the reason I considered going to Sarik for a fuselage kit. I hadn't realised until Danny emailed me that the fuselage width is constant from the firewall to the former at the rear of the cockpits, and from that former to the tail end, the fuselage shape is conical. Fortunately that means that I can generate new formers from the lines on the drawing, a drawing which really should be framed as an artwork. It is quite complicated but is comprehensive and very neat as well. I'll make a couple of formers from thin card to see if they fit. If they don't, I'll go for the Sarik laser cut parts. I don't know if Sarik will sell just a kit of parts for the fuselage, and I'm not going to buy all the parts for the model. No worries though, a couple of days ago I had a box of balsa sheet delivered, the wing and tail sheeting for Moonglow. Now for lots of taping, gluing and sanding!
Please Log in or Create an account to join the conversation.
Moderators: DaveBright
Time to create page: 0.429 seconds
Latest Posts
- No posts to display.
©
2009 - 2026
WMAC PCF Design