- Thank you received: 0

Back to Basics
- Brian
-
 Topic Author
- New Member
-

Less
More
02 Dec 2021 19:06 #25421
by Brian
Replied by Brian on topic Back to Basics
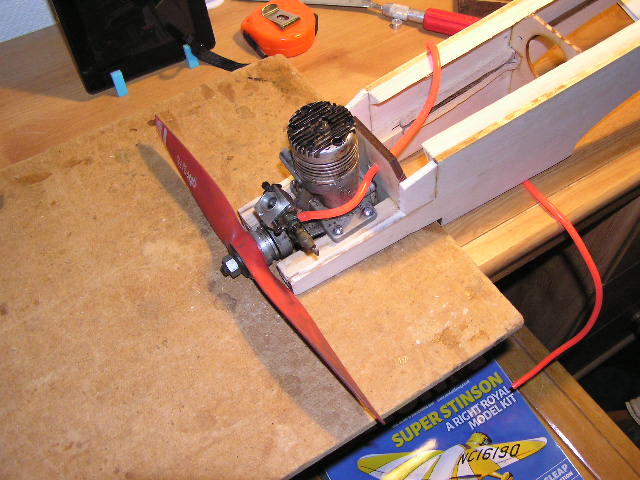
Until today, I didn't realise that fitting a Merco .61 to a fuselage could be such fun. The last Merco I had was in a model called "Uproar", a design by Chris Olsen, I think I sold the model to David Wedge a couple of years ago, now I wish I'd kept it! After marking and checking the mounting hole positions, I braved the chilly garden outside my shed, and drilled the required holes. Back indoors and thawed out, I popped the Merco between the bearers, and was suitably relieved when all four screws went in without any fuss. Then I decided to alter the position of the fuel intake nipple on the carburettor. "As supplied" it was tilted upwards, no doubt it would have worked alright, but I'm trying to get things as neat as possible. The Merco's carb is a well engineered item, it took a while to figure out which screws to loosen, and which nut released the intake nipple housing. Eventually the penny dropped and the necessary adjustments were made. Earlier today, I checked my stock of assorted strip and sheet balsa, unfortunately I don't have anywhere near enough of anything to be able to complete the Moonglow. I made a list of 1/16" and 3/32" sheet needed, good job I was sitting down as I hadn't realised how expensive balsa has become. I wondered if I could "Crowd Fund" the purchase, then I remembered that our kind and caring Government had given me a heating allowance that would cover the cost. Now it will be woolly hats, long underfugs and lots of jumpers as I turn down the heating and place an order with The Balsa Cabin. Cruel I know, but needs must.
Please Log in or Create an account to join the conversation.
- Brian
-
Topic Author
- New Member
-
Less
More
- Thank you received: 0
16 Feb 2022 15:14 #25576
by Brian
Replied by Brian on topic Back to Basics
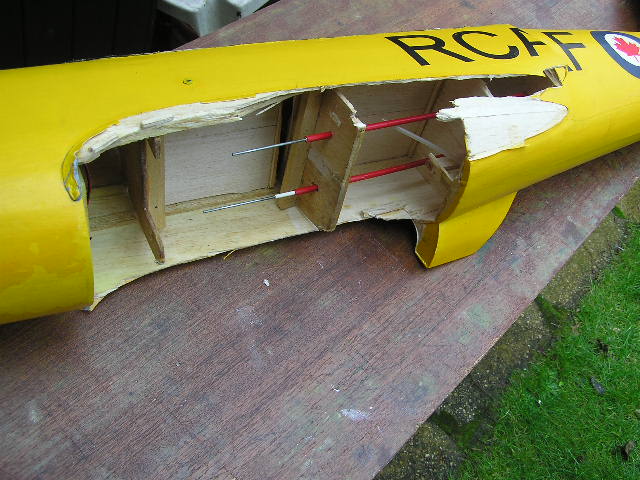
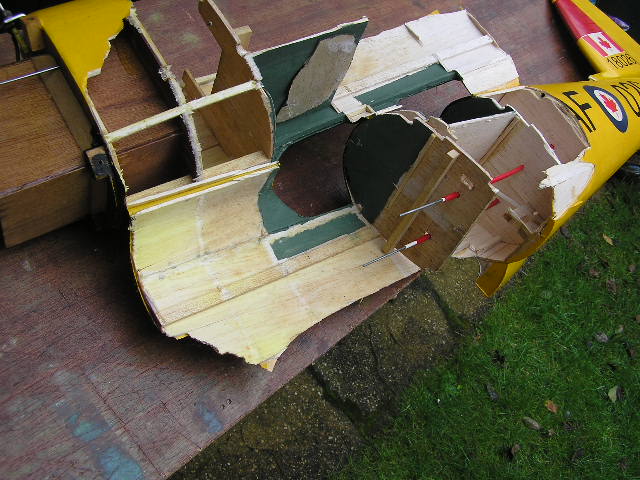
I had a look at the damaged lower wing of the SE5A this morning. It didn't look all that bad, just a slightly misaligned leading edge at the wing root. Opening up the area soon showed that the two ribs which made up the front part of the wing mounting had disintegrated during the "arrival". This was a bit of a setback I hadn't anticipated. There's a fair bit to do on the fuselage, new front former and dummy radiator to replace. Front engine cowling needs a complete rebuild. The upper fuselage in front of the cockpit needs a lot of work to repair the access holes made when removing the cabane struts, and there's some structural damage to repair around the wing seating and servo mountings. I'd spent a lot of time on repairing the model last year, and now I wonder if its worth spending any more. Seems a shame to abandon the project at this stage, but in the light of the number of hours spent repairing it and the only flight was a couple of minutes before losing signal and crashing, I think perhaps its time to put it all in a box and forget it.

Please Log in or Create an account to join the conversation.
- Brian
-
Topic Author
- New Member
-
Less
More
- Thank you received: 0
16 Feb 2022 15:32 #25577
by Brian
Replied by Brian on topic Back to Basics
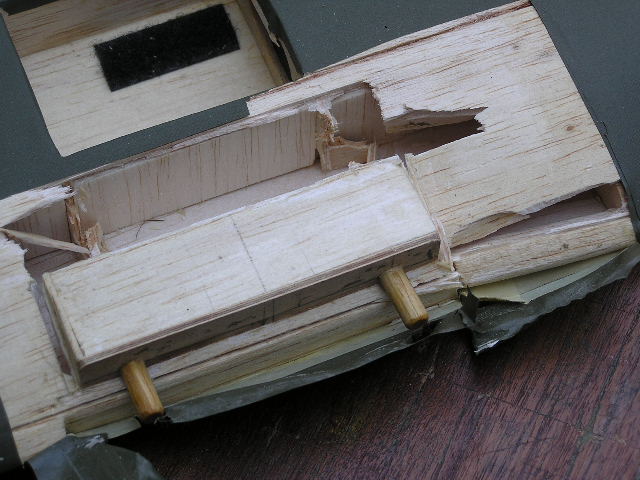
Feeling a bit fed up, I had a look at another repair job. This time it was a damaged Airsail Chipmunk I picked up at a clearance last Spring. The wings and tail unit were OK, but the fuselage had been damaged around the wing seating area. Unfortunately the fuselage seems to be a lightly built structure, most of the strength coming from the 1/16" balsa skinning. I assume that the fuselage was built in two halves, split along the centre line. If anyone knows how to repair this type of structure without actually completely rebuilding from scratch, I'd be grateful for any tips. I don't think I want to go the route of building a fuselage, especially as there aren't any instructions, and Airsail have long since gone out of business.
Please Log in or Create an account to join the conversation.
- Brian
-
Topic Author
- New Member
-
Less
More
- Thank you received: 0
20 Feb 2022 18:58 #25596
by Brian
Replied by Brian on topic Back to Basics
Some years ago, RCM+E had a "mass build" of the Chipmunk. It took me ages to recall who was the lead builder sending lots of photos and helpful hints. Finally the onboard filing system kicked in and I remembered it was Danny Fenton. I emailed him for advice on the Chipmunk. His opinion was to rebuild the fuselage as the original design. I had been considering getting a set of laser cut parts from Sarik. Their Chipmunk is the same span as the Airsail version, and I figured that it would be OK to graft the Airsail wing and tail on to the Sarik fuselage. I have the Airsail two sheet plan of the Chipmunk, but it only shows two fuselage sections, the firewall and the last former at the tail end. The lack of information on the intermediate formers was the reason I considered going to Sarik for a fuselage kit. I hadn't realised until Danny emailed me that the fuselage width is constant from the firewall to the former at the rear of the cockpits, and from that former to the tail end, the fuselage shape is conical. Fortunately that means that I can generate new formers from the lines on the drawing, a drawing which really should be framed as an artwork. It is quite complicated but is comprehensive and very neat as well. I'll make a couple of formers from thin card to see if they fit. If they don't, I'll go for the Sarik laser cut parts. I don't know if Sarik will sell just a kit of parts for the fuselage, and I'm not going to buy all the parts for the model. No worries though, a couple of days ago I had a box of balsa sheet delivered, the wing and tail sheeting for Moonglow. Now for lots of taping, gluing and sanding!
Please Log in or Create an account to join the conversation.
- Brian
-
Topic Author
- New Member
-
Less
More
- Thank you received: 0
23 Feb 2022 10:00 #25601
by Brian
Replied by Brian on topic Back to Basics
I'd like to stick to the methods used back in the 1970s. I rummaged through my box of assorted covering materials and realised that all that's left are odds and ends of rolls. No Polyspan at all, I used up the last of that on the Kadet build. I noted that Sarik are offering a discount on their "Diacov" polyester fabric, and its about half the price of conventional heat shrink film. I went to the manufacturers website and found that they sell a similar covering that has no adhesive, its called Diatex 1000. A piece 36" X 70" would cost around £20 including postage. Having used the adhesive free lightweight covering from Solarfilm, I reckon that the Diatex 1000 would be glued to the model in a similar way, i.e. paint the edges of the framework with PVA, paint the relevant part of the covering with PVA, and when dry, the fabric could be ironed on in the usual way. I'm going to get a 36" length of the stuff, if it doesn't work with PVA and heat sealing, I'll use it for covering sheeted surfaces and just use thinned PVA. I was prompted to find some alternate means for covering models when I saw that one supplier is charging over £30 for a roll of Oracover. For that price I can get a very large piece of Diatex 1000. I'll probably start to assemble the wing sheeting for Moonglow this week, as usual I'll have to make a trip to Screwfix, I don't have any masking tape left. The Chipmunk repair is on indefinite hold. After the encouraging email I received about the profiles of the fuselage formers, I got out my old drawing kit and started to generate lines using the scant data on the plan. The top and bottom profiles of the formers are a plain radius, when I found this I generated what I thought would be a former to replace the first one behind the cockpit area. It took a fair time to plot the shape and cut a template. I offered the template up to the fuselage. Guess what? Yup! Load of rubbish, nothing like the Airsail original. I spent a couple of hours redoing it this morning, I got the same result as before, with perhaps 1/16" difference in the width. I'm obviously missing something, in the meantime, the other way to repair the model by using laser cut parts from Sarik's 68" chipmunk short kit has sort of petered out. I don't see the point of buying all the laser cut parts when I need only a few fuselage formers.
Please Log in or Create an account to join the conversation.
- kevinross
-
- Offline
- Platinum Member
-

Less
More
- Posts: 1023
- Thank you received: 583
23 Feb 2022 15:59 #25602
by kevinross
Replied by kevinross on topic Back to Basics
Diatex has been adopted extensively by the LMA and Ultra light fraternity and i am very interested using this for my Stearman fuselage so will be interested to know how your trial goes.
Still planning to use the covering you passed to me for the tail surfaces to keep the weight down
Still planning to use the covering you passed to me for the tail surfaces to keep the weight down
The following user(s) said Thank You: Brian
Please Log in or Create an account to join the conversation.
- ruggerbloke
-
- Offline
- Junior Member
-

Less
More
- Posts: 59
- Thank you received: 18
23 Feb 2022 17:49 #25603
by ruggerbloke
Replied by ruggerbloke on topic Back to Basics
I saw this post so thought I'd add my two pennyworth. I have used SIG Koverall (now discontinued) and also Diatex 1000 to cover numerous c\l Combat models. Both of these coverings require adhesive to be painted onto the airframe allowed to dry and then iron on. Once the bottom is done, more adhesive is applied to the airframe where no adhesive exists. Then cover the top. Once allowed to fully dry, an iron or hot air gun can be used to shrink it. At this point 50/50 dope can be applied to shrink to taste. Fuelproofer applied on top if required. I use Rustins Plastic Cote 2 pack for diesel fuel. After experimenting with adhesives, the best and cheapest option is this stuff:
www.amazon.co.uk/Impex-HT1789-Faster-Dry...ef_=pd_bap_d_rp_11_i
It is quite thick so slightly thinning with water makes applying it a bit easier.
Good luck!
It is quite thick so slightly thinning with water makes applying it a bit easier.
Good luck!
The following user(s) said Thank You: kevinross, Brian
Please Log in or Create an account to join the conversation.
- Brian
-
Topic Author
- New Member
-
Less
More
- Thank you received: 0
23 Feb 2022 19:12 #25605
by Brian
Replied by Brian on topic Back to Basics
While I'm held up due to non-delivery of a few things, I had another "go" at drawing a former for the Chipmunk. Still miles out! In a senior moment I downloaded a plan from AeroFred which was for an 80" version, Printed it out at 85% which seemed to work. Still no good, the sections are much too big. The design is by a chap named Nelitz, traced it back to the 70s, where I found it wasn't scale but "semi-scale" although it won the scale comp at that time. Odd that. Anyone want 24 A4 sheets of a 68" semi scale Chipmunk fuselage?
Please Log in or Create an account to join the conversation.
- Brian
-
Topic Author
- New Member
-
Less
More
- Thank you received: 0
25 Feb 2022 11:44 #25618
by Brian
Replied by Brian on topic Back to Basics
I was thinking about the differences in the shapes of various parts of the Chipmunk. I suppose each drawing was based on an original somewhere, and it must be all too easy to draw something that appears to be two inches wide, and make it 2" wide, when in fact the part is 50.0mm. Add the scaling factor and there's the chance of a big difference between the original and the hand drawn scale version. Enough of that! To avoid pacing up and down while waiting for another delivery (which was promised to arrive yesterday) I went back to Moonglow and sorted through the rest of the laser cut parts. I was delighted to find that the balsa sheets holding the parts had generous margins and spaces between the parts. A few minutes work with the trusty old balsa stripper yielded enough strip for my immediate needs. Now I can spend an afternoon building Moonglow's fin and tail plane, from what is in essence, free balsa. The old saying "you learn something every day" is true, unfortunately since I started to weather a bit, its hard to remember what I learned yesterday. The Diatex 1000 arrived yesterday, I was amazed to find that I'd completely forgotten how big something is when its 70" wide. Missusladywoman was not the slightest bit impressed by it, and thought my enthusiasm about this covering material was quite unnecessary.
Please Log in or Create an account to join the conversation.
- Brian
-
Topic Author
- New Member
-
Less
More
- Thank you received: 0
25 Feb 2022 13:25 - 25 Feb 2022 15:15 #25619
by Brian
Replied by Brian on topic Back to Basics
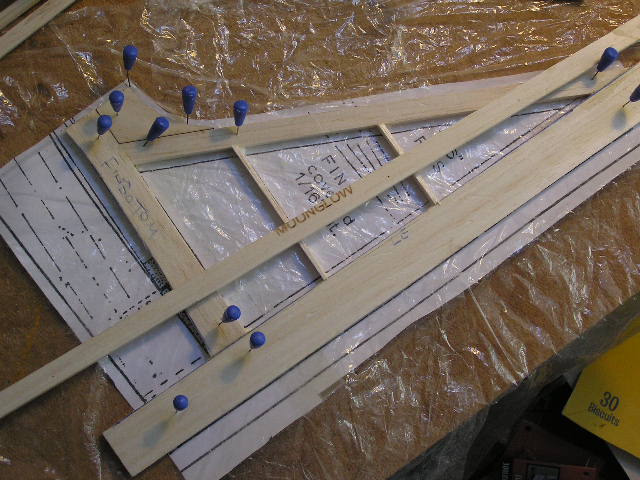
The fin made from recycled bits plus one laser cut part, which is the small fairing at the base of the leading edge. The long bit is 3/8" X 1/4", its for the TE of the tail plane. It went together much quicker than I thought.
Last edit: 25 Feb 2022 15:15 by Phil Ford. Reason: Re-insert image
Please Log in or Create an account to join the conversation.
Moderators: DaveBright
Time to create page: 0.391 seconds
Latest Posts
- No posts to display.
©
2009 - 2026
WMAC PCF Design