- Posts: 803
- Thank you received: 202
Back to Basics
- 4Pedalsfly
-

- Offline
- Platinum Member
-

Less
More
4 years 4 months ago #24694
by 4Pedalsfly
Replied by 4Pedalsfly on topic Back to Basics
Brian - You missed a good day yesterday, plenty of action & no
major incidents.
The "new" model looks good fun,
look forward to seeing it fly.
I was bending up some " Z bends" from old wire stock - a real white knuckle job for 2 mm dia.
Colin
major incidents.
The "new" model looks good fun,
look forward to seeing it fly.
I was bending up some " Z bends" from old wire stock - a real white knuckle job for 2 mm dia.
Colin
Please Log in or Create an account to join the conversation.
- Brian
-
 Topic Author
- Offline
- Platinum Member
-

Less
More
- Posts: 1044
- Thank you received: 414
4 years 4 months ago #24740
by Brian
Replied by Brian on topic Back to Basics
Das Mini Stik has been tested on the back lawn. Successful taxi trials avoiding the pole of the clothes drier were made, final touch was the obligatory OP number. Since the excitement of the Virgin Media engineer's visit, he didn't call as he couldn't get me on the 'phone that Virgin Media disconnected last March. I wonder what qualifications are needed to be a Virgin Media engineer?
Far more exciting has been the assembly of the, smelling faintly of acetone, Panic. Looking suitably horrible with a dreadful patchwork of original and new covering, it was time to check the controls. Seemed OK, so I filled the tank, gave the engine a couple of priming flicks, attached the glow driver, and I was quite surprised when the SC .52 four stroke fired and ran straight away. Ran the engine for the whole tankful, first to get things back to normal after the Winter/Spring layoff, second to irritate my neighbour, who has an exceedingly smelly two stroke lawn mower which he tends to use when he spots our kitchen window open. The stink and smoke take ages to go away.
The next part of this article is probably going to be a bit longer than those on Das Mini Stik and the Panic, but not so long I hope as the long build of the Sig Kadet.
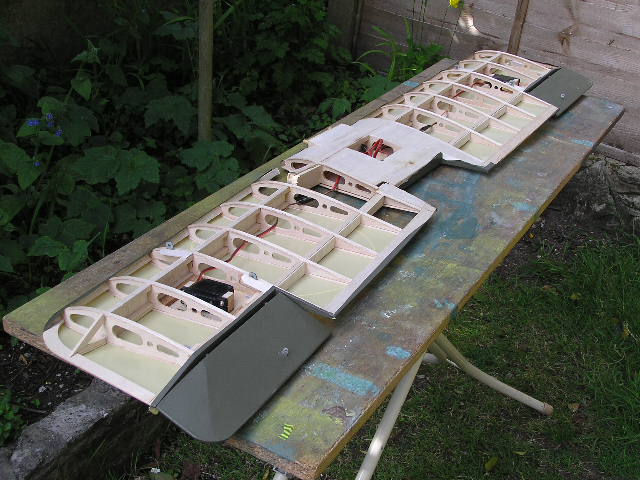
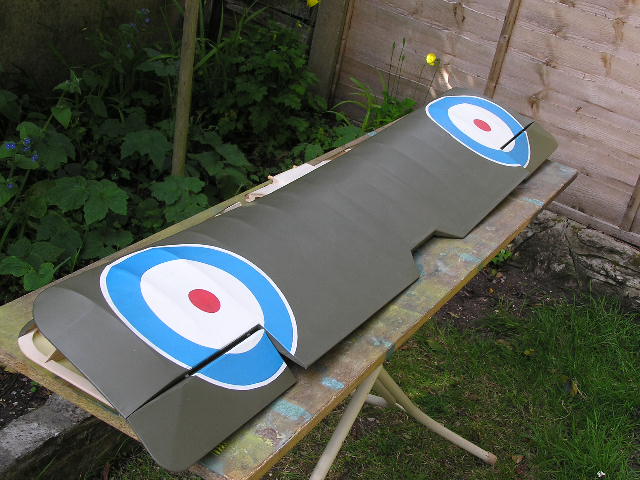
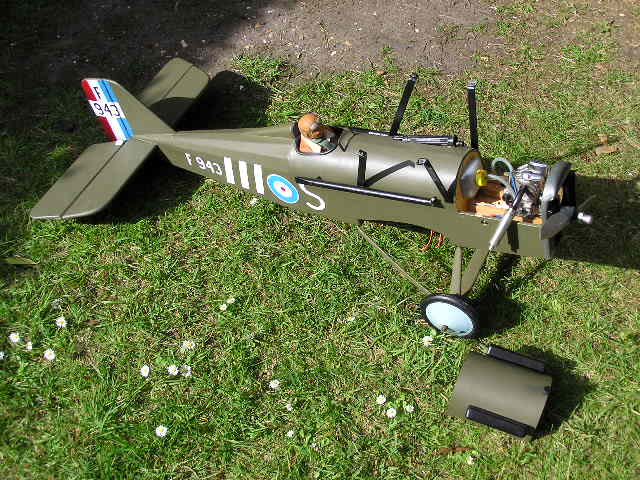
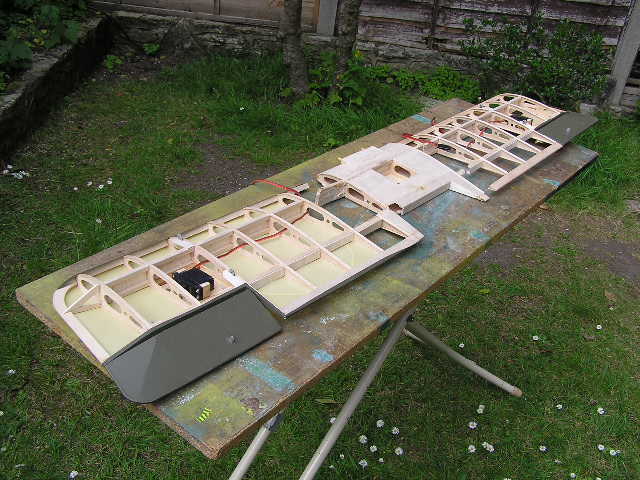
I have this Flair SE5A that I got from the Peter Wallis "tidy up". It had a lower wing broken at the root and three damaged wing tips. Didn't seem like a lot of work. Today I found just how much damage there really is. The lower wings are both broken at the dihedral joint as is one upper wing. To add to the problem, the screws that hold the cabane struts to the fuselage have come loose, and the only way to get to them is to open up the top of the fuselage.
While trying to think of the least destructive way to get at the screws, I thought it would be nice to be able to get the tool I was instructed to get from the stores when I was a young apprentice doing small jobs for a skilled fitter. We worked on pressure cabins for the Vickers Valiant. I knew that apprentices had to take a lot of leg pulls, and I felt pretty smug when I knew about the "box of sparks", "a tin of 2BA tapped holes", "a long weight", and stuff like that. But I fell for it, I was sent to get a "5/16" Ferret", apparently it was to be used to rescue a bolt or something that had fallen into the door frame structure. The lightening holes in the frame were too small for even my (at the time) small hands. I had to wait nearly a quarter of an hour before a grinning storeman told me they didn't have one and were never likely to either. Fortunately things went back to normal in less than a week, but a week is a long time when you're sixteen.
The photos show the lower wing with no upper covering, both have broken spars at the dihedral join. The upper wing looks OK, but the right wing is being held on by the covering. The engine is a nice looking Saito FA.50.
The following user(s) said Thank You: 4Pedalsfly
Please Log in or Create an account to join the conversation.
-

- New Member
-

Less
More
- Thank you received: 0
4 years 4 months ago #24742
by
Replied by on topic Back to Basics
I’m so looking forward to see the SE5 flying, I can’t tell you how much! More power to your elbow (and your trusty 5/16 ferret) Brian!
Please Log in or Create an account to join the conversation.
- Brian
-
 Topic Author
- Offline
- Platinum Member
-

Less
More
- Posts: 1044
- Thank you received: 414
4 years 4 months ago #24744
by Brian
Replied by Brian on topic Back to Basics
With the covering removed, the wing fell neatly into three sections. The previous owner's repair had attempted to do the job with the covering in place, a shame because the epoxy used made it difficult to get the wing back to its original just plain busted state. Once again the thin diamond disc in the Dremel got most of the bits either cleaned up or cut away completely. I plan to reinforce the spars in the wings and centre section by fitting long ply webs between the main spars. The next job will be to remove the sheeting from the centre section to enable access for fitting/gluing the new spar inserts.
The following user(s) said Thank You: Phil Ford
Please Log in or Create an account to join the conversation.
- Brian
-
 Topic Author
- Offline
- Platinum Member
-

Less
More
- Posts: 1044
- Thank you received: 414
4 years 4 months ago #24751
by Brian
Replied by Brian on topic Back to Basics
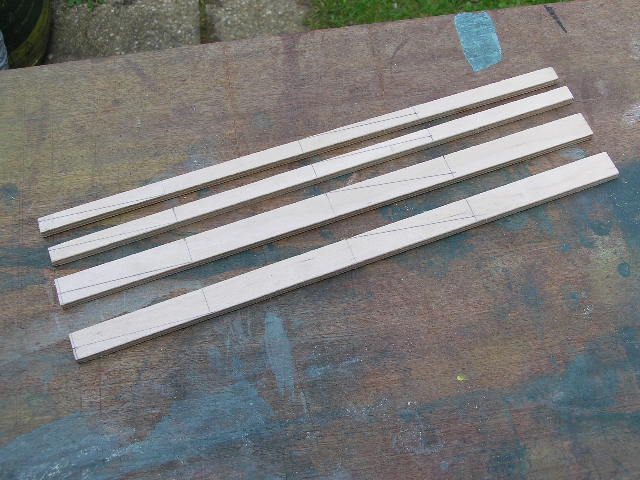
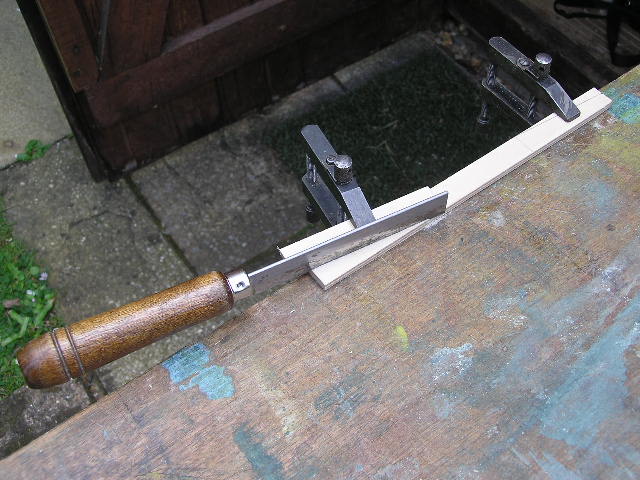
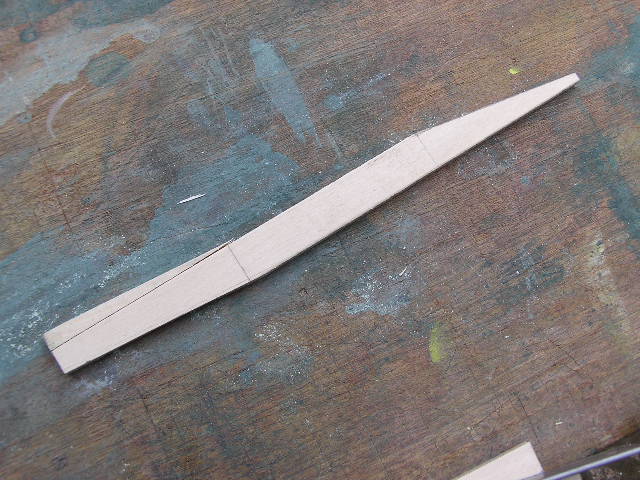
The Flair method of joining the wings to the centre section uses thin ply dihedral braces, these are quite short, and although might be adequate for normal day to day flying, they were lacking when it came to taking a serious tumble, as I'm sure the SE5A did just that. I've made up some new spar inserts from 1/4" ply. These will fit between the existing 1/4" square spars. Just in case I've prepared enough to be able to rebuild the upper wing assembly as well.
The SE5A plan shows the root ribs on the wings being set by using an angle template. I measured the angle as 6 degrees, using the angle I made up a packing block to fit under the last rib, rather than rely on the accuracy of the dihedral braces to get both wings to the correct dihedral. Might be a long winded way of going about it, but once the fiddly bits are sorted, it should prove to be a straightforward as well as accurate rebuild. The photos show the spar inserts in various stages, the saw is a "Zona", I've used it for at least twenty years, it enables very accurate cutting with a nice thin kerf that hardly notices when you cut bits apart and glue them back together. This is the way I made the LE and TE spars for a Copland 1937 Wakefield, so the idea isn't mine. Piece of scrap and a couple of clamps make cutting an accurate line easy.
The SE5A plan shows the root ribs on the wings being set by using an angle template. I measured the angle as 6 degrees, using the angle I made up a packing block to fit under the last rib, rather than rely on the accuracy of the dihedral braces to get both wings to the correct dihedral. Might be a long winded way of going about it, but once the fiddly bits are sorted, it should prove to be a straightforward as well as accurate rebuild. The photos show the spar inserts in various stages, the saw is a "Zona", I've used it for at least twenty years, it enables very accurate cutting with a nice thin kerf that hardly notices when you cut bits apart and glue them back together. This is the way I made the LE and TE spars for a Copland 1937 Wakefield, so the idea isn't mine. Piece of scrap and a couple of clamps make cutting an accurate line easy.
The following user(s) said Thank You: 4Pedalsfly,
Please Log in or Create an account to join the conversation.
- Brian
-
 Topic Author
- Offline
- Platinum Member
-

Less
More
- Posts: 1044
- Thank you received: 414
4 years 4 months ago #24760
by Brian
Replied by Brian on topic Back to Basics
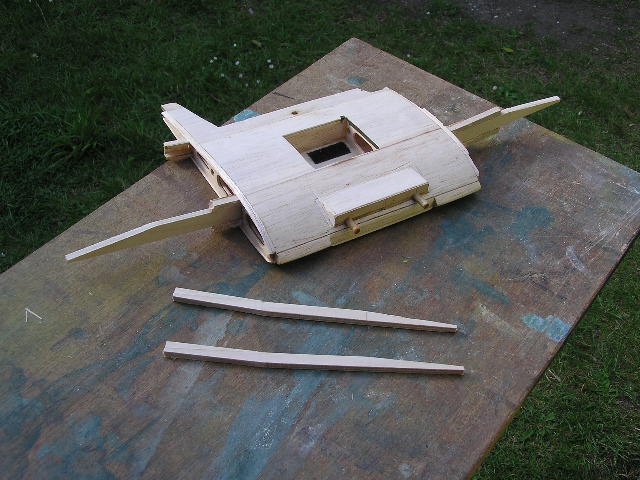
The spar reinforcements were glued up this morning. As they were "drying", "setting", "curing", I attacked the lower centre section. The object was to remove all the previous attempts to repair the damaged wings. Unfortunately large quantities of epoxy had been used. Fortunately I have a way of dealing with it. Softening the epoxy with a heat gun, I managed to get most of it out of the way with the tool that is normally used to "pick out" the balsa after using a hinge slotting tool. Final establishing an area to accept the new spar reinforcements was carried out using a small diamond disc in a Dremel flexible drive and a small X-Acto saw blade. This evening I offered up the spar bits, they slotted into place as though they had been made to do just that. The photo says the rest
The following user(s) said Thank You: Phil Ford
Please Log in or Create an account to join the conversation.
Moderators: DaveBright
Time to create page: 0.293 seconds
Latest Posts
-
-

- Various Gliders from Dave Ambrose ex W.M.A.C Membe...
- In WimborneMac Members / For Sale - Exchange - Wanted
- by 4Pedalsfly
- 1 week 1 day ago
-
-
-

- Ray Ivey's Models
- In WimborneMac Members / For Sale - Exchange - Wanted
- by Phil Ford
- 2 weeks 5 hours ago
-
©
2009 - 2025
WMAC PCF Design

